Most video creators and YouTubers record audio and videos separately: the video is recorded with a camera while the audio is captured from a high-end microphone. For post-production, iMovie is the top-notch video editor trusted by millions of video and audio fans to sync audio and video effortlessly. Besides separate file sync, iMovie can also adjust an out-of-sync video to normal.
In this post, you will learn how to sync audio and video in iMovie and also an alternative way to match audio and video files without any laggy problems.
Free and Trending Video Templates Synced with Music for You:
Instagram Reels Snow Mountain Travel
Weekend Vlog Instagram Reels
Rhythm Travel Vlog Social Reels
How to Sync Audio and Video in iMovie
Also interested in: How to Layer and Overlap Audio in iMovie>>
1. How to Sync Audio and Video Recorded Separately in iMovie
It’s common to see that you record visuals from the camera while using microphone equipment to capture clear voiceover. Under such circumstances, audio and video sync are necessary to align your video with an external soundtrack. To sync your voiceover to video content, follow the steps below.
Step 1
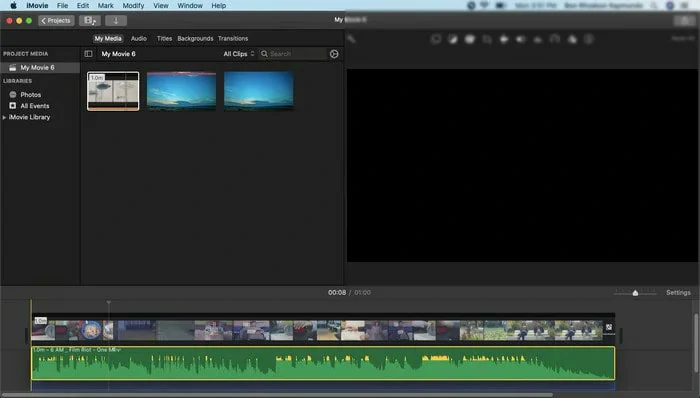
Open iMovie on your Mac and import the voiceover and video clips to the timeline.
Step 2
Ensure the play ahead is at the starting area and you need to place both video and audio at the beginning part. Use the Command + to zoom in on the level so that you can check the waveform for both of them.
Step 3
Next move the audio from left to right to make the audio and video match with each other. Trim out unnecessary parts of the soundtrack if it makes the audio out of sync.
Step 4
Once done, preview and play to check if the audio syncs to the video. Once the alignment is done, you can go along with the next step of editing or exporting the video to local.
How to Sync Audio and Video in iMovie Separately
How to Sync Audio and Video in iMovie
What if you already have an out-of-sync video? No worries! iMovie enables you to detach audio from video and match them perfectly again. Just follow the workflow and sync your audio right now.
Step 1
Launch iMovie on your Mac and click on File from the Menu bar, then import the video you wish to edit.
Step 2
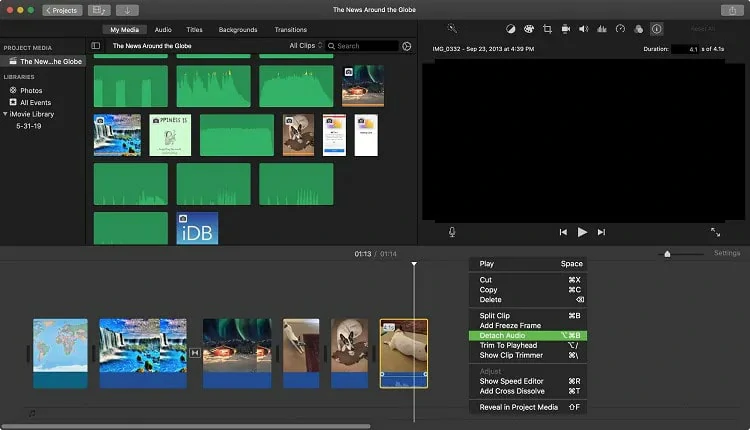
Add the clip to the timeline and right-click the selected clip to find the Detach Audio function to extract the audio from the video.
Detach Audio from Video in iMovie
Step 3
Edit the audio on the timeline. You can preview the audio waveform to trim the lagging part and align the audio according to the video.
Step 4
Then finalize the changes and save the synced audio and video to your computer.
3. A Free Way to Sync Audio and Video Online for Mac and Windows
Most people encounter the problem that the audio is out of sync after exporting from iMovie. Well, the clash often occurs especially when you’re syncing audio with long clips. For a better editing experience, we recommend a third-party video editor - FlexClip.
As an online video editor, FlexClip allows users to match the audio with the video without lagging. Moreover, you can also apply the curve speed feature to make an engaging video with the video following the beat. Aside from audio sync, its extensive royalty-free soundtrack library and powerful audio editing tools will take your audio to the next level. No editing experience or download is needed! Let’s take a look at how to align audio and video using FlexClip.
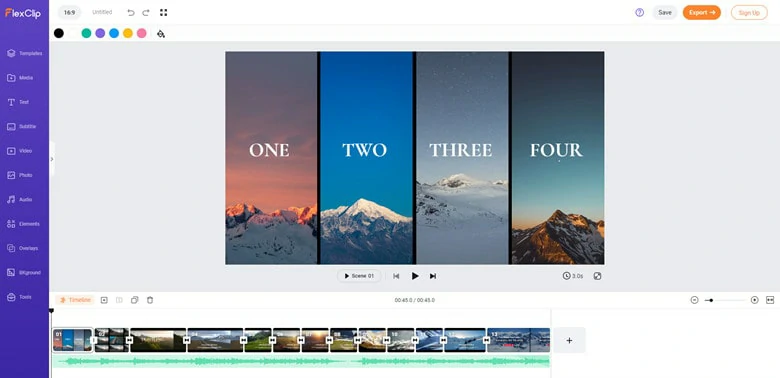
FlexClip - Online Tool to Sync Audio and Video
Key Features:
A non-linear overlapping timeline allows you to sync multiple audio and video.
4000+ designer-made audio-video synced templates for you.
Support voiceover,
text to speech, sound effects and millions of royalty-free music library.
A wide range of AI tools like text-to-video to simplify your creation process.
How to Sync Audio and Video Using FlexClip
Step 1
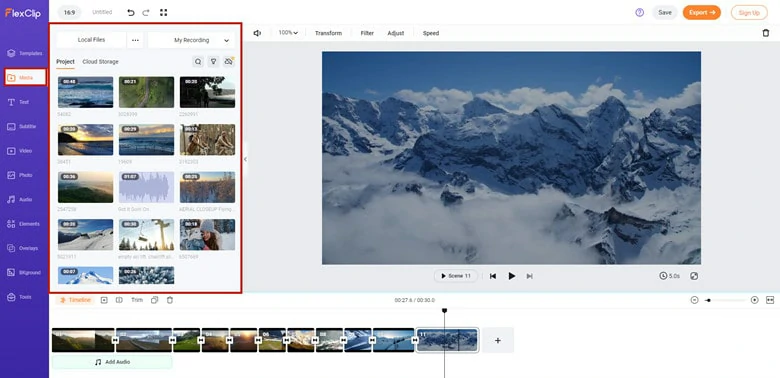
Go to FlexClip’s editor page and upload video and audio files from your computer, mobile phone and Google Drive. After that, drag them to the timeline.
Upload Media Resources to FlexClip
Step 2
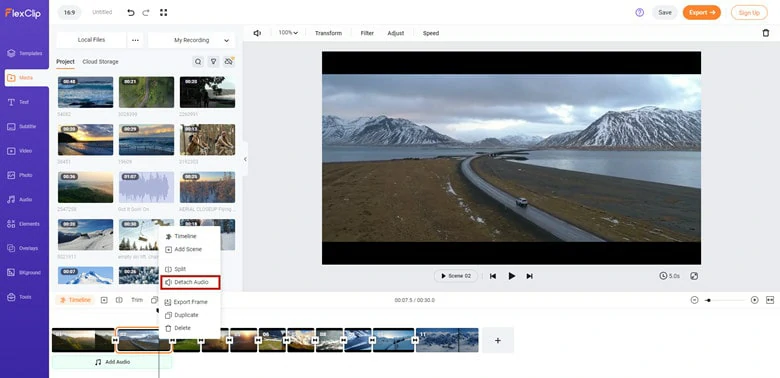
(Optional) If you’re handling an out-of-sync video, you can use the Detach audio feature to separate the audio and video. For different resource files, just skip this step.
Detach Audio from Video
Step 3
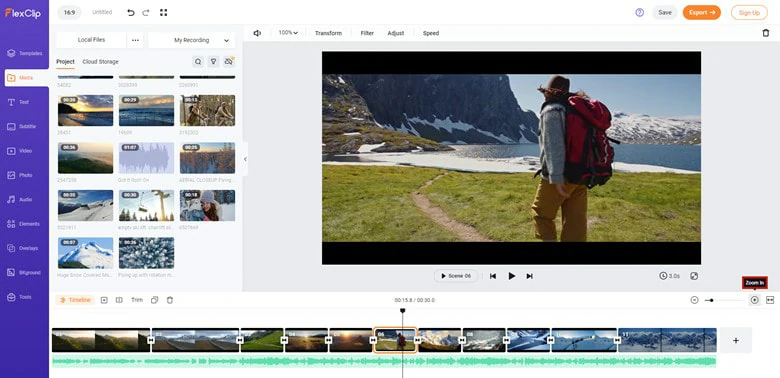
Zoom in the audio to check the waveform precisely and then use the trimmer or splitter to remove the lagging part.
Zoom in to Check the Audio Precisely
Step 4
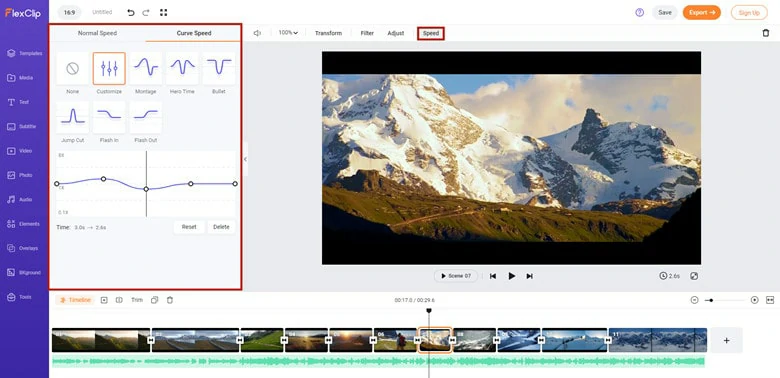
To make your audio better align with visuals, take advantage of the curve speed function to create an engaging effects with the rhythm. You can add points to mark the tempo and drag-and-drop to create eye-catching effect.
Use the Curve Speed Feature to Follow with the Beat
Step 5
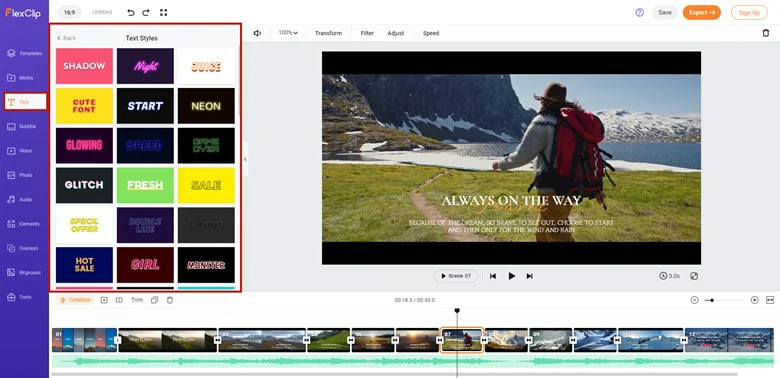
Preview and play the sync video to see if everything goes right. Here you can either make further edits like adding sound effects, applying text and changing filters as you want or directly export the synced video to your local drive.
Preview and Check the Synced Video
The Bottom Line
That’s all for how to sync audio and video in iMovie with separate files or correct an out-of-synced video. However, iMovie may cause the audio lagging problem when exporting the project. Considering this aspect, we recommend a powerful iMovie alternative called FlexClip to match your audio and video perfectly. Now it’s your turn to make a decision and have a try!
Bella
/
Full of vitality, curiosity and hope, Bella is an energetic copywriter at FlexClip. She mainly concentrates on video creation and troublesome issues related to video editing, providing users with practical solutions and tricks. Personally, Bella loves novels, sci-fi movies, cooking and travel. And, she believes that all her life is the best arrangement from God.