Recording the screen with audio is a great way to help you walk the viewers through a process with detailed steps. Whether you're working on your Windows 10 PC to make a tutorial video to show how to perform a task, or gameplay video to show off your gaming process, you'll need a screen recorder to capture your screen with audio.
Well, Windows 10 PCs come with the built-in screen recording tool called the Xbox Game Bar, which was designed essentially to capture PC and Xbox gaming sessions, but it can also be used to record other apps and activities on your screen.
However, Game Bar has some limitations for you ro record screen on Window 10 - it can't capture some programs (such as file explorer, or the entire desktop), and it can only screen record one app at a time and not the whole screen. So what do you do in this situation? To make it easier for you, we'll introduce another easy and free way to help you capture everything in Windows 10.
Quick Navigation:
Also Read: How to Add Multiple Text in Windows Video Editor>
Part 1 How to Record Screen with Audio on Windows 10 via Xbox Game Bar (Built-in Screen Recorder)
This screen recording tool is part of the Xbox app that comes installed by default in Windows 10. You can use the Game Bar to record more than gameplay and on-screen activities on your Windows 10 PC. However, there are some limits you'll find when you record the screen using the Xbox Game Bar:
1. Game Bar can't capture some programs (such as file explorer, or the entire desktop).
2. It only allows you to screen record one window at a time.
If you don't care about that, just follow the simple steps below to learn how to record your screen with audio on Windows 10. Otherwise, the next online screen recorder should be a better choice for your needs.
Step 1 Enable Xbox Game Bar on Your Windows 10 PC
To record your screen on Windows 10 using Xbox Game Bar, you'll need to set it up first. Luckily, every Windows 10 PC has the Xbox Game Bar active by default, but you can also follow the steps below to check to see if it's set up.
Go to Settings > Gaming > Game Bar and check that if you've toggled the option near the top of the screen so that it's switched on just like the image shows below.
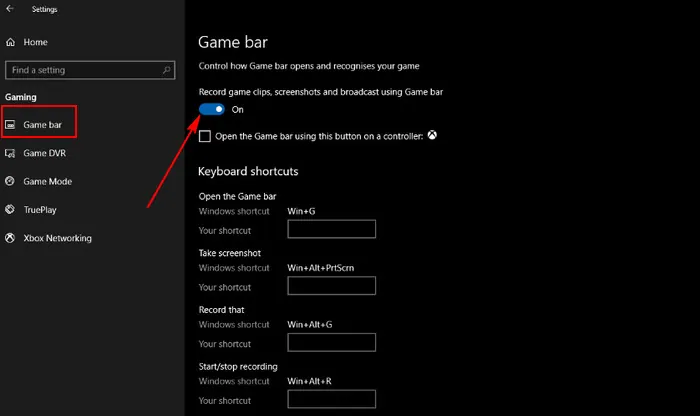
Record Screen on Windows 10 Using Game Bar - Set up
Step 2 Include System Audio in Your Recording
Now you're all set to record your screen, while before you start recording the screen, you'll need to make sure all computer sounds are included, which can make the most of your recording.
Use the shortcut key "Windows + G" to open up the Game Bar. If this is your first time opening the game bar, you'll get a dialog box that will look like the image below. Simply tick the box next to "Yes, this is a game." to open the Game bar.

Record Screen on Windows 10 Using Game Bar - Check
Now, the Gamebar overlay should pop up, and you'll see several widgets, including Capture, Audio, Performance, etc. Here we'll need to go to the Setting and check your recording options to make sure the game bar is recording your voice.
Click the Settings and navigate to Capturing, then you can choose whether or not the game bar record all your system sounds or just the sound from your app and microphone, simply choose the one you need for your screen recording.
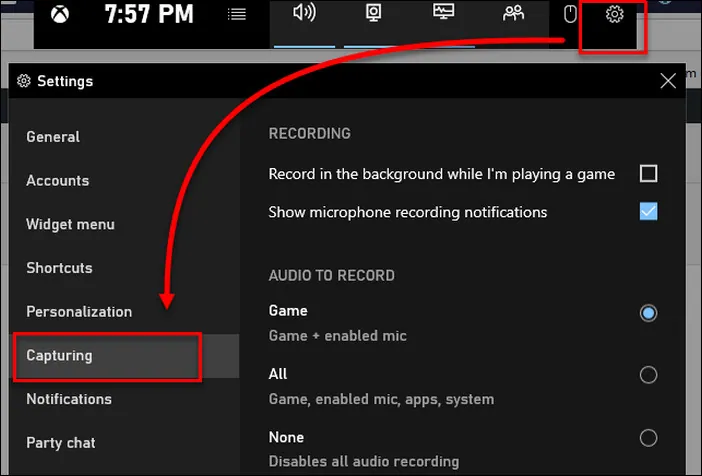
Record Screen on Windows 10 Using Game Bar - Set Audio
Step 3 Record Your Screen with Audio on Windows 10
Once done, you can start record the screen with audio via Game Bar on your Windows 10 PC, and it's a pretty simple process to do so.
Open the app you want to record on your Windows 10 PC. And then tart recording your screen with audio simply by clicking the Start Recording button ( a circle with the dot), or you can press the Win + Alt + R to start recording your screen with audio on Windows10.
Once you start recording, a capture status with a timer, recording controls, and a microphone will appear. When you need to stop the recording, you can click the stop button on the game bar or press the Win + Alt + R again.
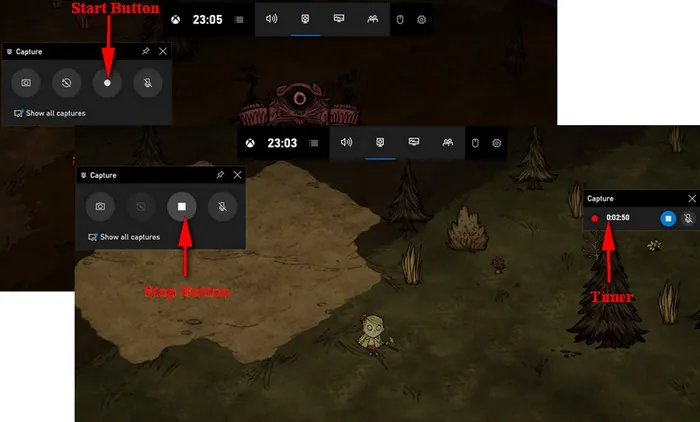
Record Screen on Windows 10 Using Game Bar - Recording
Part 2 How to Record Screen with Audio on Windows 10 or Any via Online Screen Recorder - Recommended
Although Game Bar's recording feature works with most apps on Windows 10, if you want to record the entire Windows desktop or any that Game bar doesn't allow to capture, what should you do?
Here comes FlexClip, a free online screen recorder that allows you to record screen with audio on Windows 10 or any other PC.
Below is how to record your screen using FlexClip online screen recorder on Windows 10 or any other PC:
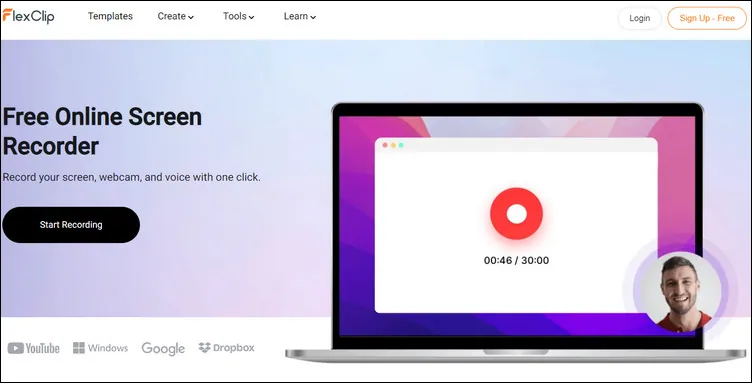
Record Screen on Windows 10 with FlexClip - Step 1
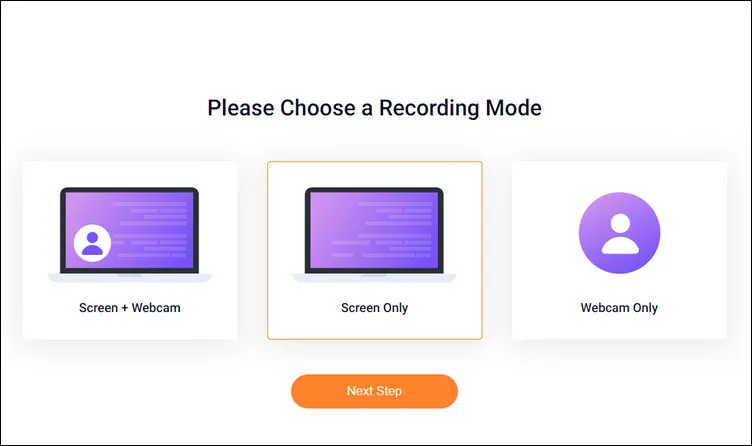
Record Screen on Windows 10 with FlexClip - Step 2
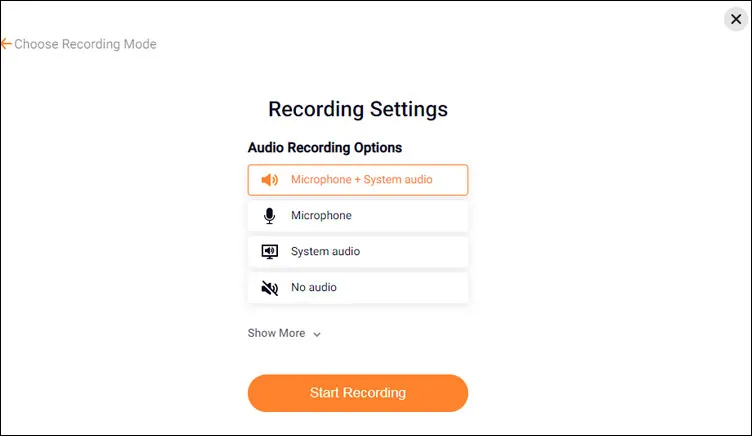
Record Screen on Windows 10 with FlexClip - Step 3
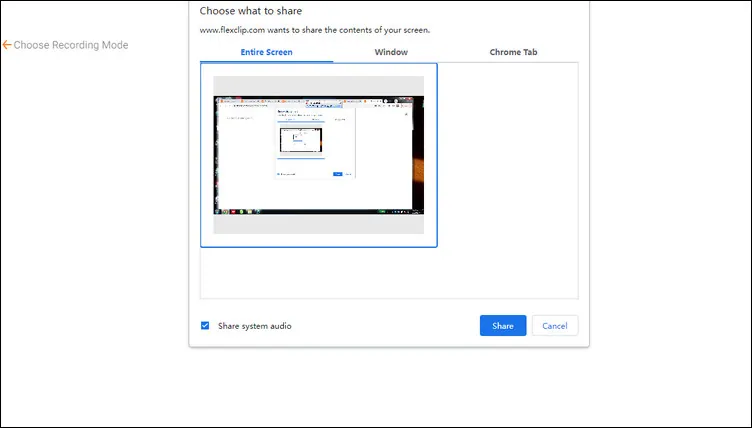
Record Screen on Windows 10 with FlexClip - Step 4
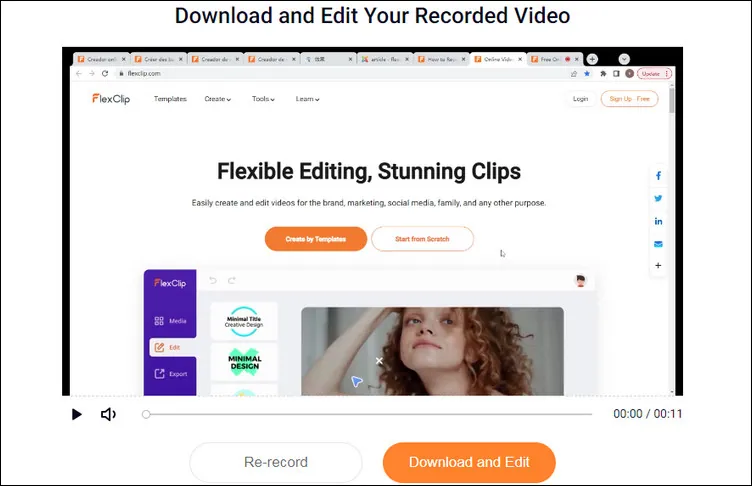
Record Screen on Windows 10 with FlexClip - Step 5
Bonus: Edit and Turn Your Screen Recordings into Stunning Videos in Minutes
Now, you've got your recording and the screen capture on Windows 10. Want to turn your screen recording into a video and try to make it more professional-looking? FlexClip video editor is ready to help.
FlexClip is one of the best free online video editors with powerful audio and video editing tools. You can easily turn to screen recording into fully-edited videos with music and text and more special effects in minutes.
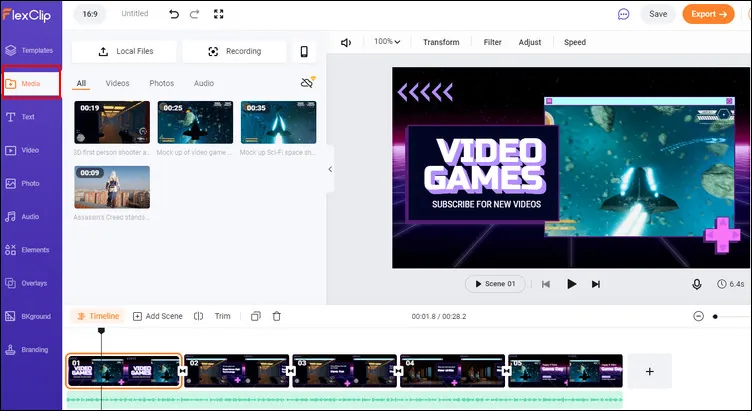
Turn Your Screen Recording into a Video - Upload
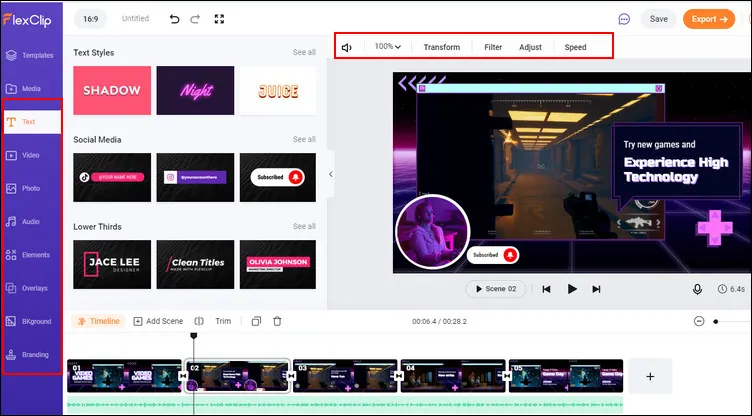
Turn Your Screen Recording into a Video - Edit
No idea on what to do with your screen recording? You can view FlexClip's abundant pre-made templates that give you endless ideas and help you get started in clicks.


Final Words
You’ve learned how to screen record on Windows 10 using the built-in free screen recorder and how to use a free online screen recorder to capture your screen on Windows 10 laptops and any other PCs. Try it free now to record your screen on Windows 10 right now.


