Creating an iPhone text message animation offers you a realistic scenario to display how the conversation goes on between you and your friends on your iPhone.
So, in this tutorial, we will walk you through how to easily make a realistic text message effect in your video using FlexClip online video editor and Adobe Premiere Pro.
Here’s What You Will Learn:
Also, read 3 best iPhone mockup generators for iPhone mockup videos.
How to Make Text Message Animation Online
If you are new to video editing or couldn’t afford the time to create multiple keyframes and motion graphics from scratch, a great workaround to create realistic text message animation with ease is using FlexClip online video editor.
Create realistic text message animation by FlexClip in a breeze.
With FlexClip, you can easily select from dozens of ready-made and fully-customizable speech bubbles and drag and drop them to put in an iPhone frame on the intuitive timeline and add animated emojis and iPhone text message sound to create a realistic text message effect in a breeze.
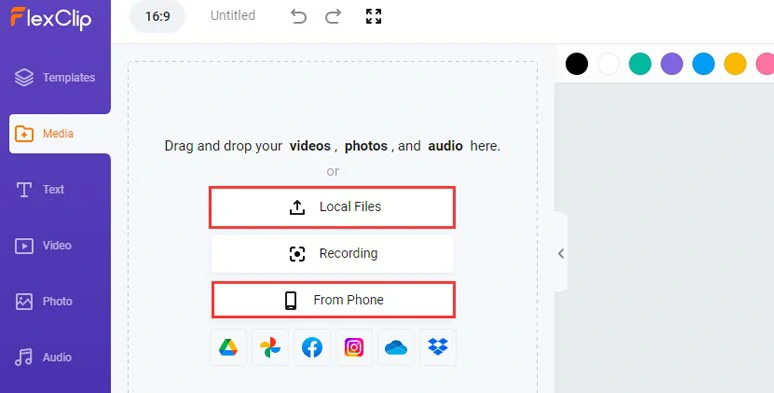
Upload your video assets to FlexClip.
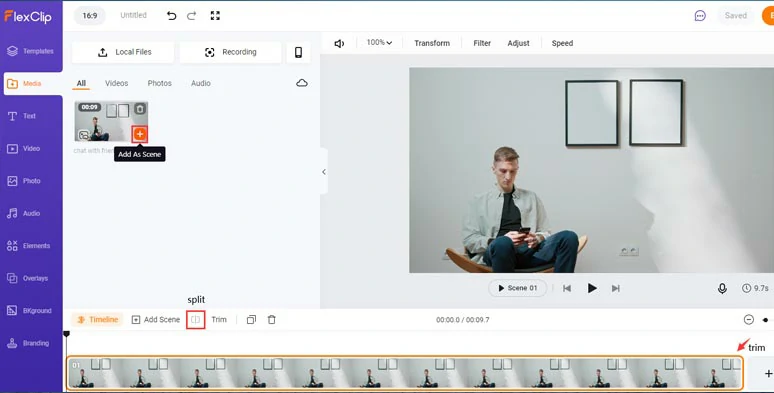
Add clips to the timeline and trim or split clips when needed.
Hit the Elements tab > Mask & Frame > scroll down to find an iPhone frame and add it to the video > drag its corners to enlarge it and trim its duration on the timeline.
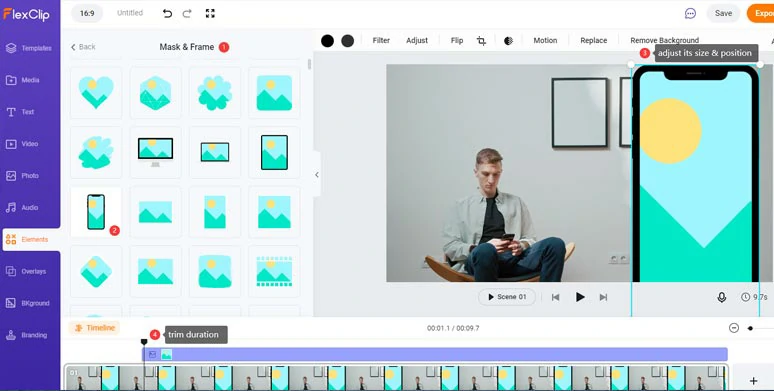
Add an iPhone frame to the video and adjust the details.
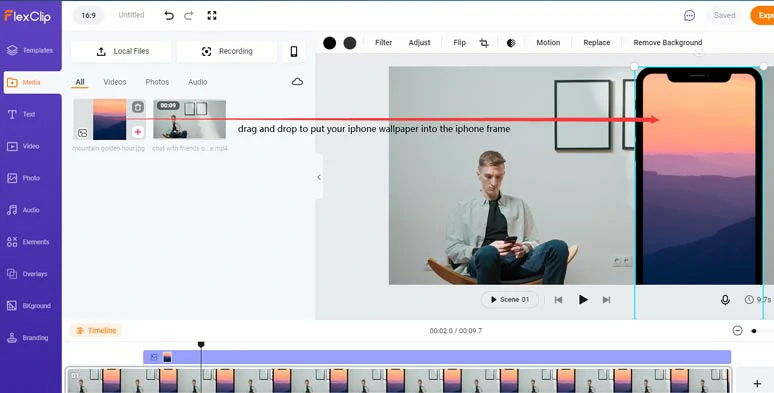
Put your iPhone wallpaper into the iPhone frame.
Click the Text tab > scroll down to find Speech Bubbles > select a text bubble and add it to the iPhone frame and adjust its size properly. Then, you can customize the text, text fonts, text styles, colors of texts, and text bubble’s color backgrounds well.
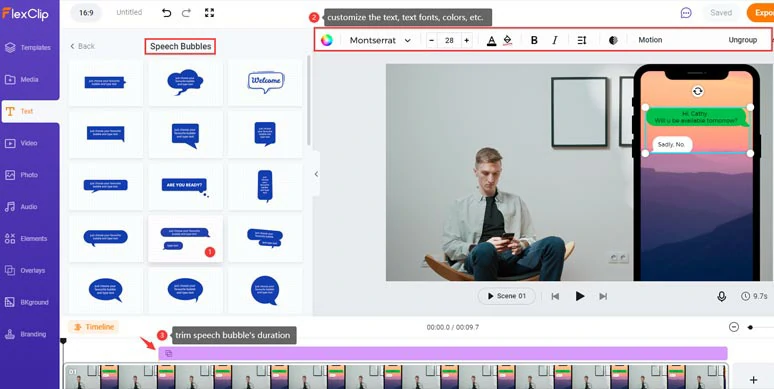
Add speech bubbles and customize texts, colors, etc. for the text message animation.
If you have chosen two speech bubbles as I did, you can click Ungroup to customize each text bubble individually. Then click the Motion tool to animate the text like the typewriter effect to make it look more realistic.
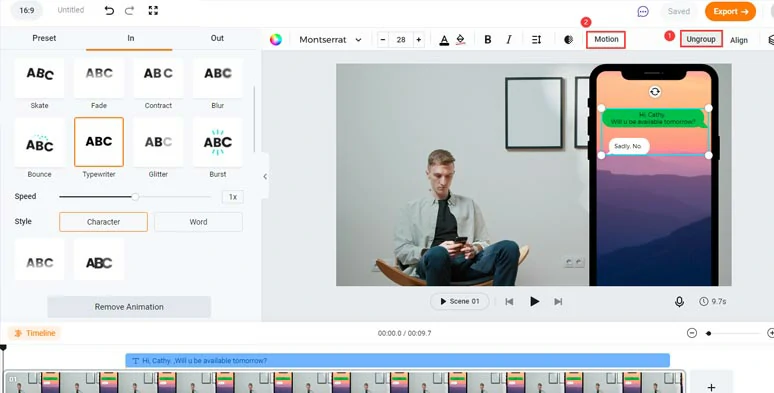
Animate the text message animation with a typewriter effect.
By clicking the Timeline, you can see all layers of motion graphics and texts. You can trim it or drag and hold it to decide when the speech bubble pops up or disappear in the text message animation without using any keyframe. Easy peasy lemon squeeze!
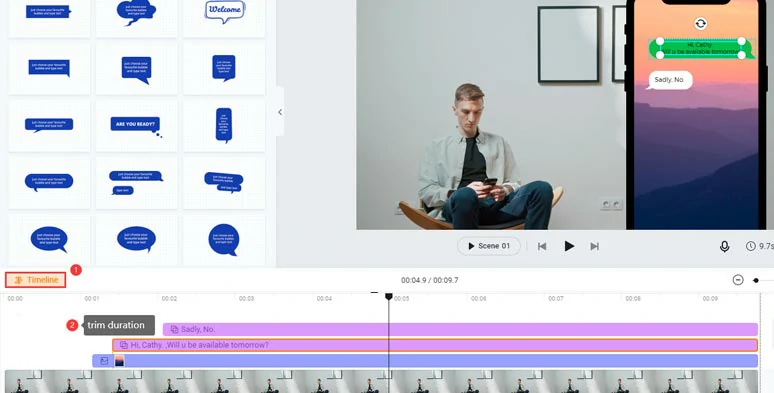
Trim the duration of each text message animation.
Click Timeline to close it and hit Elements tab > scroll down to Emoji > select an Emoji or any animated elements you like for your conversation. You can control the animation of emoji and duration as mentioned above.
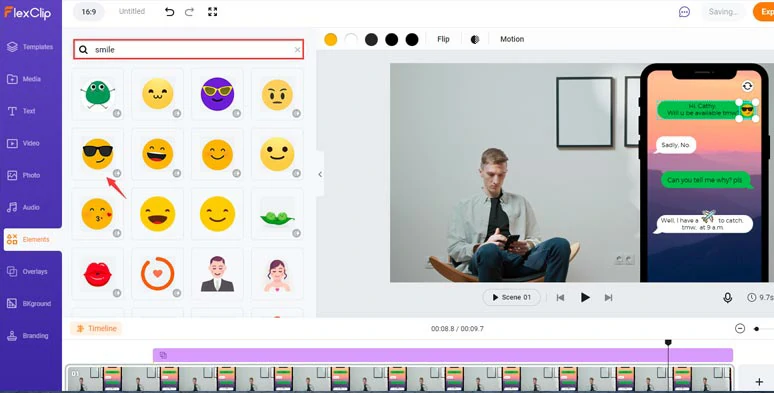
Add emojis and stickers to text message animation.
Go to Audio > Sound Effects > search for “message” in the search bar > add phone message sound effects to the timeline. You can trim it and move the playhead to align with the animation of speech bubbles. Done. You may upload your iPhone text message sound for use as well.
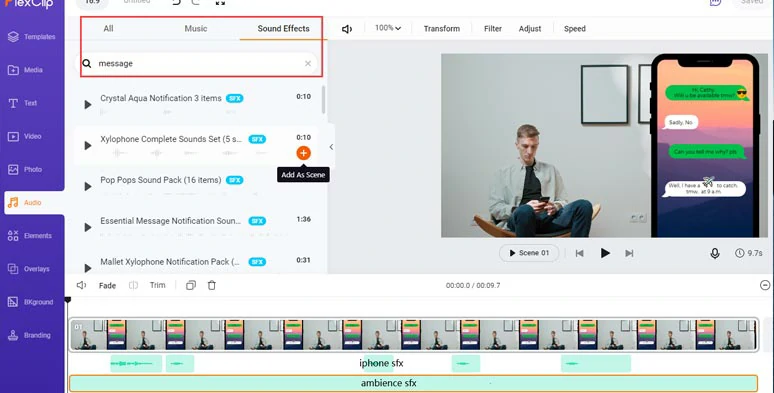
Add iPhone sound effects and ambience sound effects to make text message animation come alive.
Here is the resulting text message animation video from the example above:
Realistic iPhone text message animations made by FlexClip.
Done with the editing. You can download the 1080P video to your hard drive or directly share it to your YouTube, Google Drive, and Dropbox; a shareable link and an embed code are also available for repurposing.



How to Create Text Message Animation in Premiere Pro
Well, another way to create text message animation is using Adobe Premiere Pro. You may either purchase a MOGRT file (motion graphics template) or google for a free text bubble PNG file and quickly create a text message animation in Premiere Pro. Here, we will be covering the second solution.
How to make a text message animation in Premiere Pro.
Drag a text bubble into the timeline > Go to the Effects Panel > search for “Tint” in the search bar > drag the Tint effect to the text bubble layer on the timeline > go back to Effect Controls > pick a color to your liking for the speech bubble.
Move the playhead to the beginning of the text bubble > select the Motion in Effect Controls > move the anchor point to the right bottom corner of the speech bubble.
Next, head back to Scale in Effect Controls > move the playhead 10 frames forward > click the Stopwatch to add the first keyframe > move the playhead 4 frames backward > add the second keyframe and make the Scale size 105 > right-click this keyframe > select Ease in > move the keyframe to the first keyframe > make the Scale size to zero.
Now the text bubble shall pop up in the video.
With the text selected, go to Effect Controls > search for Cross Dissolve > drag this effect to the beginning of the text layer > trim the length of the cross dissolve effect. Or you may apply a wipe effect to the text layer as well.
Now, It's Your Move
So, hopefully, you can create more creative and realistic text message animations yourself. If you find this post helpful, do share it with your friends on Facebook or Twitter and leave your comment to us. Looking forward to enjoying your text message animation videos.


