Lens flare effects add warm color tone and cinematic vibes to your photo and video project. In this tutorial, we will walk you through how to capture lens flare in real shots and how to easily create a realistic lens flare effect in both photos and videos using PhotoShop, FlexClip online video maker, and Adobe Premiere Pro.
Here is what you will learn:
What Is Lens Flare Effect
In photography and videography, the lens flare effect occurs when the bright light directly hits the camera lens, resulting in lens flares in the shape of circles, starbursts, or soft haze over your photo or footage.
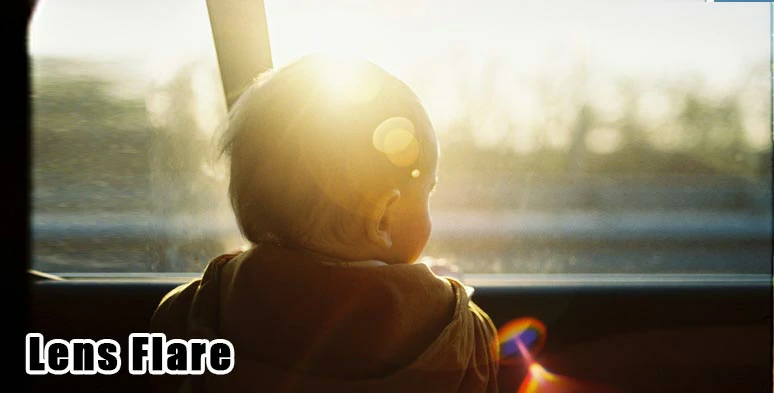
Warm lens flare captured by the camera.
The lens flare effect especially works for backlit portraits, film montages, travel Vlogs, outdoors drone footage, wedding scenes, romance movies, etc. where you may use lens flares’ warm color temperature and dreamy softness to add a cinematic touch to your image and video.
How to Capture Lens Flare in Outdoor Shots
To capture the lens flare in real shots, using a zoom lens can produce a better lens flare effect than a prime lens since a zoom lens has more lens elements, which leads to more internal reflection when the strong sunlight goes through the camera lens.

Capture lens flare in outdoor shots.
Besides, an older lens with less anti-reflective coating often yields a better lens flare effect than the latest camera lens. And you need to remove the lens hood and UV filter and use the biggest aperture available and manually capture the lens flare during the golden hours at sunrise or sunset.
Also, read the 9 best hacks to create cinematic videos with any camera.
How to Create Lens Flare Effect in PhotoShop
Well, capturing dreamy lens flare during the outdoor shots does require a lot of practice and a stroke of good luck. If you can’t get it right, no worries! The powerful PhotoShop is built to help you create a custom and realistic lens flare effect for your photos.
Create Custom Lens Flare Effect in PhotoShop.
Go to Filter > Render > Lens Flare > select a lens flare type and drag the slider to adjust the brightness of the lens flare to your liking > hit OK. Now, the lens flare effect shall be automatically applied to your image. To make this lens flare overlay adjustable, the following edits are needed.
Go to Filter > Lens Flare. Then PhotoShop will reapply the lens flare effect to the black layer.
So, now, you can only keep the lens flare effects on the black layer while the black background will be removed completely.
Now, you can adjust the opacity, hue, and direction of the lens flare effects with undestructive edits. You may press Ctrl/CMD+ U to customize the hue and saturation of the lens flare effect or apply a mask and use a brush to hide any lens flare that you don’t like or apply a Gaussian Blur to make your lens flare softer and more cinematic.
How to Create Lens Flare Effect in Videos by FlexClip Online
If you’ve missed out on the golden hours to capture the dramatic lens flare for your footage, a great workaround is to add a lens flare overlay to your footage to create the iconic lens flare effect. To this end, FlexClip online video maker can be your one-stop solution, with no downloads and experience needed.
Create lens flare effect in your videos by FlexClip’s free lens flare overlays.

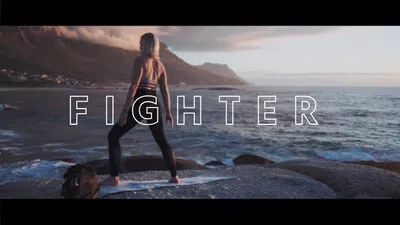

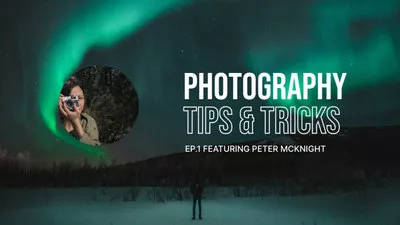

Select a free video template to begin with.
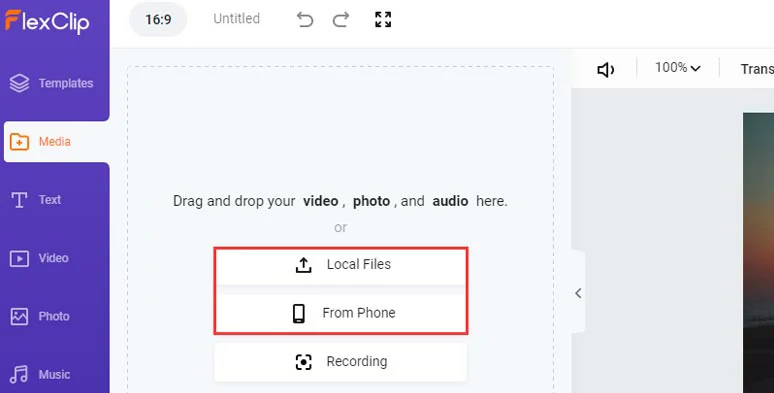
Upload your video assets to FlexClip.
You may also add other clips to the timeline and drag the slider inward to trim the clips or split clips or drag and hold to adjust their sequence on the timeline.
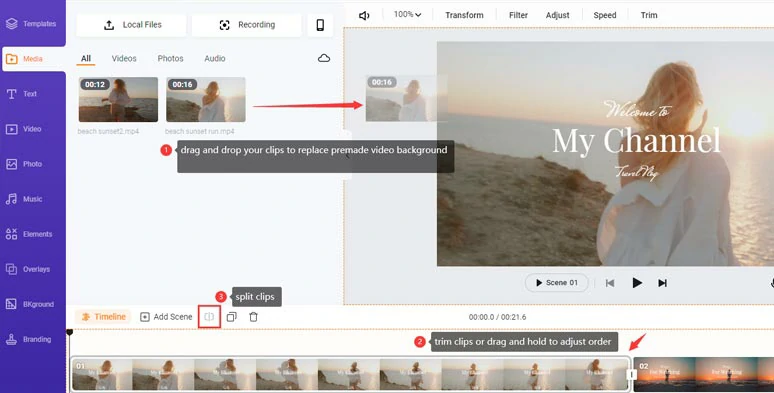
Replace the premade video elements with your clips and trim, split clips.
With the clip selected, click the Overlays tab > scroll down to find a lens flare overlay that fits your footage, esp. the direction of lens flare > add this lens flare overlay with transparent background to your video. You may trim the duration of the lens flare overlay and adjust its opacity and blending mode to your liking.
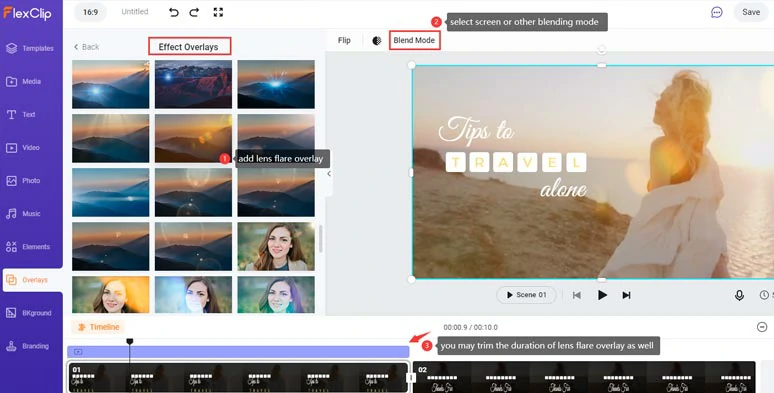
Add lens flare overlay to your video and create dramatic lens flare effects.
You can click the Timeline tool and animate the text with customizable text animations bounce, typewriter, glitter, stomp, blur, burst, etc.; or add multiple royalty-free music and sound effects to add rhythm and emotions to your videos; use stylish circle transitions and liquid transitions, and speed controls, GIF stickers, animated illustrations are also available.
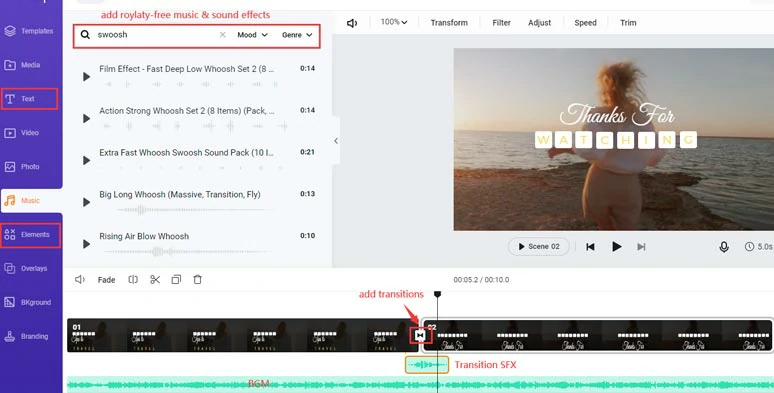
Add royalty-free music and transition sound effects and text animations and transitions to the video.
So, now let’s compare the original footage with the edited video with the lens flare overlay from the example above:
Cinematic lens flare effect made by FlexClip’s free lens flare overlays.
You can directly download the video to your local PC or share it to YouTube, Google Drive, or Dropbox; a clickable link and embed code are also available for a private share or your blogging and another repurposing.
How to Create Lens Flare Effect in Videos in Premiere Pro
If Adobe Premiere Pro is your go-to choice for editing videos, you can combine the built-in lens flare effect and keyframes to create realistic lens flare effects in your videos.
How to create the realistic lens flare effect in Premiere Pro.
Go to the Effects Panel > type in “Lens Flare” in the search box > drag and drop the lens flare effect to the footage on the timeline.
Go to the Effect Controls > you can add keyframes to control the parameters of Flare Centers or Flare Brightness to create realistic lens flare effects as the perspective changes in your footage.
Now, It's Your Move
So, hopefully, you can either capture great lens flare in outdoor shots or create realistic and cinematic lens flare effects with the tools recommended above. If you find this tutorial helpful, click and share this post with your friends on Facebook, Twitter, etc. and leave your comment to us. See you there.


