We're Bringing New AI Tools to Elevate Your Image Editing

Create Pop Up Text Animation in After Effects

Last Updated: 2022. 05. 23

Pop-up text after-effects are nothing less than 'cool' when deployed on images or videos. A pop-up text has the same characteristics no matter where it is applied. Its common characteristics are the fun-induced movement, a catchy appearance, and complexity in color and movement. A pop-up text can be useful in videos and images, but the kind of creativity you apply makes it stand out. Now, imagine adding this feature to a well-designed video image; hence, most of the movies and animations you gush about today are products of pop-up text effect.

To come up with the best pop-up animation, you need the right tool. We must confess that many online and offline tools can help you do this, but we will always recommend Adobe After Effects: one of the world's most used pop-up text animation makers. Unlike others, After Effects is much more advanced and comes with more features.

Can't Miss: How to Create a Realistic Typewriter Effect in Premiere Pro and Online>

There are some stunning video templates:
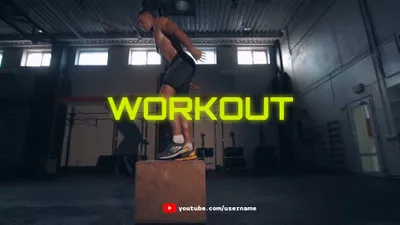
Fitness Video for YouTube
Preview
Fitness Video for YouTube
Use This Template

How to Create Pop Up Text Effect with After Effects

Please follow the steps below to create a bounce text with After Effects through the animator.

Step 1: Add Composed Text Layers

  • Click on the 'Type' tool in the Tool panel, click on the Composition panel, then type your text. Remember to use the "Selection" tool to adjust your text layer.
  • Select font, color, size, justification, and other textual properties in the "Character and Paragraph" section.
  • Preview your fonts. Click on a text layer located in the timeline. Scroll to the font drop-down menu located in the "Character" section.
  • Step 2: Apply the Text Presets

  • Search for your preferred text (which should be present in the Effects and Presets panel).
  • Search for animation presence. Use Adobe Bridge.
  • Drag and drop the preset via your Effects and Presets panel on the text layer to apply. Do it directly.
  • By now, your first keyframe of the present will be placed where the Current Time Indicator (CTI) is.
  • Now slide the keyframes to adjust the timing of the animation. For Windows users, hold Alt to Squash multiple keyframes. And for Mac OS users, drag the first or last keyframe with all keyframes selected.
  • Step 3: Animate, Type Letter by Letter

  • Go to the timeline and open the parameters of the layer. To do that, click the triangle at the left of the layer number. Text layers come with a designated set of parameters, including normal transform options for the layer.
  • Look for "Animate," which is located on the right side of the text layer parameters. Click the button located on the right-hand side of the word Animate and select a parameter to animate. Once you have selected the parameter, a Text Animator will be applied to the text.
  • Scrub the Selector parameters to preview available parameters associated with the animate. Now, it's time to animate. Add keyframes to different range selector parameters.
  • If you wish to remove the applied parameter, animator, or range selector. Click on the words located in the timeline, then press "Delete."
  • Step 4: Create and animate your Shape Layer

  • Don't select any layer in the timeline; pick a "Shape" tool from the Tool panel. Now, click on any of the Shape tools to see the rest of the Shake tool. Select Fill and Stroke colors for the shape from the Tools panel. Click, then drag it to the Composition section; that's the only way you can add a Shape layer to the composition.
  • Drag your Shape layer upwards, then down, vertically in the timeline. That way, you can position the object above or below every other object in your composition.
  • Some sharp layers, like text layers, have their parameters, including the normal layer transform properties.
  • Mind you, properties that display stopwatch can also record keyframes for animating.
  • Text Animation in After Effects

    An Easier Way to Create Pop Up Text Animation

    As you can see, using After Effects for your pop-up text animation can be very complex: not everyone can use it. But there is still a way around it; there is an alternative. This is where we introduce FlexClip: one of the world's best tools for applying pop-up text after effect.

    FlexClip is an online video and image editing tool which also be used to apply appealing pop-up text after effects. It is developed with one of the best eye-catching pop-up text effects and gives you some textual options to choose from.

    Some text designs embedded on FlexClip are Fade in, Pop up, Wipe, Enter, Rotate, Flip, Zoom in, Bounce in, etc. Again, the simplicity in the website interface makes it easier to be accessed, no matter your level of computer knowledge. And unlike Adobe After Effects, you can add your pop-up text effects in a few seconds. Pick the Pop up effect, and apply to your text!
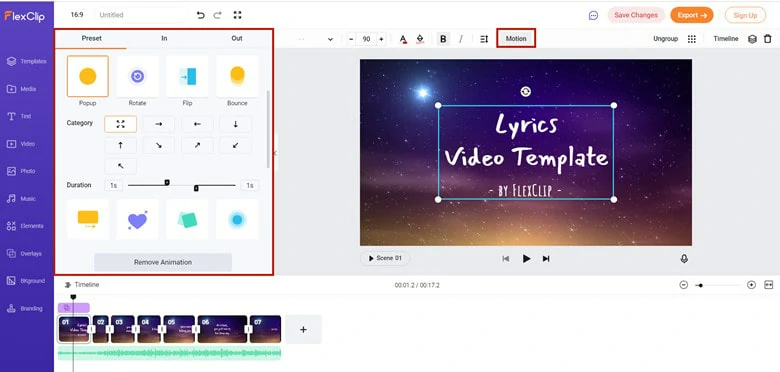
    Pop up Effect in FlexClip

    Pop up Effect in FlexClip

    Create a Video View Templates

    The Bottom Line

    Pop-up text effects remain one of the best ways to give either your videos or image a lift; you just have to find the right tool. And for the sake of simplicity, sleek textual design, and a variety of text options, we will recommend you use FlexClip. So, if you find this article useful, please endeavor to like and share.

    Group 11
    Make a free video online
    Create Your First Video With FlexClip Now
    Get Started - Free