Have you been to any of the nightclubs in Los Vegas? Have you noticed the special characters writing their business names on their electronic signboards? Yes, those glowing electronic characters are called the neon text.
The neon text has a charming aesthetic that brings visual interest to a variety of situations from announcing a sale or opening. Today, neon text effects are applied to entertainment videos, especially music videos.
If you transform the phrase to a stylish neon sign, the right tool is needed, and in this piece, we have created an easy-to-use step to follow in coming out with the perfect neon text effect. Continue reading.

How to Create a Neon Text Effect in Photoshop
Step 1: Create Your Background
Create a new document and go to File > Place Embedded, then open the image you want to set as the background. Most people use a brick or a dark color image as it gives a striking contrast to the neon text effect.
Step 2: Edit the Background
Click on the Create new fill or adjustment layer icon at the bottom of the Layers panel and choose Levels. Then on the Properties panel, evoke the Clip adjustment to layer option to change the Shadow value.
Then tap the Create new fill or adjustment layer again to find Hue/Saturation option. Finally click the Clip adjustment to layer icon at the bottom of the Properties panel, and here adjust the Saturation and Lightness value to darken the image.
Step 3: Create a Neon Text
Use the font Beon Medium to create a text in All Caps and here you can customize the color and size of the text. Then, duplicate the layer and make it invisible by clicking the eye icon.
Step 4: Separate the Horizontal and Vertical Part
Right-click the copy layer and choose the Rasterize Type. Next you need to separate the vertical and diagonal parts of the neon text letters from the horizontal ones. By doing so, you can apply the effects with flexible Angel Value options.
Now pick any selection tool you like, click the Add to selection icon in the Options bar and select all the horizontal parts of the neon text letter you created. After the separation process, go to Edit > Cut and then Edit> Paste Special > Paste in Place to place the divided parts in a new layer and get a copy. Give it a name and change the layer's Fill value to 0.
Step 5: Make Editing of Each Layer
Now you'll see four layers: the original horizontal layer and the copy, the vertical layer and the copy. To give the Photoshop text a glowing design, you should do as follow. Add a Bevel and Emboss > Add a Contour > Add an Inner Shadow >add an Inner Glow >Add a Drop Shadow to each layer with settings based on your needs. Repeat the steps until you complete editing on four layers.
Step 6: Customize the Text with Cables and Glows
To make the text look more authentic, you can add cables and glows to the creation. Once you complete the neon text, export the text and apply it to your videos.
Create a Realistic Neon Light Text Effect in Photoshop
How to Create a Neon Text Effect on Video in An Easier Way
The thing is, even with stating the simplest steps to create neon text using Photoshop, it still looks complex and somehow complicated. This is because the neon text effect was created; it would have been easier if it had been added directly to the video. And to do this, you need a more advanced tool to pull it off.
Talking about an advanced tool, we would like to introduce FlexClip: the world’s best online tool for adding Neon text effect on videos. The tool comes with both innovation and advanced applications, which is why you get interesting features like rich text styles and fonts, easily adjusted texts, and an easy-to-use user interface. Below is how you can add neon text effects online using FlexClip.
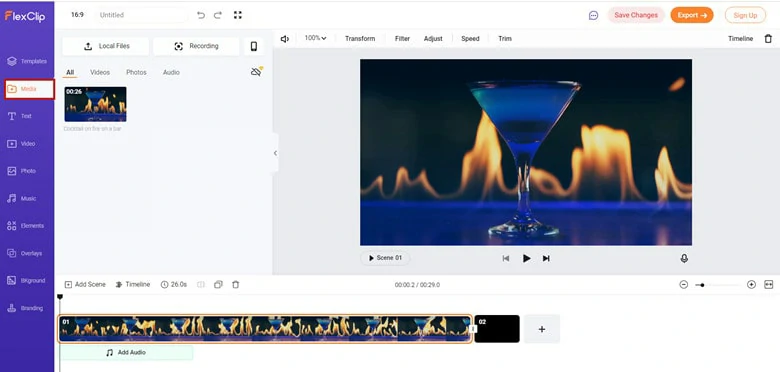
Upload Media Resources to FlexClip
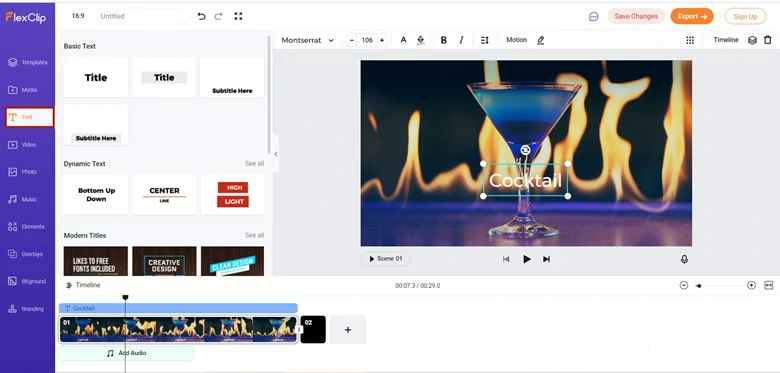
Add Text to Your Video
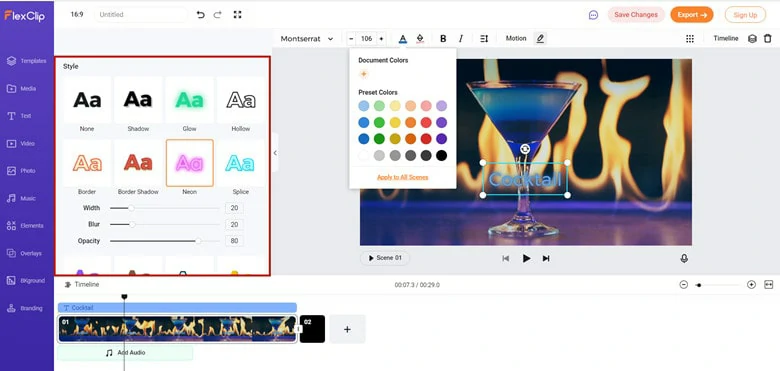
Apply the Neon Text Effect
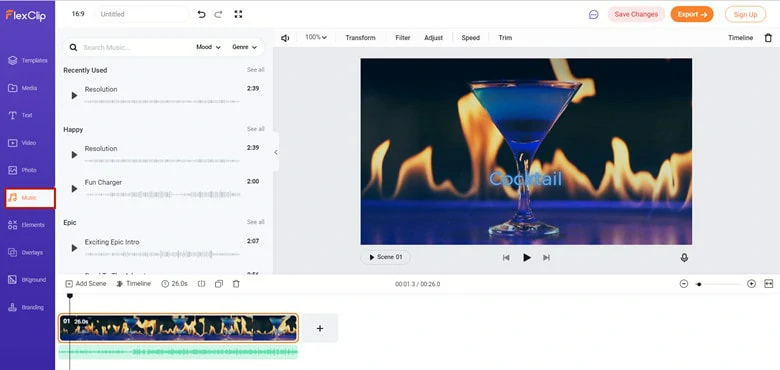
Apply the Neon Text Effect
The Bottom Line
Finally, it is in place to say that the neon text effects remains one of the most appealing inventions in video content creation, and a tool like FlexClip has come to make the whole process of adding neon text in videos very easy, through its many innovative and appealing features like transition, filters, and much more. So, go ahead, leverage the innovation a tool like FlexClip has to offer and be glad you did.


