Adding images to your slides is a great way to spice up your presentation, as those pictures make your slides appear very creative and interactive.
However, it's not advisable to simply arbitrarily put all the images in your presentation. You can insert your images in shapes to make them look more presentable, such as making the image a circle shape.
In this guide, we'll show you how you can change the shape of a picture to make a circle image and more in Google Slides.
Contents:


Also Read: How to Insert a Video into Google Slides >
Part 1 How to Insert Images in Shapes in Google Slides: Make an Image a Circle & More
To fit an image to a shape, such as making a picture into a circle, in Google Slides, you can mask the image. Follow the simple steps below to learn how to mask images into shapes in Google Slides.
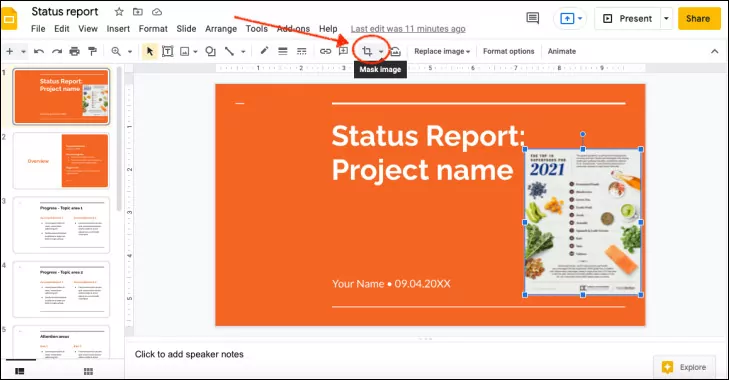
Crop Picture to Shape in Google Slides
Part 2 How to Put a Picture in a Shape Online
Apart from Google Slides, most online slideshow makers allow you to change the shape of an image in your slides. Among them, we recommend one of the top-rated slideshow makers - FlexClip. Fitting images in circles, heart shapes, and other creative shapes are easy and quick with this FlexClip's slideshow maker.
FlexClip has an intuitive interface that even if you are new to editing, you are capable of changing image shape in your slides in minutes. Meanwhile, many creative shapes are available for you, including circles, squares, drop shapes, heart shapes, etc. You can easily fit your pictures into shapes with a few simple clicks; just quickly get started by clicking the button below and edit your project using such an online slideshow maker.
Step 1 Set the Slide Background
Once you access the FlexClip's editor, set the background for your slideshow first. Here you can use a simple color background or upload your own background image, or choose one from FlexClip photo library.
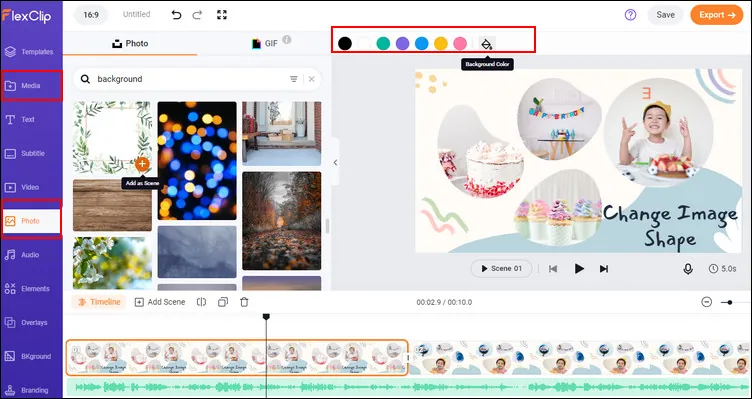
Put a Picture in a Shape Online - Background
Here, remember to adjust the background duration to make the slide in the length you want.
Step 2 Pick the Shape for Your Image
When the background gets ready, go to the Element section and find the Shape. Click See all to reveal the Shape options, pick your desired shape and add it to the canvas, then edit it freely to make it in the proper size and location you want.
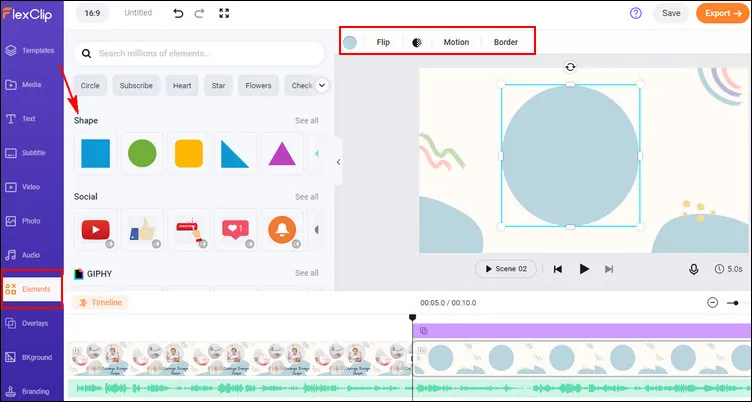
Put a Picture in a Shape Online - Add Shape
Pro tips for you: the Shape library only offers some basic shapes for you to change the image shape in your slides, if you want more creative shape ideas, you can switch to the Mask & Frame section, and browse through to find your desired one.
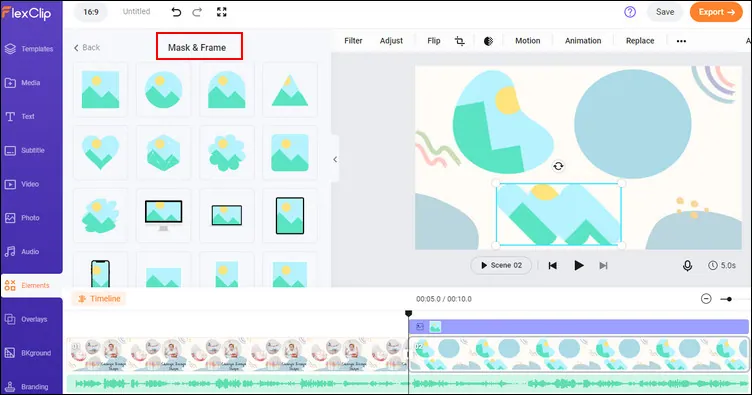
Put a Picture in a Shape Online - Mask & Frame Shape
Step 3 Insert Your Image in a Shape
Once you get the desired shape for your image, you can go to the Media section to upload your image from your computer or mobile, or even some third-party platforms, like Dropbox, Google Drive, etc.
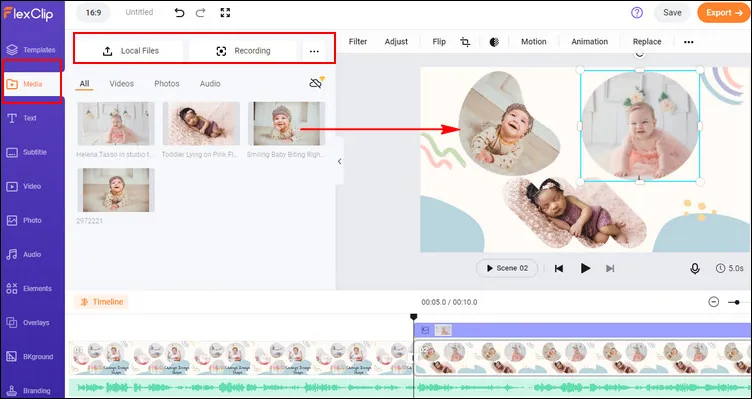
Put a Picture in a Shape Online - Insert Image in Shape
Get your images ready? Just drag it over the shape on the canvas, and the image will occupy the shape automatically.
Besides making an image in a circle or any, while you're in FlexClip editor,you can make more edit to level up your slideshow:
- Add & edit text animation to the slideshow;
- Add transition effects, filters to the sideshow;
- Add watermark, overlays & voice over;
Also, FlexClip offers various beautiful pre-made video templates, helping you easily make a slideshow for any occasion, such as birthday slideshow, wedding slidehsow, funeral slides, and more:


Final Words
You can create fascinating effects in your presentation when you try inserting your image in shape. And it's very easy with the ways we introduced above. Use one of the ways we shared in this article to change the shape of an image in your slides and take your presentations to the next level!


