Animated arrows are a frequently-used element in a video to draw viewers’ attention to a moving object or a specific area in the video for explanatory purposes.
In this tutorial, we will walk you through how to easily create a hand-drawn animated arrow in After Effects and animate this arrow in Premiere Pro and also offer you a quick online solution to quickly add an animated arrow to your video in seconds.
Here is what you will learn:
How to Create a Hand-drawn Animated Arrow in After Effects
Well, there are multiple ways to create an animated arrow in After Effects, the easiest way we believe is to use a Wacom tablet to draw a custom arrow and import this arrow clip to Premiere Pro and animate the moving arrow there. So, let’s find out how to do it.
How to create a custom animated arrow in After Effects.
How to Easily Create an Animated Arrow in a Video by FlexClip Online
Well, if you couldn’t afford the patience and time to create an animated arrow and animate it in After Effects, a viable alternative is to use FlexClip online video maker.
With FlexClip, you can easily select from a wide array of designer-made arrow animations and add one into your video, and customize its color, position, opacity. No software download and design experience are needed. Easy peasy lemon squeezy.
Add animated arrows in a video by FlexClip online

All you need to do is:
Here is the resulting video with an animated arrow created from the example above:
Add animated arrows in a makeup tutorial video by FlexClip
Now, It's Your Move
Hopefully, you can create fun and eye-catching animated arrows with our tutorial. If you find this how-to guide helpful, don’t forget to share it with friends on Facebook and leave your comments and tag us. Looking forward to hearing your feedback.


FlexClip Video Maker
The easiest way to help you create custom videos, no design skills needed.
Start Now for Free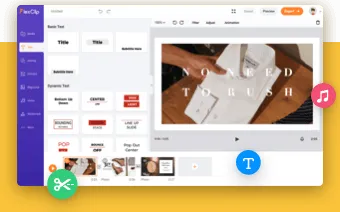
Hot & Trending
-
Ultimate Tik Tok Guide – How to Tik Tok & How to Make a Tik Tok Video that Gets Likes
-

Instagram Story Video Quality Bad After Upload? Fix It!
-

7 Best Ways to Find Music in YouTube Videos
-

How to Repost Video on TikTok & How to Remove TikTok Repost
-

Improve Video Quality Online: 3 AI Video Quality Enhancers You Can't Miss
-

4K Convert to HD 1080p without Watermark: Best 4k Video Converters
-

How to Change Face in Video on Phone/Desktop/Online
-

Top 13 Birthday Video Makers with Music and Effects Free