The need to blur videos is common, whether it's to keep someone's identity anonymous by blurring faces or to blur distracting backgrounds to help viewers focus on the main subject. As an Apple ecosystem user, you might be wondering how to blur videos using iMovie. You’re in the right place! In this guide, you’ll learn how to blur videos in iMovie on both your Mac and iPhone. Let’s dive into the details!
Also Interested in: How to Blur a Screen Recording to Protect Sensitive or Personal Information>>
Part 1. How to Blur Video in iMovie on Mac
Blurring a video in iMovie is not a straightforward task as iMovie doesn’t include a embedded feature for blurring an entire video or pixelating a specific part of video. However, you can achieve the same blurring effect with some tricks. Here we’ll take you through how to blur an entire video and also pixelate a part of video using iMovie on Mac.
1.How to Blur Entire Video in iMovie Using Pull Focus Title
In iMovie, there's a hidden blur effect within the titles preset that allows you to pixelate your entire video with just a few clicks. Follow these steps to learn how to blur a video in iMovie using the "Pull Focus" title.
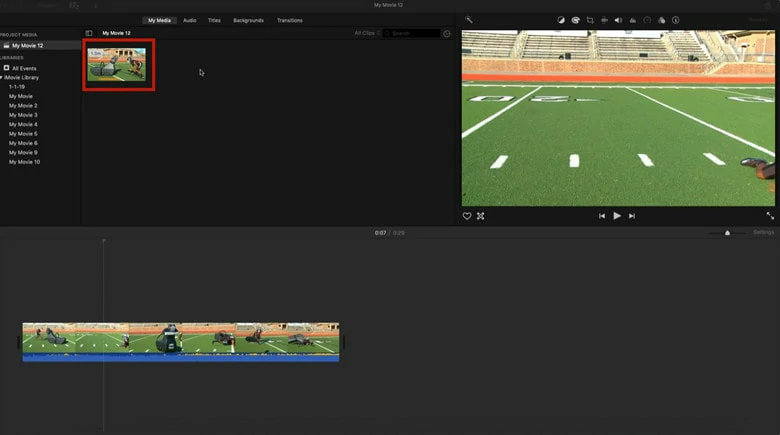
How to Blur Entire Video in iMovie: Upload Your Video to iMovie
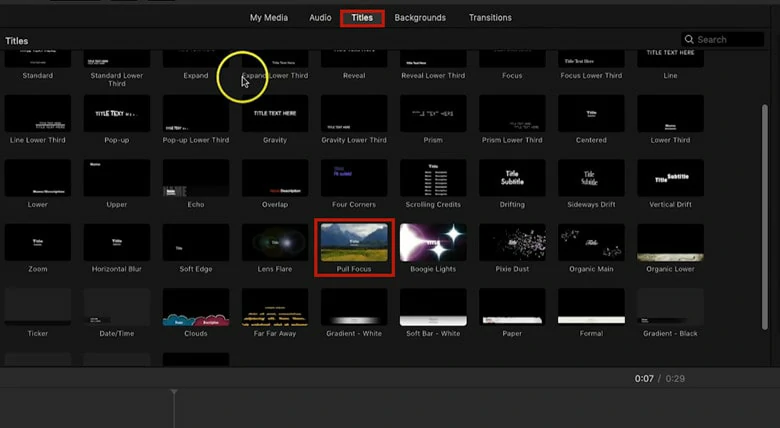
How to Blur Entire Video in iMovie: Find the Pull Focus Title Preset
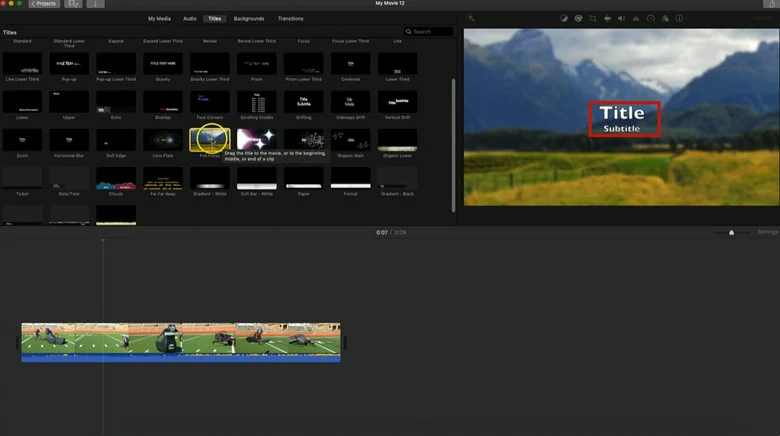
How to Blur Entire Video in iMovie: Apply the Pull Focus Title and Customize it
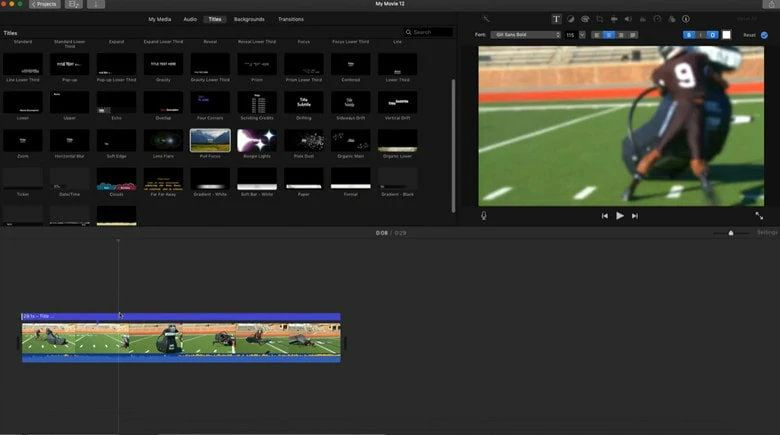
How to Blur Entire Video in iMovie: Delete the Default Text in Pull Focus Title Preset
2.How to Blur a Face or Specific Area of a Video on iMovie
Blurring a specific face or object in iMovie is often more common than blurring an entire video. By combining mosaic images, the Picture-in-Picture effect, and keyframing, you can achieve your desired blur effect. Here’s how to do it:

How to Blur a Face on iMovie: Add the Video You Want to Blur to iMovie
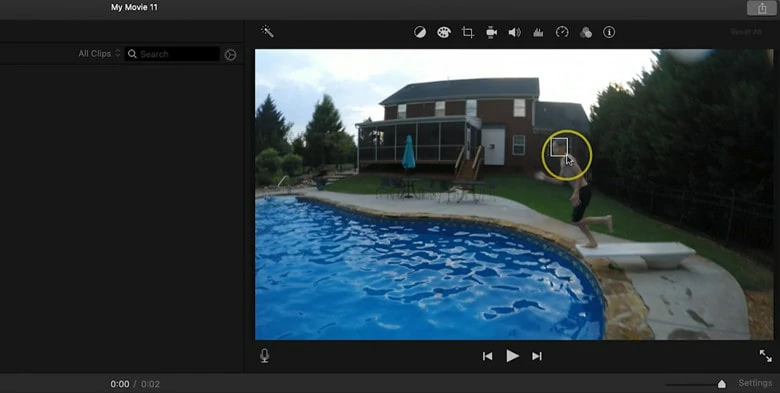
How to Blur a Face on iMovie: Take a Screenshot of the Desired Area and Blur the Image
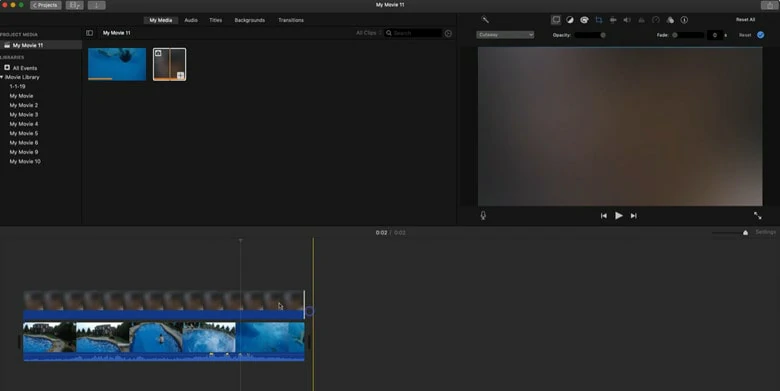
How to Blur a Face on iMovie: Add the Blurred Image to iMovie and Apply Picture-in-Picture Effect
How to Blur a Face on iMovie: Use Keyframe to Make the Blurred Image Follow the Motion Tracking
Part 2. How to Blur Video on iMovie on iPhone or iPad
Now that you've learned how to blur a video on iMovie using a MacBook, let’s explore how to achieve the same effect on an iPhone or iPad. Note that the iMovie version for iPhone and iPad lacks keyframe functionality, so it won't allow you to blur moving objects. However, the steps are similar. Here’s a detailed guide for these devices:
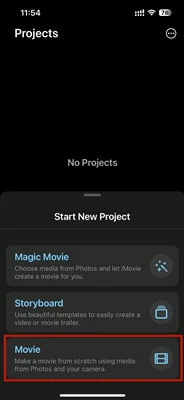
How to Blur a Video on iMovie: Import the Video You Want to Blur on Your iPhone
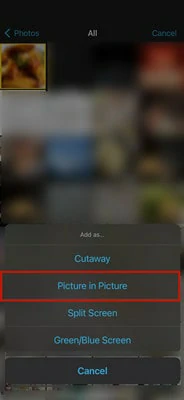
How to Blur a Video on iMovie: Apply the Blurred Image and Set it Picture-in-Picture
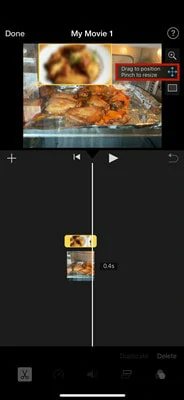
How to Blur a Video on iMovie: Resize and Position the Image to the Target Place
Part 3. Two iMovie Alternatives to Blur Videos with More Flexibility
# 1 FlexClip - Blur Entire Video, Faces and a Part of Video Online
Blurring video is super easy in FlexClip. As a versatile video editor, it offers a blur tool that allows you to apply a hazy flair to your whole clip or hide personal privacy in your video in clicks. Unlike iMovie, FlexClip provides you six blurring effects to choose from with customization of intensity of each and instantly blur a moving object without using keyframe. Can’t wait to try it now? Let’s dive in!
1.How to Blur Video Online Using FlexClip
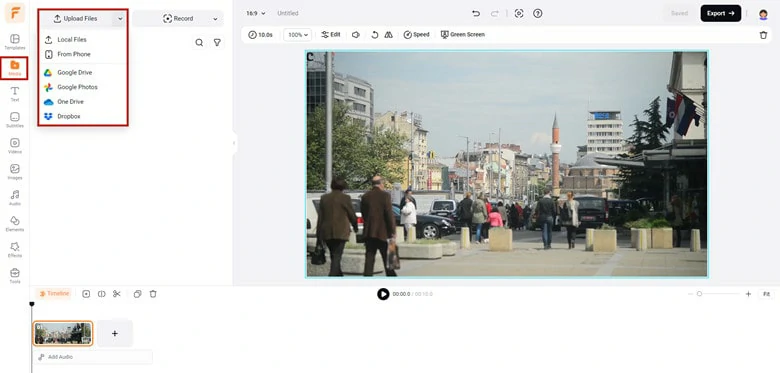
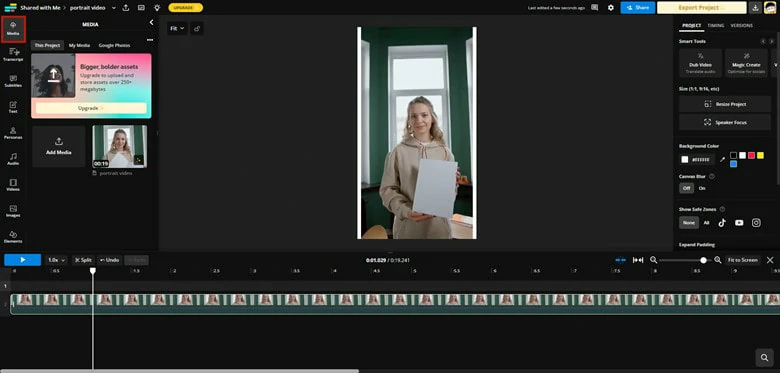
How to Blur Video Online: Upload the Video You Want to Blur to FlexClip


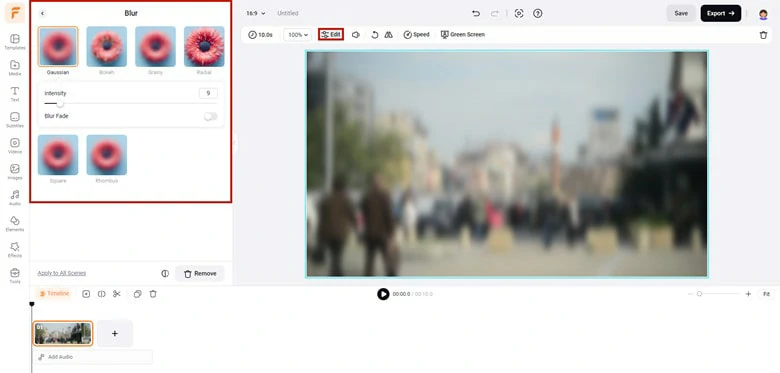
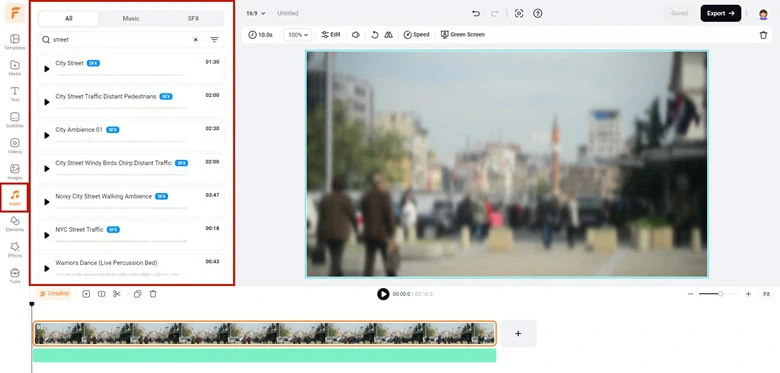
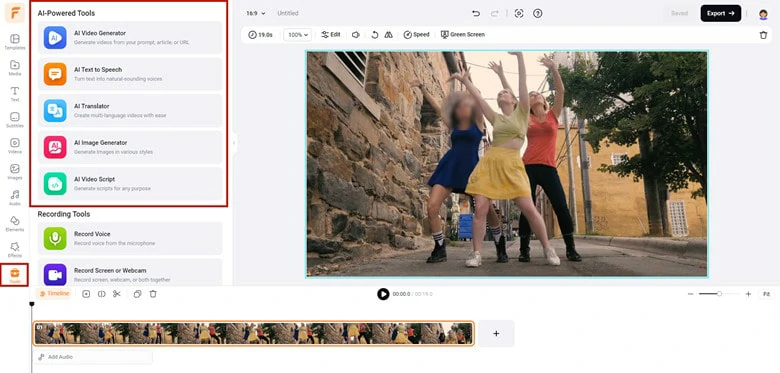
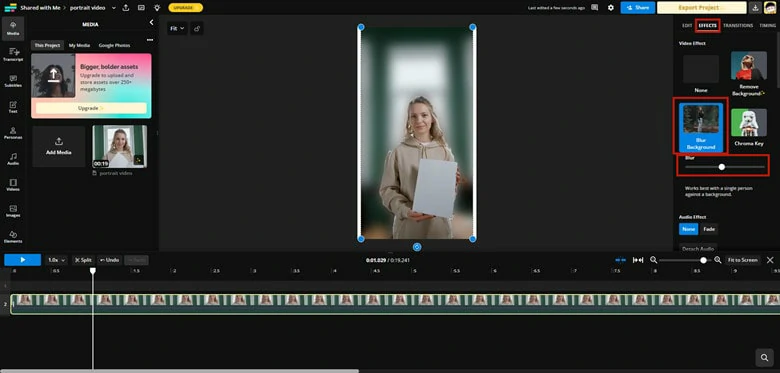
How to Blur Video Online: Add Video to Timeline and Select the Blur Effect You Like
How to Blur Video Online: Finetune Your Blurred Video with FlexClip's Powerful Editing Tools
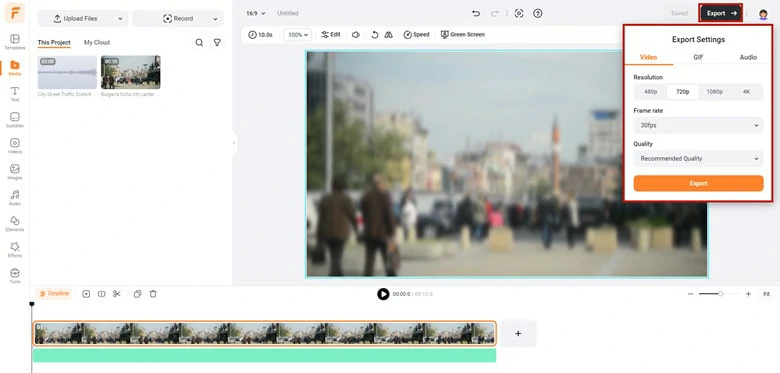
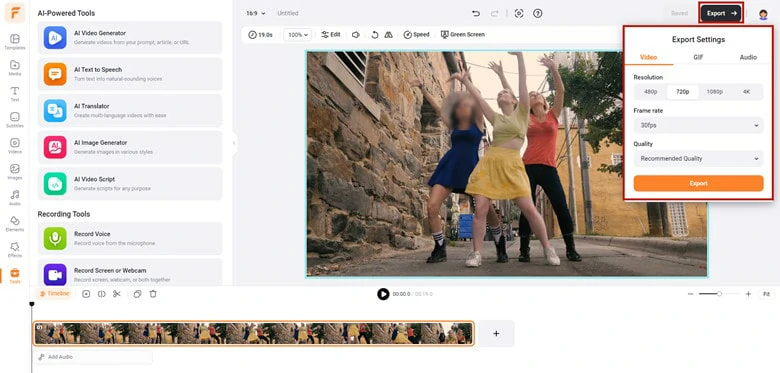
How to Blur Video Online: Export Your Edited Blurred Video from FlexClip
2.How to A part of Video Online Using FlexClip
Whether you want to blur logos, faces, license plate or any part of your video, FlexClip gets you covered with the steps below.
How to Blur Video Online: Import the Video You Want to Blur to FlexClip
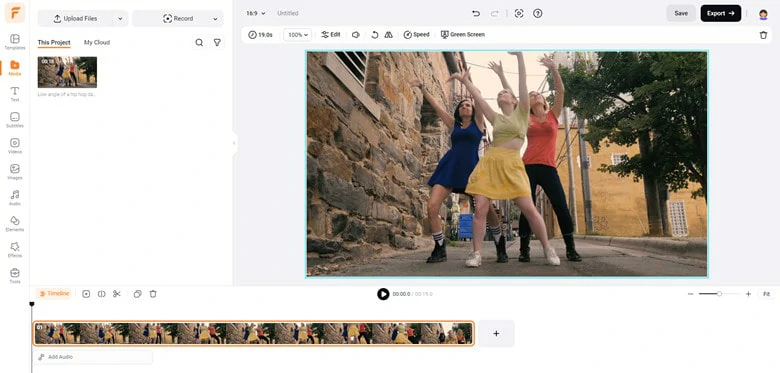
How to Blur Video Online: Add a Video Overlay and Crop it
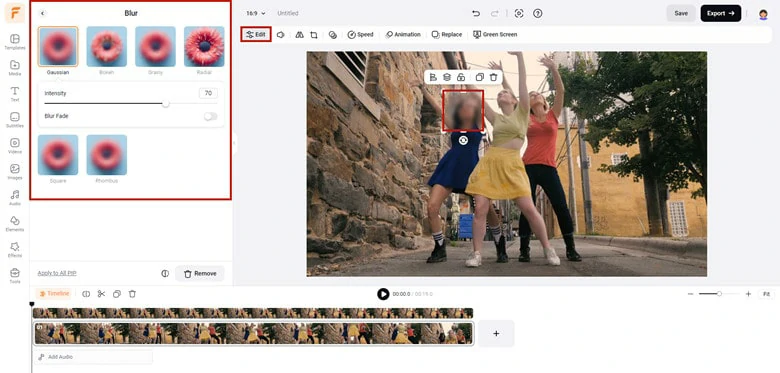
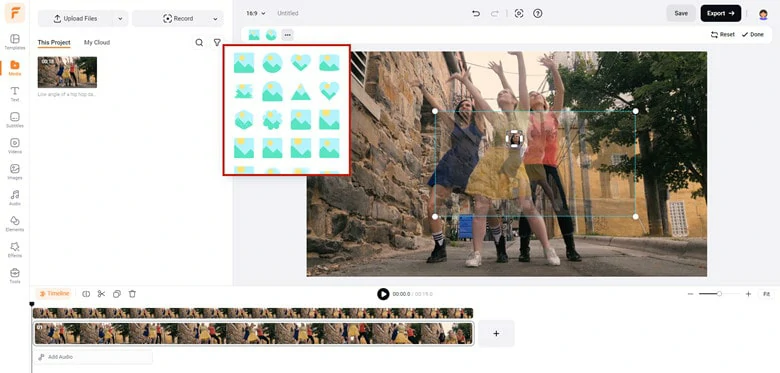
How to Blur Video Online: Blur the Video Overlay and Place it Above the Desired Area
How to Blur Video Online: Perfect Your Blurred Video with FlexClip's Powerful Editing Tools
How to Blur Video Online: Save Your Edited Blurry Video
# 2 Kapwing - Blur Background in Video Online
Want to hide a messy bedroom in your video? Need to protect people’s identities in a public shoot? Or perhaps you forgot to enable the background blur in your Zoom recording? No worries! Kapwing's video background blurring feature can handle all of these situations with just one click. Here’s how to do it.
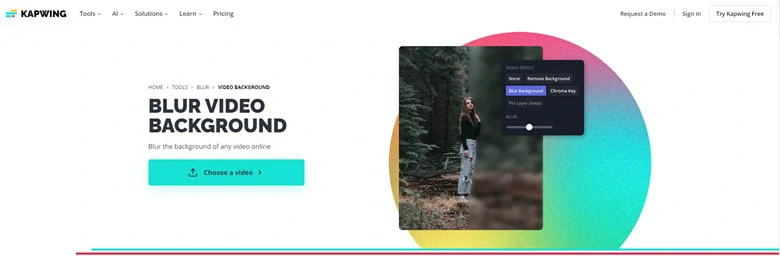
Go to Kapwing and Select the Blur Video Background Feature
Upload Your Video and Add it to the Blank Canvas
Enable the Blur Background Feature to Blur Background in Video Online
The Bottom Line
That’s all for how to blur videos in iMovie on Mac and iPhone. To summarize, while iMovie lacks a dedicated video blurring tool, you can still achieve the effect using some workarounds. However, these methods come with limitations, such as the inability to blur backgrounds. As an alternative, we’ve recommended two online tools that make video blurring much easier and more flexible. Which method do you prefer? Choose your option and start your blurring journey today!


FlexClip Video Maker
The easiest way to help you create custom videos, no design skills needed.
Start Now for Free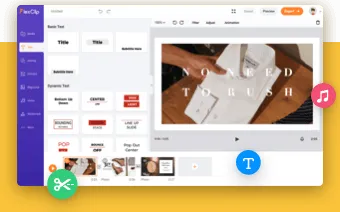
Hot & Trending
-
Ultimate Tik Tok Guide – How to Tik Tok & How to Make a Tik Tok Video that Gets Likes
-

Instagram Story Video Quality Bad After Upload? Fix It!
-

7 Best Ways to Find Music in YouTube Videos
-

How to Repost Video on TikTok & How to Remove TikTok Repost
-

Improve Video Quality Online: 3 AI Video Quality Enhancers You Can't Miss
-

4K Convert to HD 1080p without Watermark: Best 4k Video Converters
-
How to Change Face in Video on Phone/Desktop/Online
-

Top 13 Birthday Video Makers with Music and Effects Free