It's reported that 80% of people watch videos on their mobile devices with the audio frequently turned off. To ensure viewers can understand the content, captions or subtitles are essential. Without an audio track, capturing viewers’ attention through caption/subtitle animation becomes crucial to keep them engaged. Since Premiere Pro is the industry-leading software for creating videos with subtitles/captions, we'll discuss how to animate captions in Premiere Pro. Let’s dive in!
Also Interested in: How to Auto Generate Captions with Premiere Pro>>
Part 1. How to Create Captions/Subtitles in Premiere Pro
Before jumping to the key point, make sure that captions/subtitles are already generated in Premiere Pro. If you haven't done this yet, follow this tutorial to learn how to auto create captions/subtitles in Premiere Pro in advance.
Part 2. How to Animate Captions in Premiere Pro
Now that captions are available in Premiere Pro, it's time to bring them to life by adding animation effects. Thanks to its versatility and flexibility, Premiere Pro supports a wide range of caption animations using keyframes, including word-by-word subtitle animation, pop-up effect, karaoke-style subtitles, and more. In the following section, we’ll show you how to animate captions in Premiere Pro using the pop-up text effect.
How to Animate Captions in Premiere Pro
Although Premiere Pro offers multiple caption animation capabilities, its intimidating interface and complex operation process can be overwhelming for many users, including those who are tech-savvy. If you're seeking easier ways to animate captions or subtitles, keep reading to discover an alternative online solution to Premiere Pro.
Part 3. Premiere Alternative to Animate Captions/Subtitles Online
Known for its simplicity and flexibility, FlexClip is the ideal solution for handling caption-related tasks. Whether you need auto subtitle generation, subtitle-to-speech conversion, or subtitle translation, FlexClip offers a convenient one-click approach. For subtitle animation, you have access to a wide range of effects, such as pop-up, word-by-word, highlight, hollow, and more, all easily accessible with just a few clicks. With FlexClip, you don't need any editing experience to meet your captioning needs. Ready to have a try? Let's dive in and see how it works right now.
How to Animate Subtitles Online Using FlexClip
How to Animate Subtitle in Premiere Online Alternative
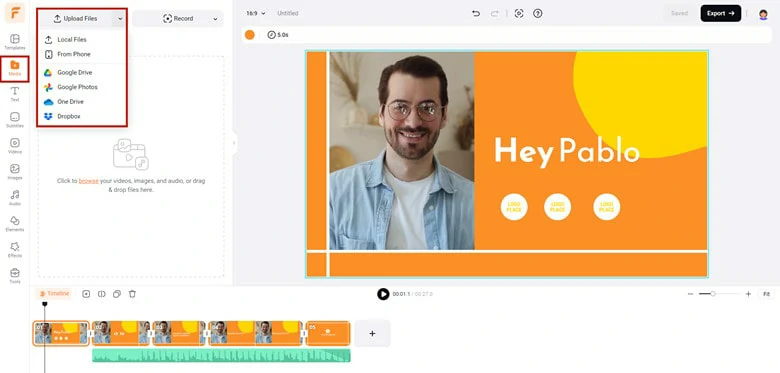
Upload the Desired Video to FlexClip


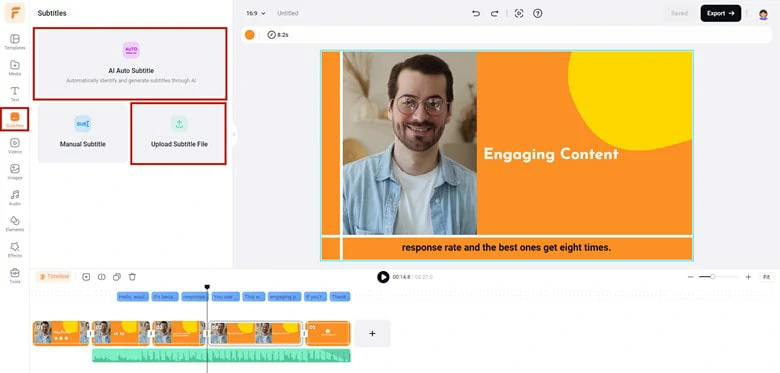
Create Subtitles for Your Video
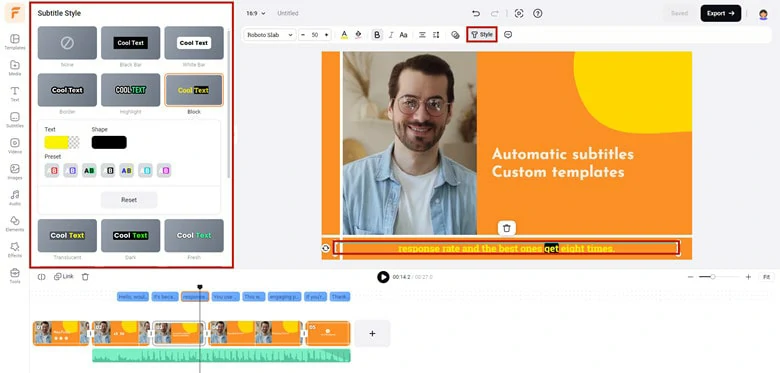
Choose a Style to Animate Subtitles
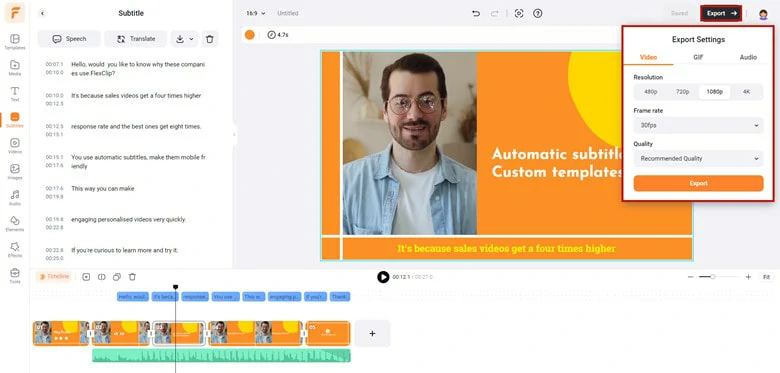
Export the Satisfied Video to Local Computer
The Bottom Line
That's all for how to animate captions in Premiere Pro. While Premiere Pro offers flexible ways to achieve this, the process can be overwhelming. If you're looking for an easier method, try using FlexClip as an alternative.


FlexClip Video Maker
The easiest way to help you create custom videos, no design skills needed.
Start Now for Free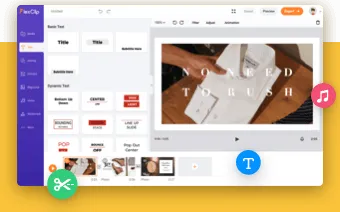
Hot & Trending
-

Ultimate Tik Tok Guide – How to Tik Tok & How to Make a Tik Tok Video that Gets Likes
-

Instagram Story Video Quality Bad After Upload? Fix It!
-

7 Best Ways to Find Music in YouTube Videos
-

How to Repost Video on TikTok & How to Remove TikTok Repost
-

Improve Video Quality Online: 3 AI Video Quality Enhancers You Can't Miss
-

4K Convert to HD 1080p without Watermark: Best 4k Video Converters
-

How to Change Face in Video on Phone/Desktop/Online
-

Top 13 Birthday Video Makers with Music and Effects Free