Twitter, Facebook, Instagram, YouTube, and other social media platforms are packed with watermarked personal and commercial photos and videos. This is because adding watermark to videos and photos can prevent unauthorized use and copying, make your videos more personal and special, and promote your brand.
We understand how eager you are to watermark your video to protect copyright or boost your channel, thus, we summarized several easy ways to add a watermark to your video. Refer to the part you need.
Can't Miss: 5 Best Video Montage Makers to Try >
Customizable Video Templates Give Away


Part 1. How to Add a Watermark to Your Video Online
FlexClip helps you put watermark to your video online in clicks whether it is a text watermark, or logo watermark. After uploading, you can easily change the watermark’s size, opacity, and position to make your video look better! Rich video templates and media resources like music, video clips and photos are also available to level up your work.
Now, click the Create a Video button and follow the steps below to get started. No download, no registration required.
Step 1. Upload Your Video to FlexClip
Once you are at FlexClip's editing page, switch to the Media section. Click on Upload Files, choose files from a local folder, from mobile devices, or cloud services. This will successfully upload your videos to FlexClip. After that, drag and drop your video to the timeline.
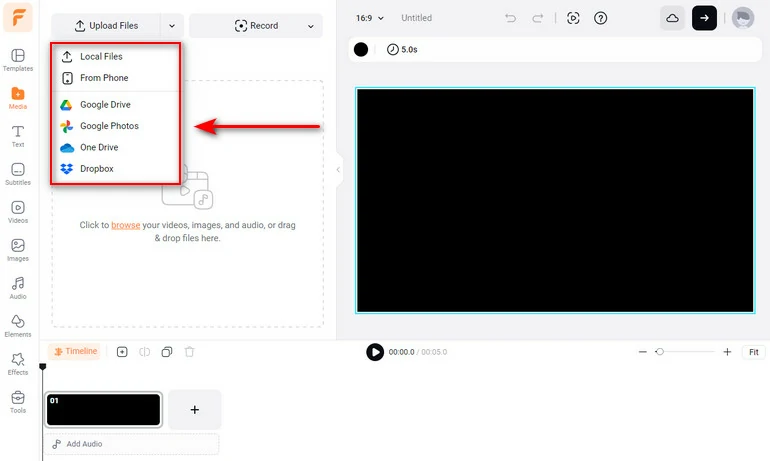
Upload Video to FlexClip
Step 2. Add Text/Logo Watermark to Your Video
Add Text Watermark to Video
Go to the Text section, choose a basic text style you like, and then enter any words for the watermark. Adjust its font, size, color, position, opacity, rotation angle to make the text look like a watermark. If necessary, you can even use your own font.
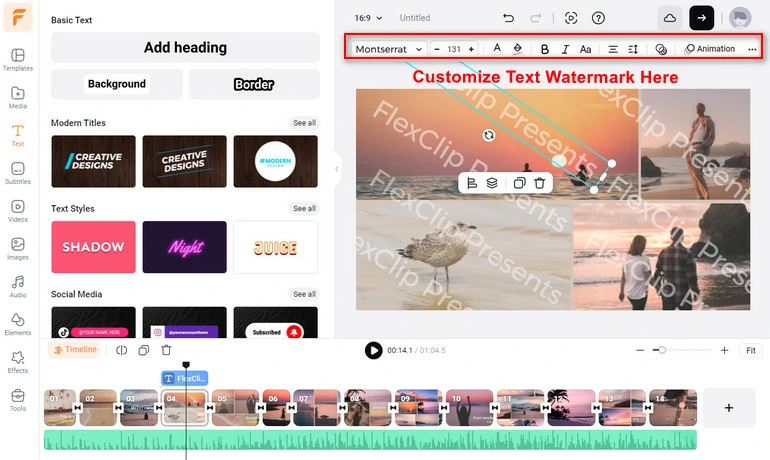
Add Text Watermark to Video
Add Logo Watermark to Video
Under the Tools tab, there is a Branding option that simplifies the watermarking process. Upload your logo, and then change the logo size, opacity, position until the logo perfectly fits your video.
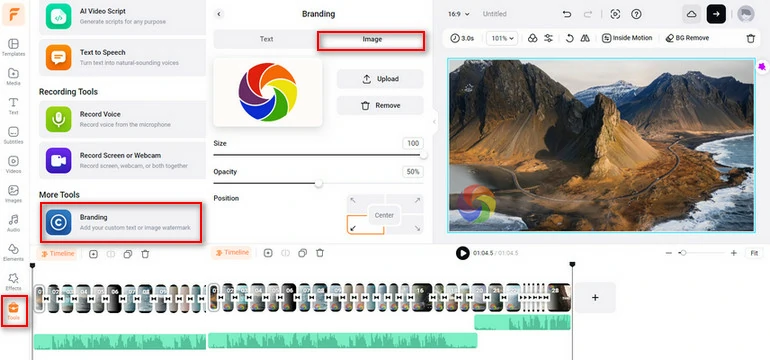
Add Logo Watermark to Video
Step 3. Share Your Watermarked Video
At FlexClip, you have the option to export the watermarked video to the desktop, save to cloud services, share via a short link, or directly post to social media platforms.
Part 2. How to Add a Watermark to Your Video on Windows Desktop
Microsoft offers ClipChamp as a default editor for majority Windows users to manage their visual assets. As for adding watermarks, you can select brand fonts to quickly customize text in your videos, or import your logos then easily add them to any video.
Step 1. Upgrade to ClipChamp Premium
Even though ClipChamp is a default software on Windows computer, using your brand fonts and applying an image watermark to video requires a subscription.
Step 2. Add Watermark to Video
Enter any text, or follow the prompts to upload your logo to the video. Adjust its size, position, opacity so that it fits perfectly with the video.
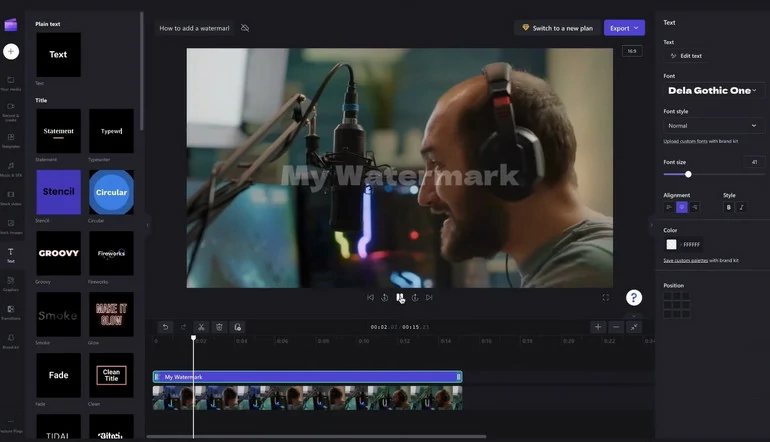
Add Logo Watermark to Video with ClipChamp
Part 3. How to Add a Watermark to Your Video on Mac Desktop
iMovie is an inborn application on all Mac/iOS devices. Its powerful editing features, special effects helped many people to create professional videos. It is a great option to embed a video watermark if you already have had a transparent logo at hand.
Step 1. Apply Videos and Your Watermark to iMovie Timeline
Launch iMovie, create a new project, and then drag and drop the video to the timeline, then the logo watermark above the video. Extend it to the end of the video clip.
Step 2. Do Some Setups
Click on your logo. Go to Video Crop feature, make sure you have selected the Fit option.
Step 3. Adjustments on Your Watermark
Go to Video Overlay, choose Picture in Picture. Set Dissolve as mode. Set the time to O. Those processes make it possible for the image to look like a watermark. Change the image size, position.
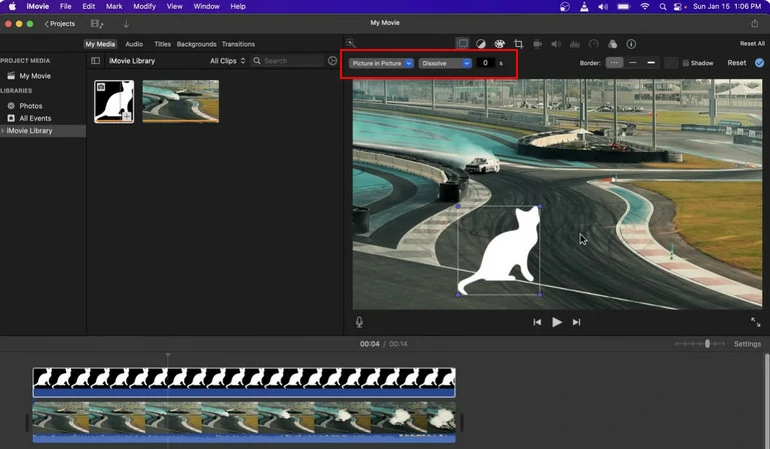
Add Watermark to Video in iMovie
Part 4. How to Add a Watermark to Your Video on Mobile Devices
On mobile devices, the most recommended video editor to add a watermark is CapCut. It offers lots of advanced features and allows you to export videos in high-quality. Let's dive into the detailed steps.
Step 1. Upload Video Clip to CapCut
Launch CapCut on your devices, click on the "+" sign, select a video to create a new project and use it on your timeline.
Step 2. Add Text Watermark to CapCut
Move to the third option Text. Enter any text you like, then change the font, size, opacity, color, style to make the text look like a watermark.
Add Watermark to Video with CapCut
Part 5. How to Add a Watermark to YouTube Videos
YouTube allows you to add a watermark to all posted videos in one go for both brand consistency and protecting copyright. Even though YouTube has removed the branding feature once, it is now finally back and available for everyone.
Step 1. Find the Branding Feature
Log in to your YouTube account, click on your profile and go to YouTube Studio. On the left side panel, select Customization > Branding.
Step 2. Upload a Video Watermark
Move to the Video Watermark part. Click on the Upload icon, select your video watermark, it will automatically appear on all your YouTube videos.
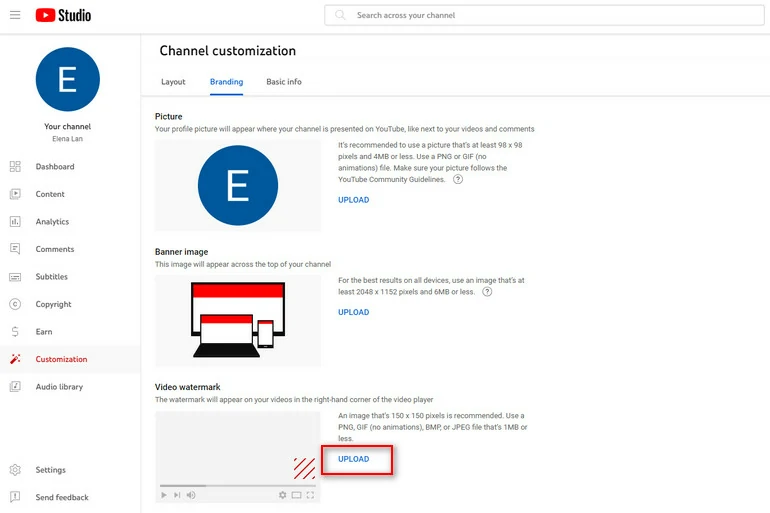
Add Watermark to YouTube Video
Tips for Adding Watermark to Video
Watermark is an important part of a video and professionals don't stop at merely embedding a watermark to the video. Instead, they do everything to make watermark look great. Here are some to-go tricks.
The Bottom Line
The above detailed steps of adding watermark to videos are easy and simple. Give them a try! If you like this blog, we’d appreciate it if you can share it with others.


