Question: Hi, I’m wondering how I can create a text mask animation. Actually, I don’t know if it’s possible to create something like this without SVG. Looking forward to everyone’s early replies!
- From Gasp Forum
Answer: Text mask is a technique used in graphic design and video creation to reveal or hide content beneath the text. Animated text masks, however, add animations to the text. It is an excellent way to make text more visually striking, and allows creators to express their artistic vision. Here is an example of an animated text mask video.
Animated Text Effect
Creating an animated text mask used to involve professional tools like KeyNote, Premiere Pro. Now, tools like FlexClip and Canva make animated text mask creation as smooth as silk.
Method 1. Create an Animated Text Mask with FlexClip
FlexClip is an online video editing tool that is able to put image or video below animated text, and then use it for other video projects. It is the top choice to create animate text effect because of its easy of use, as well as various editing options like cropping, flipping, adding filters, making corrections. Here is a video about FlexClip's text mask feature.
Click on the Create an Animated Text Mask button and follow along.
Step 1. Set Text Animation Background
Once you are at FlexClip’s editing panel, drag the slider to adjust the background to the desired length. After that, change the text mask background color right above the preview window. You can set the background color to align your brand, or use green if you feel like doing green screen in the future.
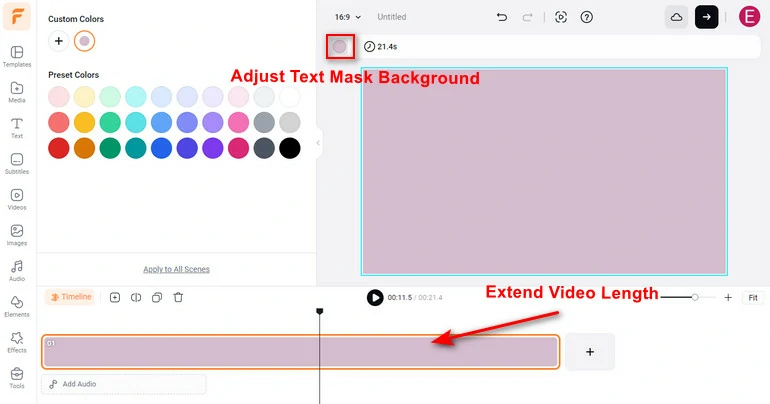
Set Text Animation Background
Step 2. Add Text to Background Video
Move to the Text section, enter any text with preferred font, size, color. To reach the best result, There are even some text default text styles designed by professionals for you to use directly.
Why not upload your own font to create a text mask? Click on the Font option above the preview window, select Upload Font and use it for a unique text mask.
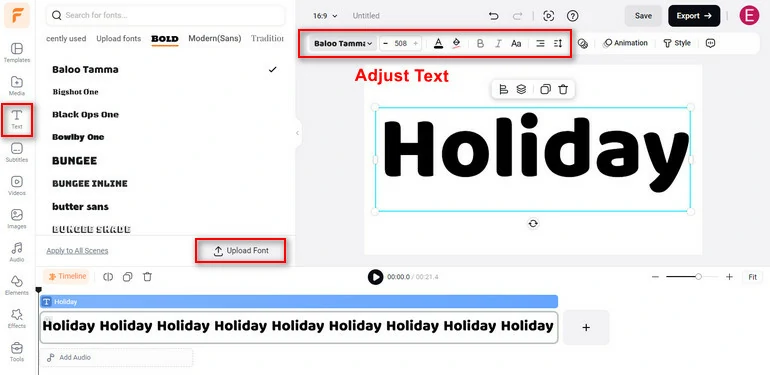
Add Text to Background
Step 3. Create a Text Mask
Click on the Style icon above the preview window, and then go to Create a Text Mask to your left.
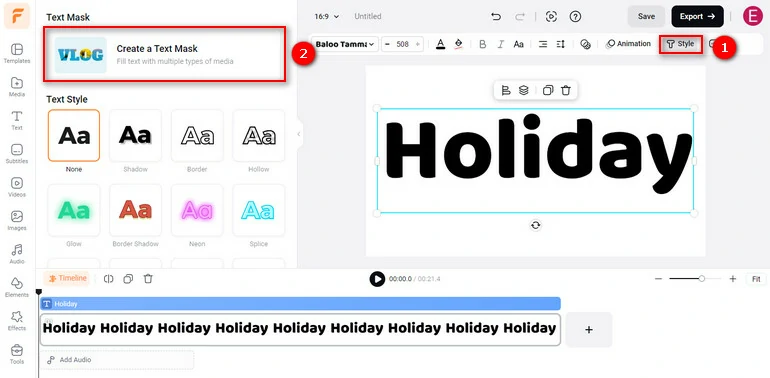
Access Text Mask Creation Tool
Follow the prompt to upload an image or video and fill in the text mask. Crop out unnecessary parts of the resource, add animations, filters, adjustments, or flip.
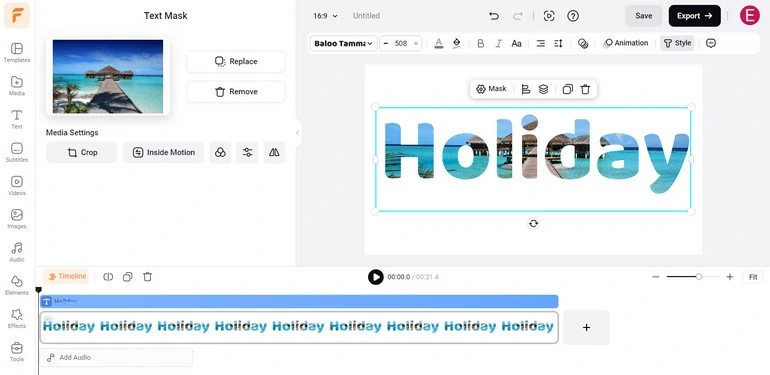
Create Text Mask with FlexClip
Step 4. Animate the Text Mask
Since you’ve now created a text mask, it is time to animate it. Go to the Animation tool above the preview window, choose from 16 animations, and then set the animation direction and duration. Explore different options.
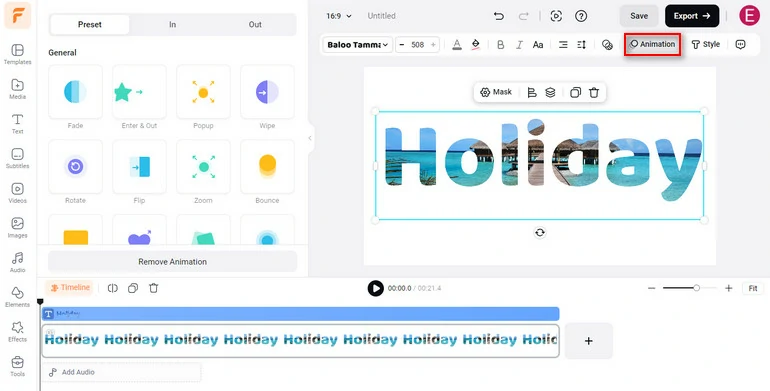
Animate the Text Mask
Method 2. Create an Animated Text Mask with CapCut
CapCut doesn’t come with a text masking tool, but there are some workarounds enabling you to put video or image above the animated text. Access CapCut through your mobile phone, or computer desktop and start to follow. The detailed process should remain the same.
Step 1. Create a Green Text Video
Go to the Text section, enter any text you like and then adjust its font, size, position. Most importantly, set the text color to green. Extend the text video to a desired length and then export it. If necessary, you can also add some animations to the green text.
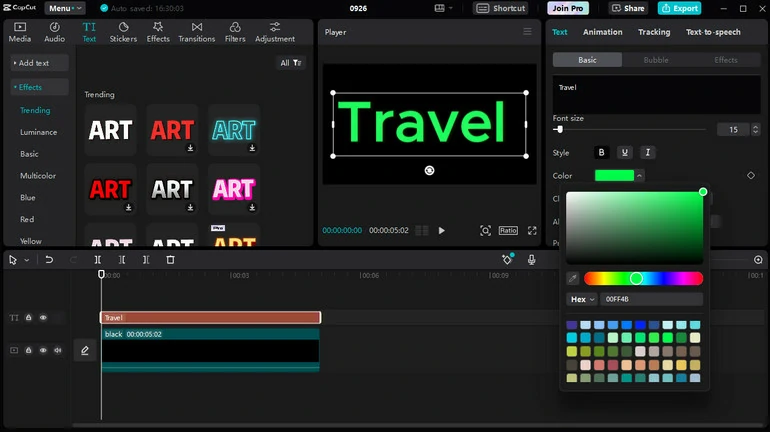
Add to the Timeline
Step 2. Overlay the Text and the Background Image/Video
Create a new project, upload the background image or video to the timeline first. Then drag the text video above the background.
Step 3. Create a Text Mask
Select the Text Video, Go to Cutout > Chroma Key. Tick the box in front of the Chroma Key, and then use the color picker to select the green color of the text. Adjust Strength and Shadow to at least 50% so that the text video and background merge perfectly.
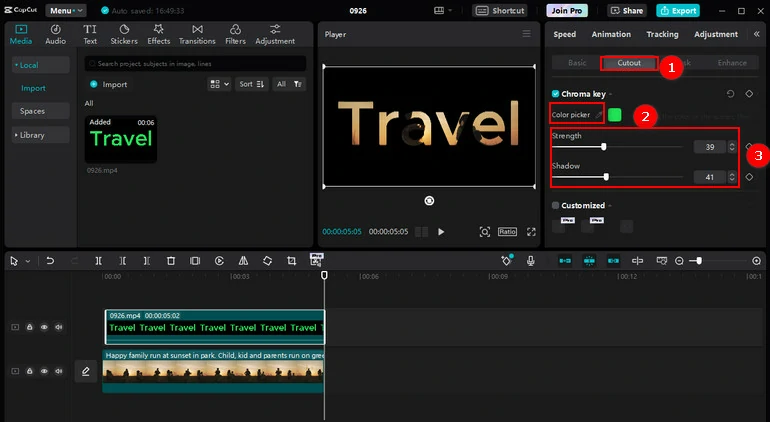
Create a Text Mask
The Bottom Line
Tools like FlexClip and CapCut make it possible to create text masks in several steps. Now, you must have successfully created a text mask. Use it to bring your video or graphic design project to the next level.


