When making a YouTube tutorial video, a product review video, an educational video, etc., it would be a great idea to add annotations to the video. As you annotate videos with hand-drawn arrows, circles, animated texts, or lines, it helps direct viewers’ attention and gets your point across easier.
So, in this tutorial, we will walk you through the 3 best video annotation tools that can help you easily annotate videos for educational videos, webinar teasers, podcast videos, YouTube videos, birthday videos, travel videos, promo videos, etc., and make your videos triple engaging.

Here is what you will learn:
Also, read how to add subtitles to YouTube videos automatically.
1. FlexClip
Well, if you don’t know how to create complex motion graphics to make annotations on a video just like me, or simply couldn’t afford the time to annotate videos from scratch, then a go-to video annotation tool you can use is FlexClip online video maker.
Annotate videos in a breeze with FlexCLip online.
With FlexClip, you can directly add hand-drawn and animated circles, arrows, emojis, checkmarks, colored stripes, mouse cursor, callout titles, location titles, profile titles, search bars, GIFs, etc. to annotate any content in your video and easily controls their duration and colors without using keyframes.
Besides, a wide array of trending and fully-customizable video templates are also readily available to you. You can drag and drop your clips to customize them into a compelling video in minutes, which can be a great timesaver.


How to annotate videos with FlexClip online:
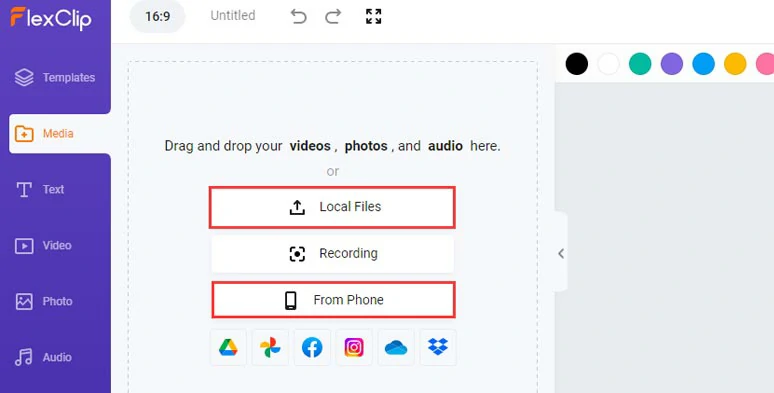
Upload your video assets to FlexClip.
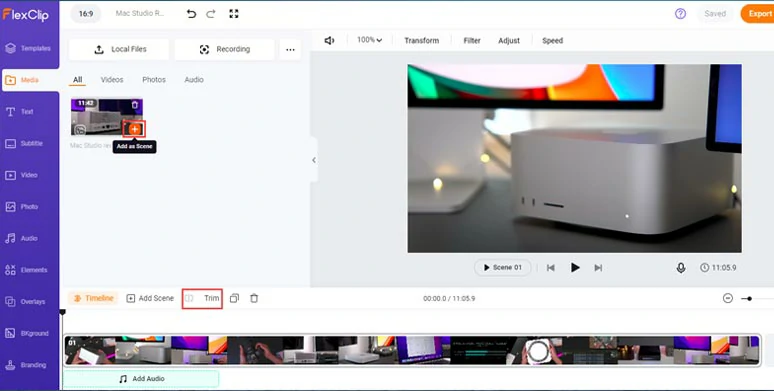
Add clips to the timeline and trim or split the clip.
With the clip selected, move the playhead to find the video moment for the video annotations. Then, click Text tab > scroll down to Callout titles and select one to your liking and add it to your video > customize the texts, fonts, text color, color of background fill, animation and trim its duration on the timeline.
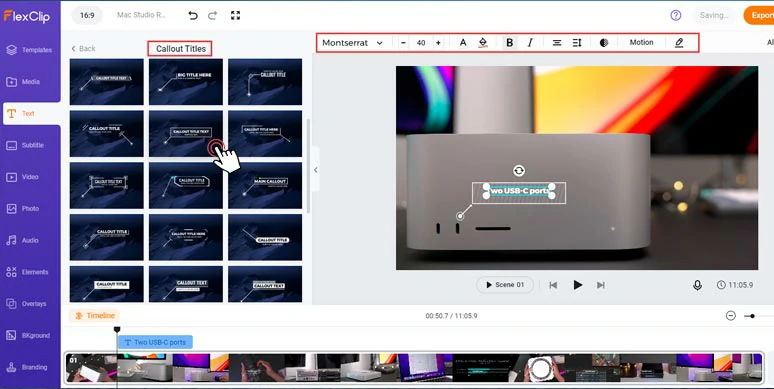
Use callout titles to annotate videos.
Alternatively, click the Elements tab > type in “line”, “arrow”, or “circle” in the search bar > you can add the hand-drawn circle or arrow to annotate parts of the video. You can customize its color, direction, duration, and motion as well.
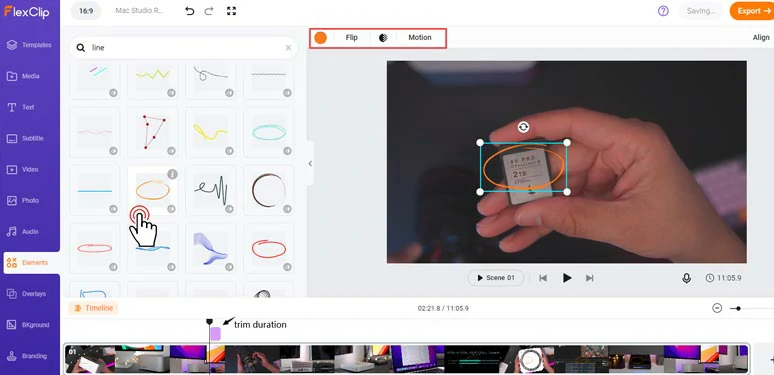
Use animated and hand-drawn circles, arrows, or lines to annotate videos.
Another popular way to annotate YouTube videos is by overlaying images, GIFs, or another video, along with animated arrows and texts over the video to highlight parts of your video. It can be as simple and complex as you can imagine.
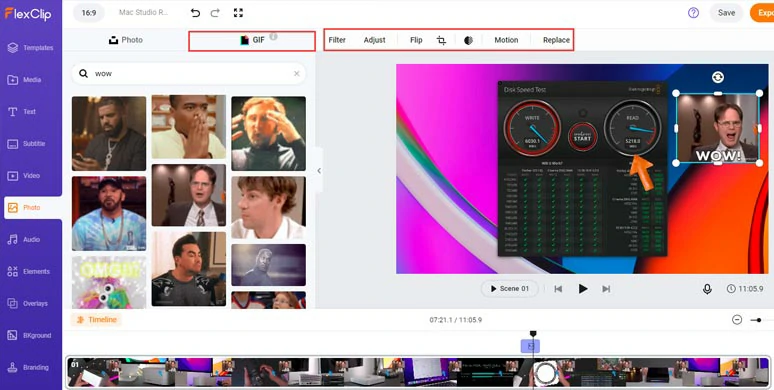
Use funny GIFs and hand-drawn arrows to annotate videos.
To enhance both visual and auditory experience, click the Audio tab > Sound Effects > search for “pop” sound effects > add the pop-up sound effects as the video annotation reveals. Just like what YouTube influencers did in their video. You can trim and split the audio while 70k+ royalty-free BGM is also available.
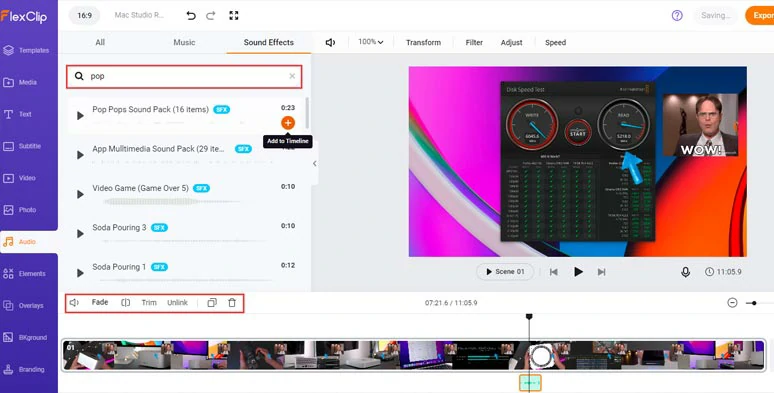
Add royalty-free pop-up sound effects to enhance video annotations.
Done with the editing. You can download the 1080P video to your PC or directly share it to YouTube, Google Drive, One Drive, Dropbox, or TikTok; a clickable link and an embed code are also available for your blogs, newsletters, or other repurposing. Pretty handy!
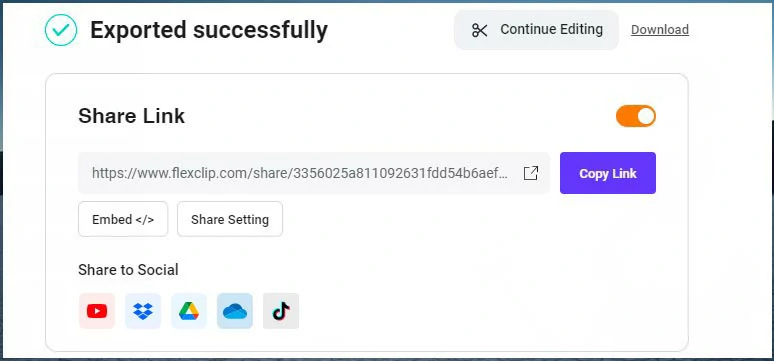
Ease of sharing in multiple ways.
2. Timelinely
If you have published YouTube videos or happened to watch others’ YouTube videos or a movie trailer on YouTube and want to annotate these YouTube videos and share them with friends or students, a great solution is to use Timelinely. It’s a free online YouTube video annotation tool that allows you to add texts, images, GIFs, or even record your reaction video through facecam to annotate a YouTube video.
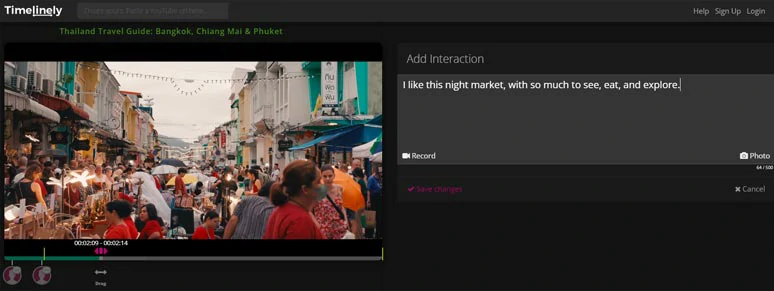
Annotate YouTube videos online with Timelinely.
The only drawback is the annotation is not added inside the YouTube video. It’s more like adding annotations to the side of the YouTube video, exactly what you did in Word.
How to annotate YouTube videos with Timelinely online:
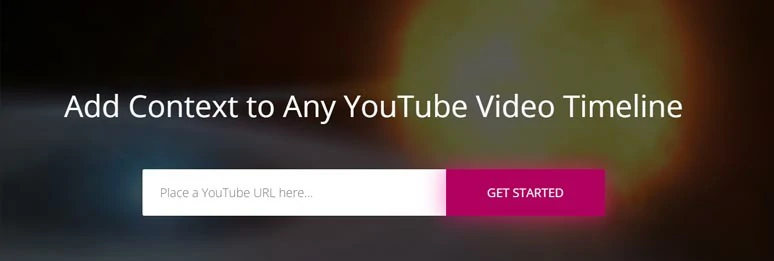
Paste the URL of a YouTube video to Timelinely.
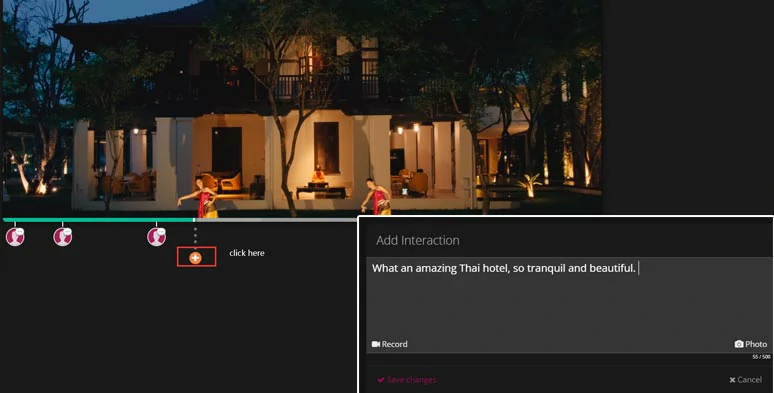
Annotate YouTube videos with texts, webcam recordings, or images.
3. iPad and Final Cut Pro
Last but not least, you want to completely use hand-drawn circles, arrows, lines, etc. to annotate videos with personal styles. Another viable option is to record how your draw circles, and lines, or write words on iPad and use a video editor like Final Cut Pro or Premiere Pro to blend the recorded video into your video.
Annotate videos with completely hand-drawn actions in your video.
Compared with the above two solutions, this workaround takes more time, planning, and effort. Recommended to experienced content creators who draw well and have enough time and the right gear to put their creativity into reality.
To do so, you need an iPad, an Apple Pencil, a note-taking app, a screen recorder, a phone or camera, and a video editor that can set blending mode like Final Cut Pro, Premiere Pro, etc.
How to annotate videos with iPad and Final Cut Pro:
Now, It's Your Move
So, that’s how you can easily annotate videos with these 3 video annotation tools. Now, the question is which solution works best for you. If you are new to video editing and lack video assets, FlexClip is your best bet. If you find this tutorial helpful, do share it on your Facebook or Twitter and tell us your take on that. Cheers!


