When we make a video, especially a sports highlights video, often we need to highlight a specific object or person in the clip. To make them more prominent and highlighted, the animated arrows are used. The small arrows lingering over an object let's you add details and attention to minor details that would otherwise be forgotten or ignored.
To create such unique content, iMovie is one of the most popularly used platforms. It's professional results and impressive tools make it the first choice for many. If you also wish to learn how to add arrows to a video in iMovie, then you are at the perfect place.
Explore below to learn the techniques to add arrows to video in iMovie to highlight the items:
Contents:


Create Video Faster with FlexClip’s Pre-Made Templates →
Start from Scratch Easily with FlexClip’s Online Video Maker →
Can't Miss: Change Aspect Ratio in iMovie: Make iMovie 9:16 for TikTok & Reels Included >
Part 1 How to Add Arrows to Video in iMovie to Highlight Items
In fact, iMovie 10 and later has no feature for creating an arrow in a movie. So, there is no direct way to add arrows as pointers on iMovie, you'll need another third-party tool to create a small arrow shape and bring it into iMovie, and then use the picture-in-picture and keyframe animation tools in iMovie to make your arrow shape follow the person along in your video.
Now, let's learn how you can add arrows in iMovie that will follow a subject throughout the video below.
How to add arrows to a highlight film in iMovie on a Mac
Prefer a written steps to follow easily? You can check the detailed steps below and learn how to add an arrow as a pointer to iMovie and highlight a moving subject in your video.
Step 1: Make a Nice Big Red Arrow Graphic
Export this as a transparent image. Then go to format slide layout and change the background to no fill. Otherwise you’ll get a black box with a red arrow in it. Instead of just the red arrow. Now go to file export to and images and in here select the format png. And make sure that export with transparent backgrounds is checked and then export it out.
Step 2: Import Images You Want to Add Arrows
Take any picture in which you want to follow one particular person by having this arrow above. So let’s bring the arrow in here in the iMovie. Create a folder for arrow image and inside it is all of the slides. Just drag that into the timeline here above the clip. Reposition the arrow so it's all the way to the left and it stretches.
Step 3: Select the Video Overlay
Make sure you select the video overlay settings change from cutaway to picture in picture in the drop down menu. Now you'll see it as a small picture in picture and its transparent effect. You will notice there are keyframes animation controls click on them to add various keyframes and adjust them.
Step 4: Add Arrows to the Entire Video with Keyframes
Keyframes move the arrow and it'll do that for the entire video. You could play it back and see the result or you can add a shadow by just clicking the shadow button on the top. When you add that it actually gets a little bit of a dark shadow around the object to make it stand out even more from the video behind it and when you’re done you can always adjust things so you can click at the keyframes and go anywhere where you want to make adjustments.
Step 5: Use the Left and Right Arrows
Use the left and right arrows in the tools box to go back and forth between all of the keyframes that you’ve set. And adjust any one of them so if something is off, you could adjust it you could also add extra arrows once you identify the jumps between these five frames set above. Going to a keyframe and then maybe advancing two or three adding another keyframe in between those existing two to fine-tune a section or maybe the actions happening a little bit faster.
Now you have got a red arrow following the chosen object in the video religiously. Adding an arrow in iMovie is a complicated task that many beginners cannot manage to ace. Below we have another easier way to add an arrow to your video.
Part 2 An Easier Way to Add Arrows to Video with iMove Alternative Online
iMovie is software that requires some practice to perform even simple tasks flawlessly. Especially for the beginners, this becomes a huge NO when they have to add an arrow or a circle following a specific person or object at iMovie. Not to mention that iMovie doesn't provide you with the built-in arrow animation resources, allowing you to add them to your video within clicks directly.
The better simpler alternative to iMovie is FlexClip. It is a professional video editor that offers numerous arrow animations that are extremely easy to use. You can add the arrows directly to your video. Plus, the other exciting editing features allow you to level up your work like no other.
Best Features of the Best iMovie Alternative - FlexClip:


Powerful AI tools a try to automate your video edits, generate video script with AI, easily turn your ideas into video in one click, and also effortlessly generate subtitles for your video with AI, create an AI voice to narrate your video, and more, which will spark your creativity and help you create videos like never before.
FlexClip AI Tools Walkthrough
Here's a quick tutorial to add arrows to the video with FlexClip.
Step 1. Upload Your Video Clip for Adding Arrow Animation
Click the Get Started Now button above to access FlexClip video editor, go to the Media tab to upload your video clips or images that you want to add arrow shapes. You can upload your footage from your computer or mobile phone, or some third-party-platforms, like Google Drive, Google Photos, and more.
You can also get some beautiful clips and photos from FlexClip's extensive media library with the Stock. Once done, click the "+" icon to add those footage to the Timeline.
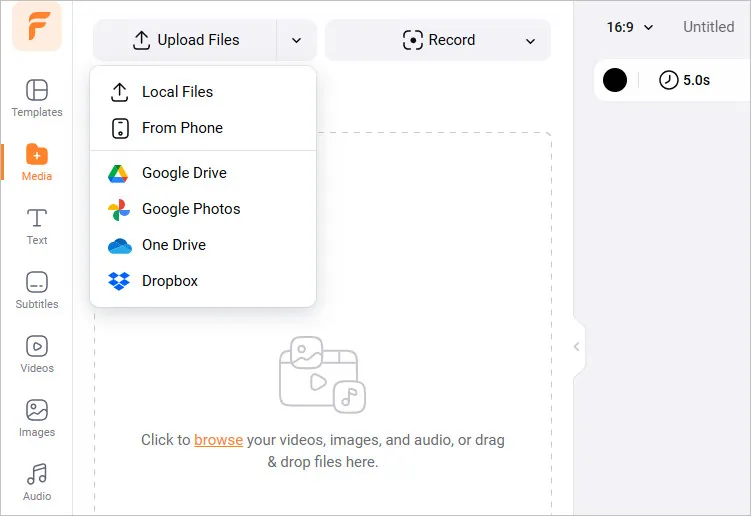
Add Arrow to Video with FlexClip - Upload Media Resources
Step 2. Find Your Desired Arrow Resource in FlexClip
Now, pick the desired arrow shapes in the Elements section of FlexClip. Simply go to the sidebar and switch to the Elements option, then choose from different shapes, arrows, emojis, bubbles, and more beautiful icons. Or you can directly search for the arrow shape with any related keyword.
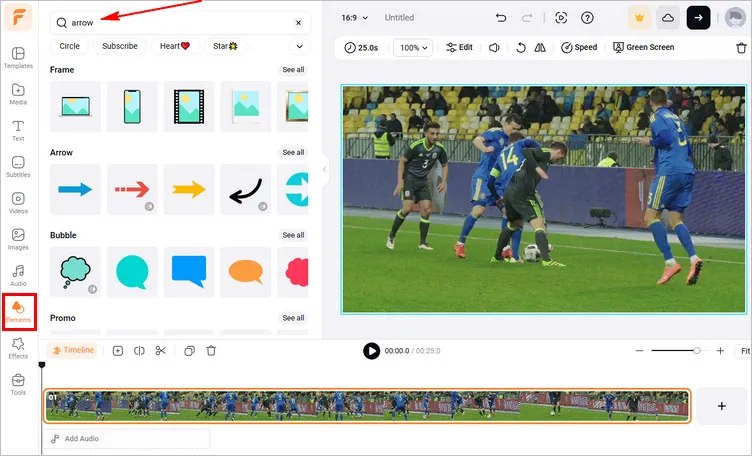
Add Arrow to Video with FlexClip - Find the Arrow Animation
Step 3. Add the Arrow to Your Video
Once you picked the desired arrow shape or animation, simply click it to add to the canvas, then you can customize it on the position, size, color, etc. Never forget to adjust the duration of the arrow animation to make it the same length of your video clip. (FlexClip offers you both animated shapes and still ones, if you choose a still one, FlexClip also allows you to add motion to it to make more attractive moving shapes).
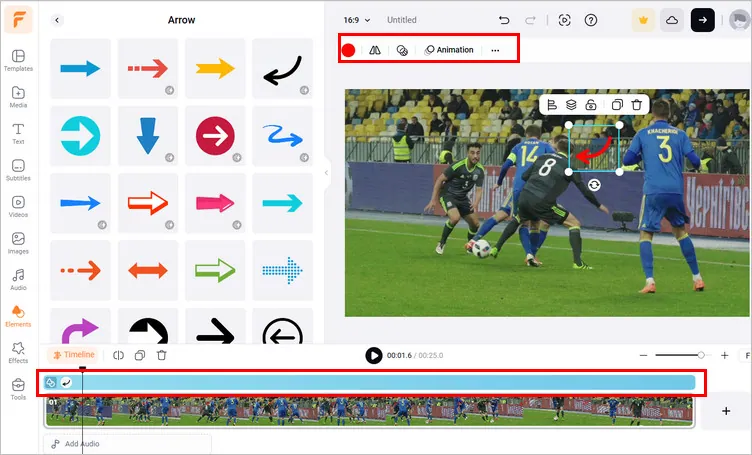
Add Arrow to Video with FlexClip - Add & Edit Arrow
Step 4. Stick the Arrow to Any Moving Object
When you get your arrow ready in the video, you can use FlexClip's motion tracking feature to make the arrow animation track any moving object in your video. Just select the arrow on the canvas and choose motion tracking feature in the top toolbox, then move the selection box to the object you want to track and click the Start Tracking button to let the system work for you.
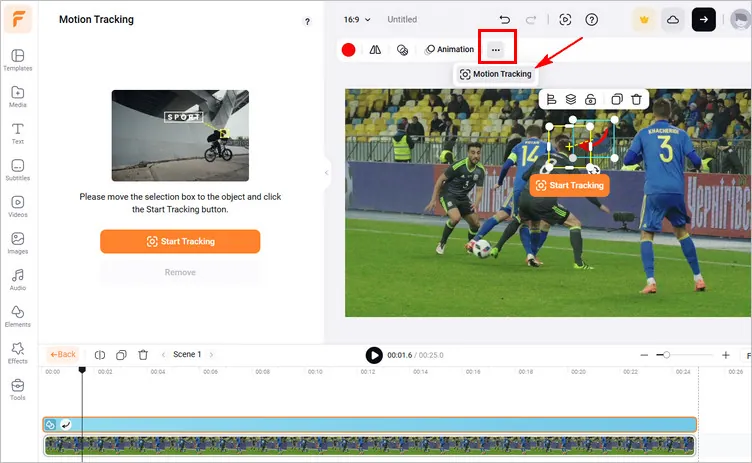
Add Arrow to Video with FlexClip - Motion Track
After the motion tracking is precessed, you can preview the video. If you are satisfied with the result, just click Export button to save your video with arrow animation. And you can also copy link to send the video to your friends or share it to social platforms directly, such as YouTube, Tik Tok and more.
Final Words
It takes a huge amount of effort and expertise to add a simple arrow to a video on iMovie. Therefore many content creators and photographers prefer FlexClip because of its easy-to-use and user-friendly procedures. Try it out yourself and get ready to be amazed by astonishing results.


