Briefs: You are on this page, because you need to record steps. Whether you are a helpdesk member or have PC problems for help, you can follow us to record a steps video for free online.
When clients have technical issues using an app/platform, they usually ask for help by emailing/skype/making a phone call to technical support team/helpdesk. However, hundreds of words or tens of conversations may not result in happy results when there is any misunderstanding.
To avoid misunderstandings and bad user experiences, you can record steps video, explaining how the issue happens and how to fix the issue. Watching these kinds of videos, a helpdesk member can quickly reproduce clients' issues, and the same, clients can immediately find out where goes wrong and follow the steps to make it right.
Part 1 - Free Easy Steps Recorder Online
There are not many steps recorders out there, Windows step recorder is perhaps a brand name you see a lot in search engine results. It captures screenshots on each click for Windows users, but there is no recording video. While, visual illustrations with good UX are the most straightforward explanations to humans. So today, we'll introduce a simpler steps recorder - FlexClip screen recorder online for all computer users (not limited to Windows).
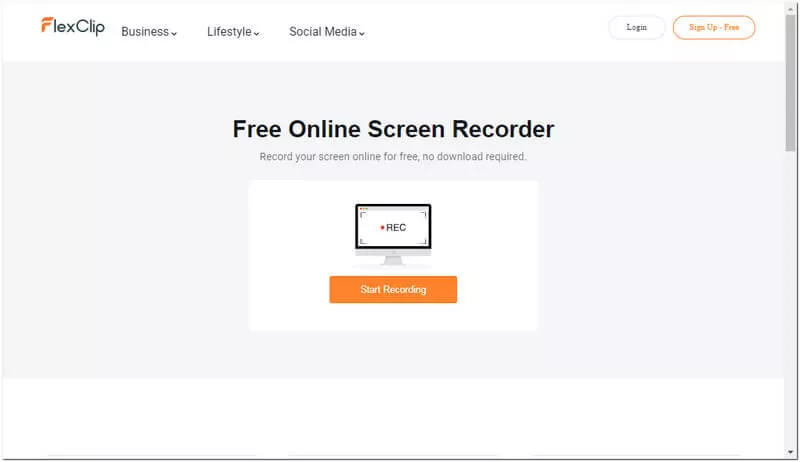
Image: Free steps video recorder online - FlexClip.
FlexClip screen recorder is a comprehensive steps recorder online with versatile functions. It's designed for all-level users. Even a PC newbie can grab it to record steps for free without troubles. FlexClip screen recorder is a lag-free screen recorder. It comes with a set of powerful screencast components that enable you to record steps video in HD.
Part 2 - How to Record Steps for Free, via Online Step Recorder?
Step 1.Prepare for recording steps.
To troubleshoot any clients' issues, a helpdesk member needs to reproduce the exact technical issue and find a solution. Launch the app/Windows to record.
Step 2.Run online free step recorder.
Go to FlexClip screen recorder webpage, and open the online app by hitting [Start Recording].
Step 3.Choose audio for steps recording.
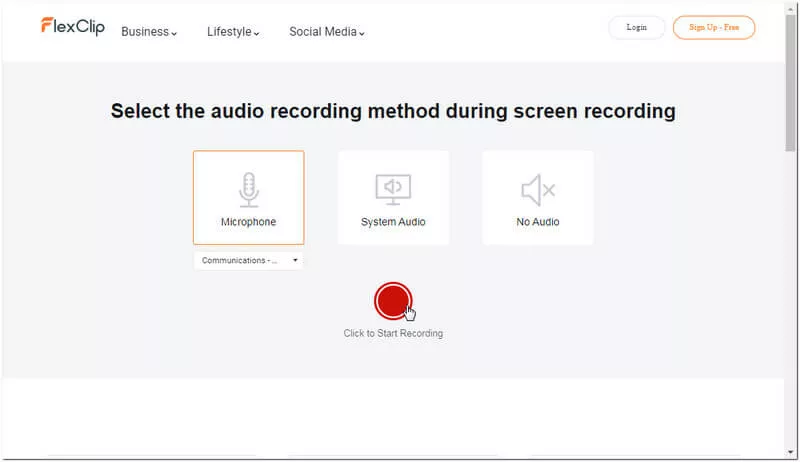
Image: Choose audio for step recording.
You have 3 options - [Microphone], [System Audio] and [No Audio]:
- [Microphone] - Record steps video in your narratives/explanations without worrying about audio quality. If you are recording steps to solve an issue of a client, this way will be effective. (FYI, Microphone voice recording will catch noise, even if you use Hi-fi microphone.)
- [System Audio] - This option will record the sound of mouse clicks, player's audio, and rest audios playing in the background.
- [No Audio] - If you go this choice, you'll need to add script texts to your recording video in a video editor.
Step 4.Select a screen to record steps.
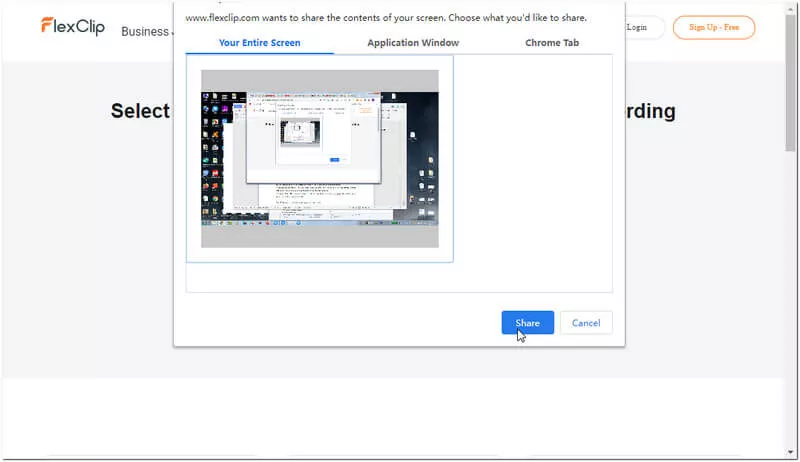
Image: Choose which screen to record steps.
A click on [Click to Start Recording] will launch a new Windows, asking you to click an active screen to record your steps video. Press the blue [Share] button, and steps recording will begin.
- [Your Entire Screen] - If your troubleshooting tutorial covers system operations, or if your steps screencast jumps between different Windows, then you need to go this option. Check the ultimate guide to making a tutorial video.
- [Application Window] - If your guide video records how to work in an application without difficulties, then [Application Windows] will be the best option.
- [Chrome Tab] - This selection allows you to record steps on a single webpage. This option won't record navigation on another tab.
Step 5.Preview, download, or edit your steps recording.
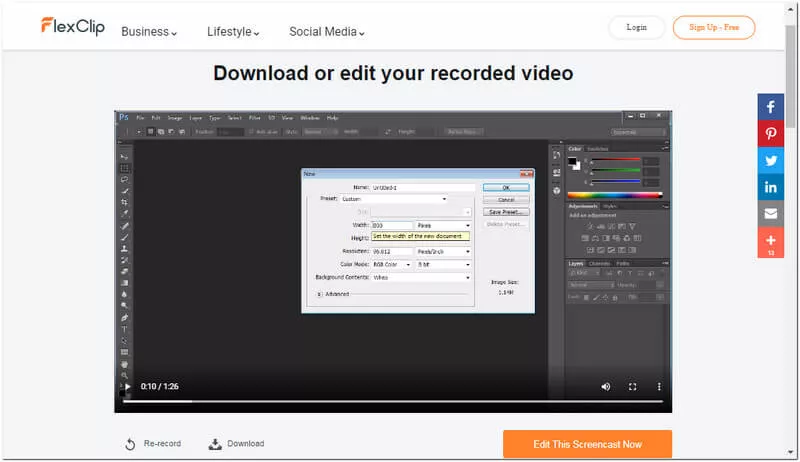
Image: Preview steps recording video.
After you stop steps recording, it automatically takes you to the preview and download page. If you are not satisfied with the step recording, you can immediately re-record it.
[Edit This Screencast Now] is a plus function. Clicking it, you will enter an advanced video editor. With only a few minutes, you can almost render any steps recording video as you wish.
Part 3 - How to Make Your Step-Recording Video More Professional?
With FlexClip, it's way easy to edit your step-recording video and make it professional. To edit your step-recording video, you can either click [Edit This Screencast Now] directly, or go to FlexClip homepage and press [Make a Free Video] > [Start From Scratch].
A professional step-recording video usually has an intro, an outro, and necessary help texts. And you can create them swiftly via FlexClip:
Step 1.Add intro for steps recording video. Follow [+Storyboard] > [Add Stock Media], search “intro”. Select a proper intro for your steps video, and move intro storyboard to the first place. Also, we suggest you insert some video texts like “How to....”, ”Guide of...”, or ”Full Steps about...” Check how to add an intro to YouTube videos.
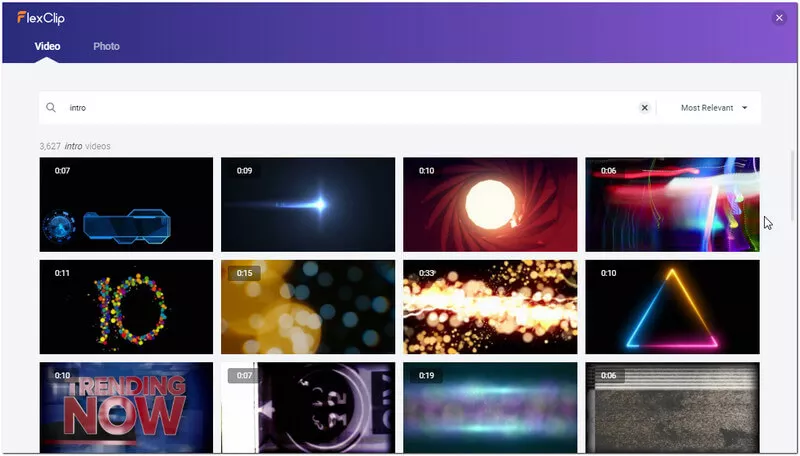
Image: Search and find intro ideas for your step video.
Step 2.Insert an outro after your steps recording video. Just go [+Storyboard] > [Add Stock Media], search “Thank you”, then you'll find a number of close-up ideas to use.
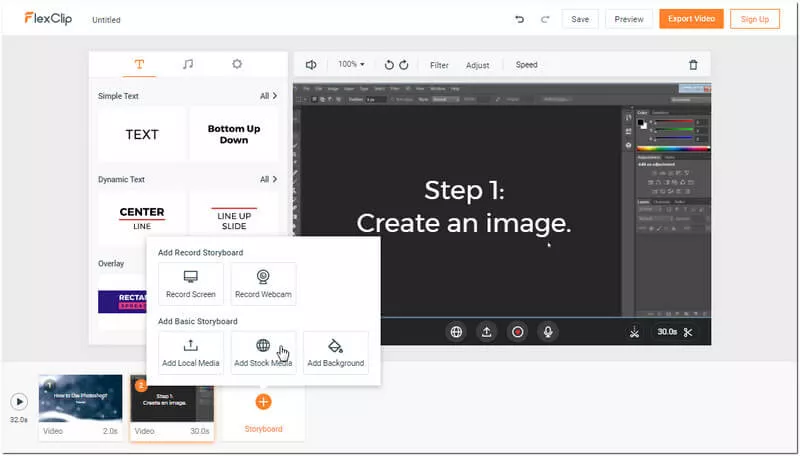
Image: Add thank-you outro to your steps video.
Step 3.Add necessary lines to explain your steps video. You can split your steps recording video to several clips/storyboards, and add different step description to each step clip.
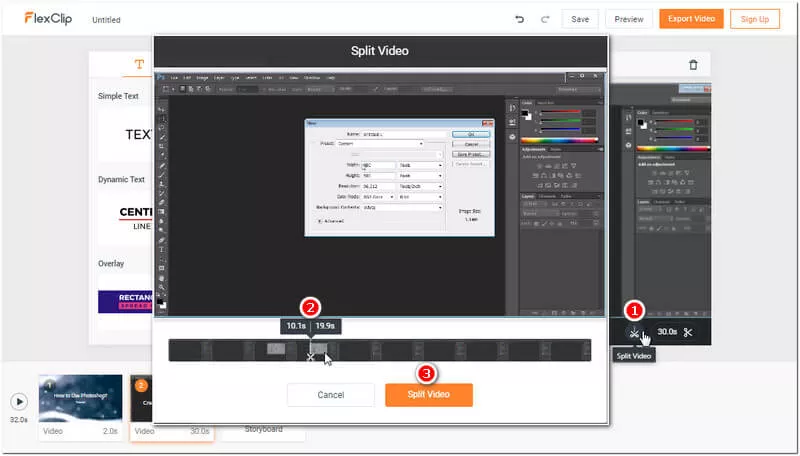
Image: Split your steps video.
Step 4.Utilize background music. Beautiful background music will upgrade audience experience. Just find the music icon in FlexClip, a click of [+Add Music] will allow you to access millions of royalty-free music, or upload your own music.
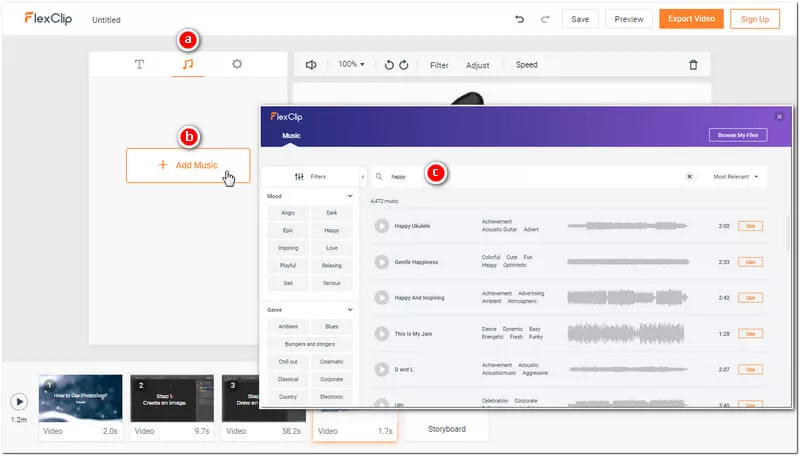
Image: Search background music.
Step 5.Preview and download your edits for the steps record video.
Part 4 - Last Words
Have you recorded your step guide video just now? Hope you find FlexClip screen recorder easy to record steps online.


