Photoshop opens up endless creative possibilities, and one of its most exciting features is the ability to swap faces—a popular technique for adding a unique touch to your graphic editing projects. Whether you're pulling off a fun visual prank, fixing a picture with someone blinking, or adding a playful twist for creative effect, face swapping in Photoshop is a valuable skill.
Curious about how to swap faces between two photos in Photoshop? This guide will walk you through the step-by-step process and introduce an online face swap tool to help you achieve similar results effortlessly.
How to Swap Faces in Photoshop?
Before diving into the face swap process, it's important to consider the quality of the photos you select, as this greatly affects the final result. To ensure a high-quality face swap, keep the following factors in mind when choosing images:
Now that you have the perfect face pictures, let’s move to the key point now.
Step 1: Open Your Image Files in Photoshop
Start by opening two images in Photoshop: the one you want to take face from and the one you want to put head on.
Step 2: Select the Face You Want to Insert
Select the Lasso Tool on the left panel or use any other selection tool you like. Then use lasso to carefully outline the face you want to swap out from the source image. Make an accurate selection for all crucial facial expressions.
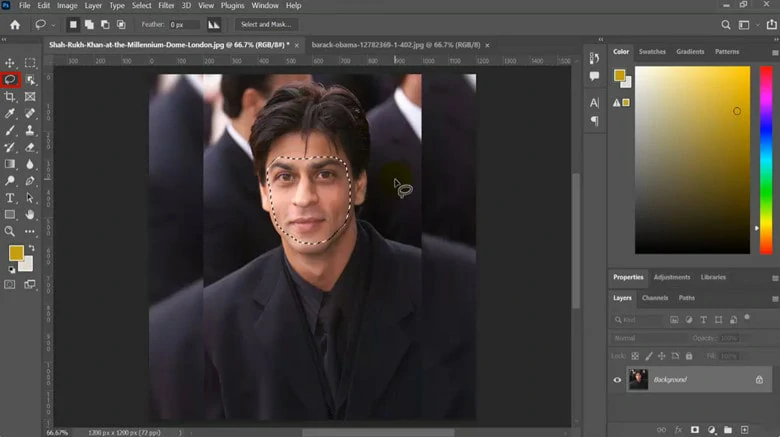
Select the Face You Want to Inser
Step 3: Copy and Paste the Selected Face
Copy the selected face and paste it onto the layer with target image. Then use Transform Tool to resize, rotate and position the pasted face so that it aligns correctly with the original face in the target image. To better align with the background picture, reduce the opacity of the inserted face by 50 percent, then carefully adjust its size to match the proportions of the original face as closely as possible. This will help ensure a realistic and anatomically correct result.
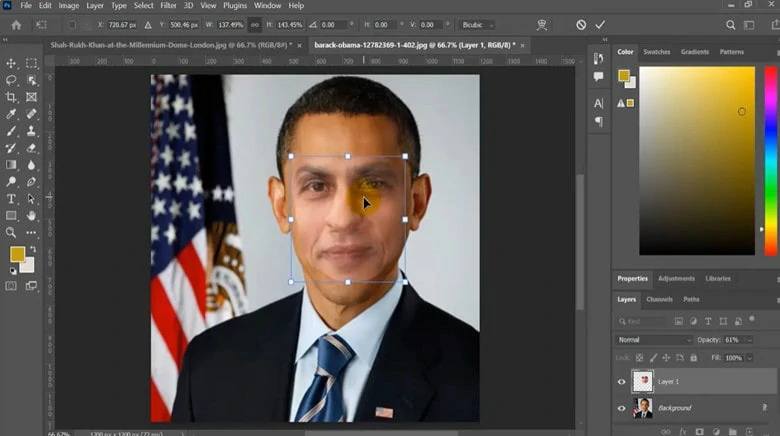
Copy and Paste the Selected Face
Step 4: Match the Color of Face and Body
To improve realism, create a slight overlap of the new face with the body. You can do this by selecting the new face and clicking Select > Modify > Contract and set the contrast value as needed.
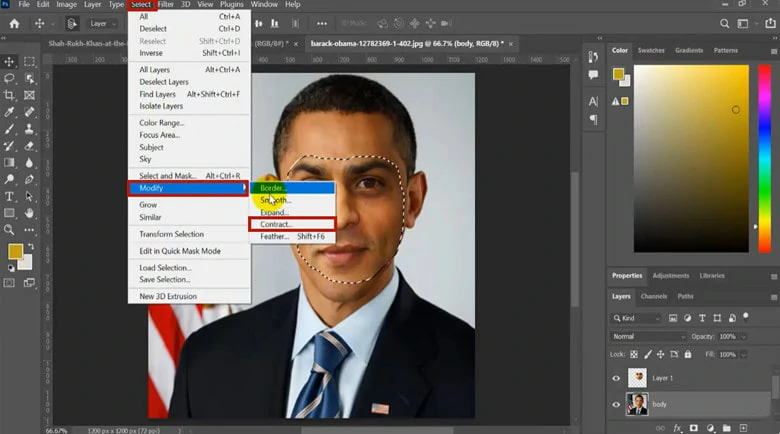
Match the Color of Face and Body
Step 5: Blend the Faces Together
Adjust the Layer opacity value to blend faces until they look like belong to the same person.
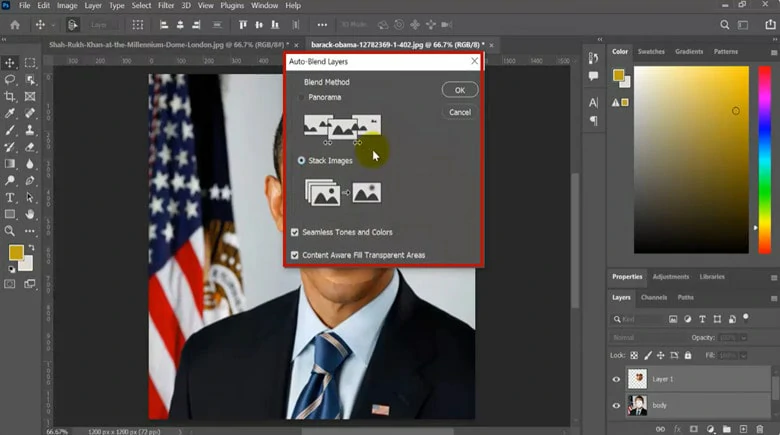
Blend the Faces Together in Photoshop
Step 6: Fine-tune the Face-swapped Picture
Use Brightness/Contrast or Hue/Saturation to fine-tune details such as facial expressions, skin textural and color harmony to make the face-blended picture look natural and realistic.
Step 7: Save the Final Result
Once you’re happy with the result, save your edited image in the desired file format.
Now you’re done with all the operations for face swapping in Photoshop. For those who unfamiliar with Photoshop, face swapping in Photoshop is still overwhelming to learn. To address this problem, we introduce an easier way to put face on another body without Photoshop.
An Easy Way to Swap Face Without Photoshop
Opt for a tool that complete face swapping in just a single click? Just try FlexClip AI Face Swap, which is a web-based tool to replace photo with another face using AI. No manual editing required—simply upload your images, and the AI will automatically handle the rest, matching details while preserving the original quality. With its intuitive interface, impressive result are within your reach in seconds.
The Best AI Face Swapper Online - FlexClip
Features:
How to Use FlexClip’s AI Face Swapper to Change Face Online
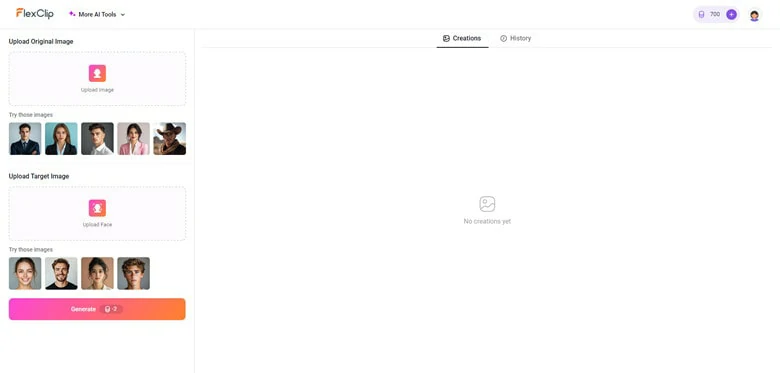
Open Your Browser and Navigate to FlexClip's AI Face Swap Tool
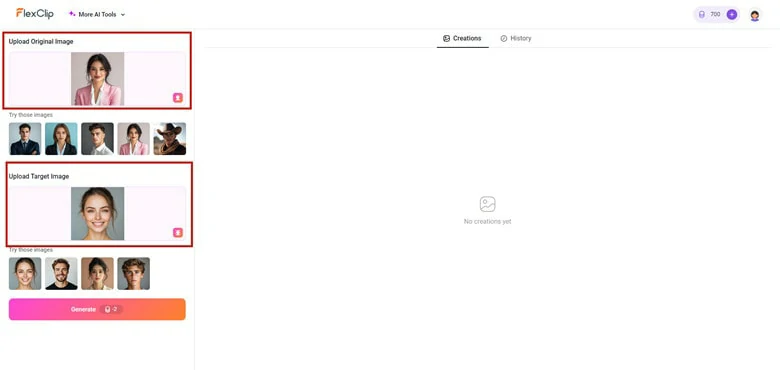
Upload Your Images for Face Swapping to FlexClip
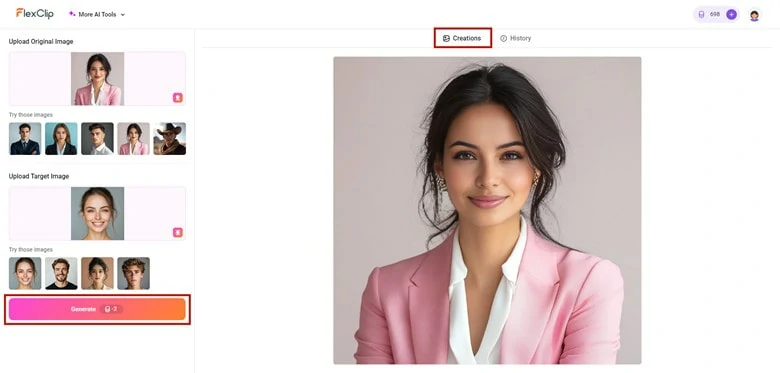
Initiate the Face Swapping Process in FlexClip
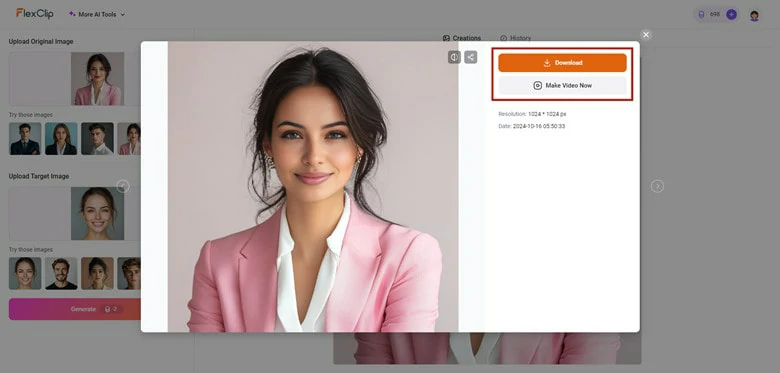
Initiate the Face Swapping Process in FlexClip
The Bottom Line
In this article, we’ve discussed step-by-step guide on how to swap face in Photoshop and also introduced an easier way for beginners to complete face-changing task using AI face swapper. Which method is your preference? Pick your favorite one and embark your creation journey right now!


FlexClip Video Maker
The easiest way to help you create custom videos, no design skills needed.
Start Now for Free
Hot & Trending
-
Ultimate Tik Tok Guide – How to Tik Tok & How to Make a Tik Tok Video that Gets Likes
-

Instagram Story Video Quality Bad After Upload? Fix It!
-

7 Best Ways to Find Music in YouTube Videos
-

How to Repost Video on TikTok & How to Remove TikTok Repost
-

Improve Video Quality Online: 3 AI Video Quality Enhancers You Can't Miss
-

4K Convert to HD 1080p without Watermark: Best 4k Video Converters
-
How to Change Face in Video on Phone/Desktop/Online
-

Top 13 Birthday Video Makers with Music and Effects Free