How do you merge two pictures together in Photoshop?
How to merge image with background in Photoshop?
Blending images in Photoshop is a great way to combine different elements and achieve a unique effect. Whether mixing canvas colors, figures, or scenery, you can transform your photos into stunning visuals. Curious about how to blend two images in Photoshop? In this blog, we'll explore three simple methods to blend images and elevate your creations. Let’s dive in!
How to Blend Two Images Together in Photoshop
Photoshop offers several methods to achieve blending effects, and here are three simple techniques to consider: adjusting layer opacity, using blend modes, and applying a layer mask. Each of these solutions will be introduced one by one.
1)Blend Two Images Together in Photoshop Using Layer Opacity
The most straightforward approach of merging two images together is adjusting layer opacity. By decreasing the opacity value, the top picture will seamlessly become transparent and make the background to be seen, which leads to an amazing blending result. Below is how to do it.
Step 1
Open Photoshop and import the images you want to blend. Then drag one image onto the canvas of the other to create layers.
Step 2
Here you’ll only see the top image, as the background is currently hidden.
Step 3
Select the top layer and locate the Opacity option to adjust the transparency. Lower the opacity value to let the background show through, creating a smooth blend.
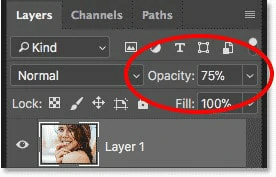
Blend Two Images Together by Changing Opacity Value
Step 4
Preview the blended images and save the result to your local file.
2)Merge Two Pictures in Photoshop Using Blend Mode
The second method for merging two images in Photoshop is by using the Layer Blend Mode, which allows layers to interact in creative ways to achieve unique effects. This technique is particularly useful for blending textures with photos, but it works just as well for merging any two images. Follow the steps below to get started.
Step 1
Open Photoshop and load the images you want to merge. Each image will appear on its own separate layer.
Step 2
Navigate to the Layers panel and enable the Blend Mode. By default, this is set to "Normal." Open the drop-down menu to explore various blend modes like Multiply, Screen, Overlay, and more.
Step 3
Choose your preferred blend mode. For a more natural result, you can fine-tune the opacity of each layer to ensure the images blend seamlessly.
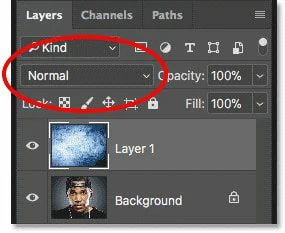
Blend Two Images Together by Changing Blend Mode
Step 4
Once you're happy with the result, save the merged image to your device.
3)Blend Two Pictures Together in Photoshop Using Layer Mask
The final recommended method for blending two images in Photoshop is by using a layer mask. Unlike the Opacity and Blend Mode options, which affect the entire image, layer masks give you precise control over where the two photos blend together. Follow the step-by-step tutorial below to learn how to use this technique.
Step 1
Open your desired images in Photoshop; they will appear on separate layers. If the image you want to blend isn’t on top, rearrange the layers accordingly.
Step 2
To add a layer mask, ensure the top layer is selected, then click on the “Add Layer Mask” option at the bottom of the Layers panel. A new thumbnail will appear next to the selected layer.
Step 3
Next, select the Gradient Tool and create a black-and-white gradient on the layer mask. Applying this gradient will create a transition area where the images blend seamlessly. The black portion of the gradient hides the top layer, while the white portion reveals it, with the gray area providing a smooth transition.
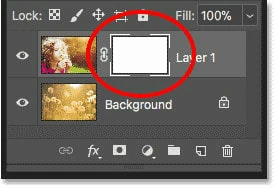
Blend Two Images Together by Using a Layer Mask
Step 4
Release the mouse button to apply the gradient and blend your images. If the result isn’t quite right, simply reapply the gradient until you achieve your desired effect.
While Photoshop is a powerful tool for blending images, its interface can be overwhelming, even for tech-savvy users, and the installation package is quite large. So is there a versatile alternative that caters to both newbies and professionals seeking easy image blending? Follow our guide to discover the best Photoshop alternative for a smoother editing experience.
Bonus Tips: Photoshop Alternative to Blend Two Images Together Online
FlexClip marks a new era in photo editing, especially with its AI-driven tools. With FlexClip, you can blend two images like you would in Photoshop while leveraging AI technology to add a creative touch to your photos. Here’s what FlexClip offers:
Seamless Image Blending: Easily blend images using layer opacity, blend modes, and creative masks.
Personal Touches: Add text, filters, outlines, speech bubbles, shapes, overlays, stickers, and blurring effects to your photos.
Dynamic Animations: Bring your static images to life with animations, music, and fun GIF stickers.
Creative Projects: Turn your images into stunning slideshows, family collages, group portraits, or time-lapse videos using over 6,000 designer-made
templates and royalty-free images.
Quick Guide to Blending Images in FlexClip
1)Combine two images into one using Layer Opacity
Step 1
Visit FlexClip website and upload your images.
Step 2
Add the one you want to use as background to timeline and then click on Add As Layer to layer the second picture. Resize the border to cover the background picture.
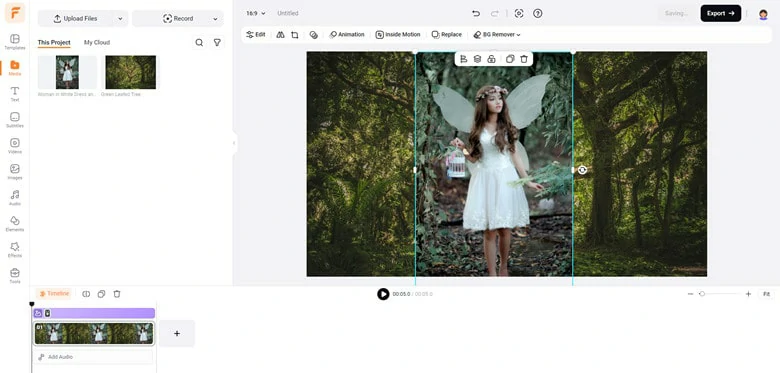
Add Image As Layer to te Background
Step 3
Enable the Opacity option located on the top toolbar and move the opacity slider to adjust the value and make the layer transparent enough to blend with the background picture.
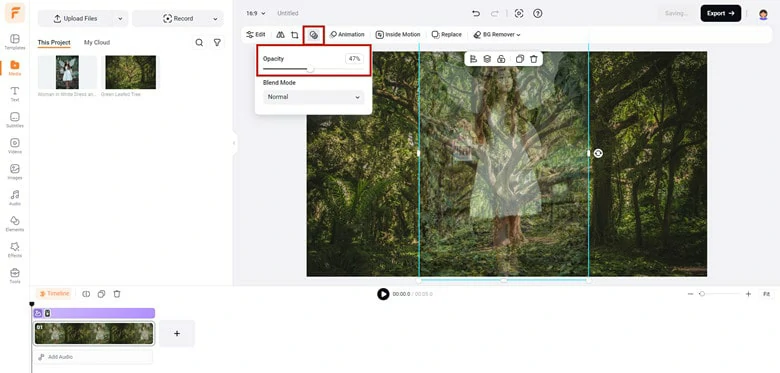
Change the Image Opacity to Make Them Blend
Step 4
When you’re happy with the result, right-click on timeline and select Export Frame option to download the blended image to local file.
2)Blend two images together using blend mode
Step 1
Access FlexClip’s editor page and under the Media panel, import images you want to blend from Google Drive, local file, mobile and more.
Step 2
Add the first photo you want to set as background to the timeline, then click on Add As Layer to place the second picture. Then you can resize the layer to make it in the same size of the background.
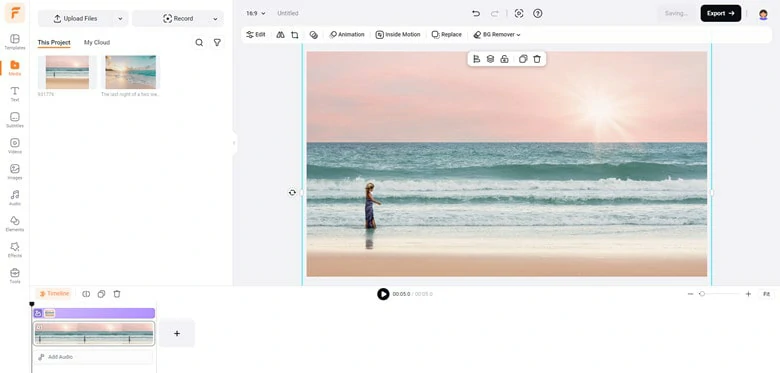
Add the Second Picture as Layer and Resize it
Step 3
Go ahead to Opacity and you’ll find the Blend Mode. By default, the blend mode is set to Normal. You can toggle the menu down to select from multiple options like Screen, Overlay, Darken, Color burn, Multiply, etc.
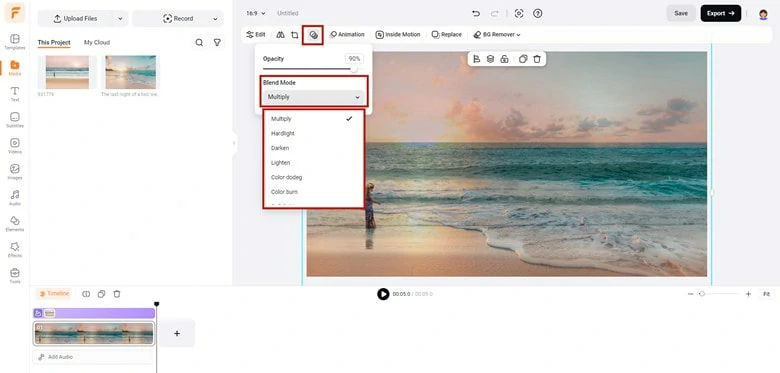
Set the Blend Mode as You Want
Step 4
If you want to pair the visual with strong effect, adjust the opacity value or apply a filter to make it as you need.
Step 5
Preview the blended image and save it to your local.
3)Merge two images in creativity using mask preset
Step 2
Drag and drop the background picture to the timeline. Then here are two ways to apply a mask preset. You can either use the PIP effect to layer the second picture and then use the crop feature for selecting a creative mask preset or navigate to Elements > Mask to directly choose the one you like and layer the picture above it.
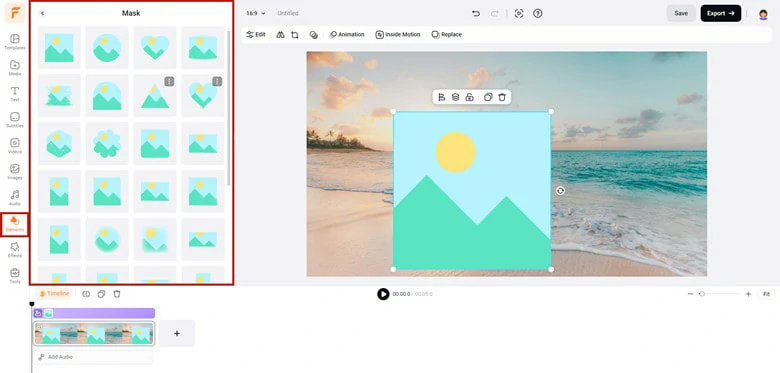
Blend the Image Using a Mask Preset in FlexClip
Step 3
After that, make sure the crucial part is displayed and resize the mask, change the opacity value or apply a filter to enhance the blend effect.
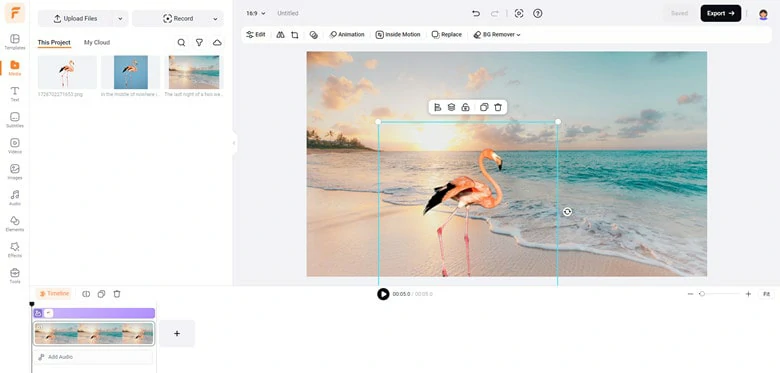
Change the Place and Use the BG Remover to Make it Blend Well If Necessary
Step 4
When you finish edits, right-click on timeline and choose Export Frame to save your output picture.
The Bottom Line
Blending images together is a common technique for creating amazing effect. In this article, we’ve discussed how to blend two images in Photoshop and also recommended a more versatile way to merge two or more pictures with great ease along with AI joy online. Now make you own decision and start your creation journey right now!
Bella
/

Full of vitality, curiosity and hope, Bella is an energetic copywriter at FlexClip. She mainly concentrates on video creation and troublesome issues related to video editing, providing users with practical solutions and tricks. Personally, Bella loves novels, sci-fi movies, cooking and travel. And, she believes that all her life is the best arrangement from God.


