How to Record Screen on Chromebook - 3 Easy Ways

Last Updated: 2024. 11. 25

Have you ever needed to record your Chromebook screen for a tutorial video, software demo, or something else, but didn't know where to start? Luckily, Chromebooks make screen recording easy and accessible for everyone as they offer built-in screen recording tools to do so.

Follow us and learn how to screen record on Chromebook with ease. Discover 3 different easy ways to capture, edit, and share your screen recordings on Chromebook effortlessly.

Awesome Videos Templates You Might Love:

Modern Minimalist How To Shop On Website Tutorial
Preview
Modern Minimalist How To Shop On Website Tutorial
Use This Template
Blue Digital Website New Features Announcement Tech Phone Computer Business Slideshow
Preview
Blue Digital Website New Features Announcement Tech Phone Computer Business Slideshow
Use This Template
Modern Gradient Fashion Mobile App Release Guide Video Tech Business Promotion
Preview
Modern Gradient Fashion Mobile App Release Guide Video Tech Business Promotion
Use This Template
Mobile Frame App Promo
Preview
Mobile Frame App Promo
Use This Template

Create Video Faster with FlexClip's Pre-Made Templates →

Start from Scratch Easily with FlexClip's Online Video Maker →

How to Screen Record on Chromebook Built-in Screen Recorder

So, how to screen record on your Chromebook? One way is to use keyboard shortcut to activate the native screen recorder for your Chromebook. You can record screen activity on a Chromebook quickly and easily with a few keyboard shortcuts. Check the detailed steps below:
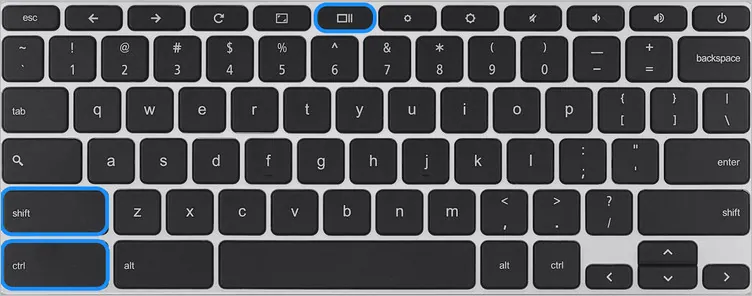
Step 1
Press Shift + Ctrl + Show windows (the key with a rectangle and two lines).
Screen Record on Chromebook Built-in Screen Recorder

Screen Record on Chromebook Built-in Screen Recorder

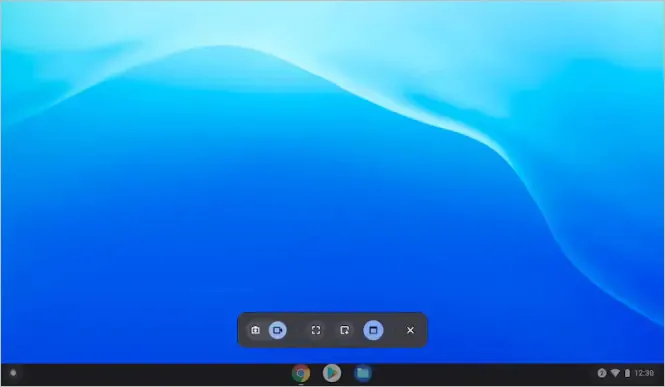
Step 2
Then a toolbar will appear at the bottom of your screen, click the "Screen Record" option(video camera icon).
Screen Record on Chromebook Built-in Screen Recorder - Screen Record Option

Screen Record on Chromebook Built-in Screen Recorder - Screen Record Option

Step 3
Choose how you want to record the screen on your Chromebook: Full Screen, Partial Screen, or Window.
Step 4
Once you make your selection, your recording will automatically begin. To stop recording, click the red record button.

How to Screen Record with Chromebook's Built-in Screen Recorder

For those who has Chrome OS 89 or newer, there is another built-in Chromebook screen recorder you can use to quickly capture video of your Chromebook screen directly.
Chromebook's Built-in Screen Recorder

Chromebook's Built-in Screen Recorder

Here's how to screen record on a Chromebook with audio using this feature.
Step 1
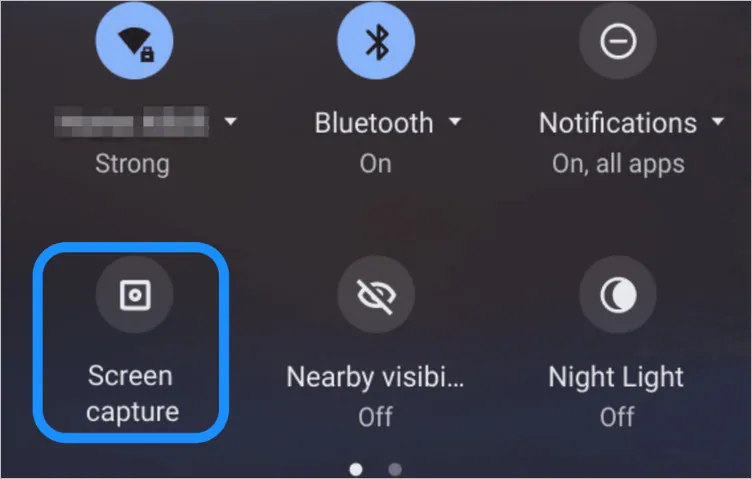
Click the clock icon at the lower-right corner of the Chromebook screen to open the Quick Settings panel.
Step 2
Then, select the Screen Capture button to open the Screen Capture toolbar.
Screen Record on Chromebook Built-in Screen Recorder - Screen Record Option

Screen Record on Chromebook Built-in Screen Recorder - Screen Record Option

Step 3
Once the Screen Capture toolbar appears, choose whether you want to record full screen, partial screen, or the entire window.
Step 4
Before start recording, click Settings (gear icon) and choose whether you want to record your microphone with the system audio.
Step 5
Once selected, click the Record button (video icon) to record your screen. When you’re finished, click the Stop button to stop the screen recording.

How to Screen Record on Chromebook Online with FlexClip

If you need a more powerful tool to screen record on your Chromebook on the go, try FlexClip's free online screen recorder. It is a powerful web-based screen recorder that allows users to capture and record their screens. Compatible with Chrome, Edge, Firefox, and Safari, it is particularly useful for Chromebook users who want to create videos, tutorials, or presentations.
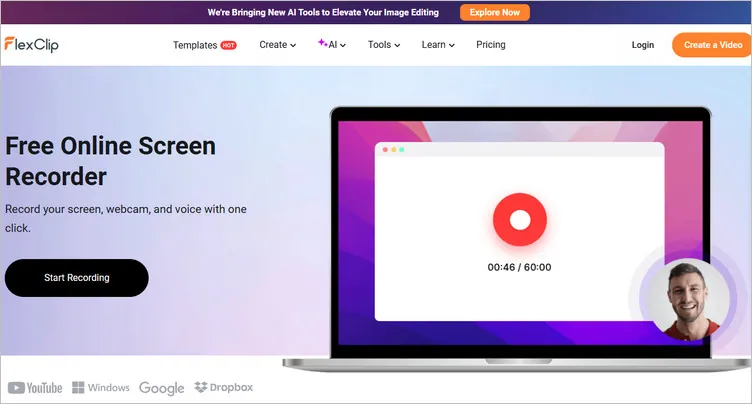
Online Screen Recorder for Chromebook - FlexClip

Online Screen Recorder for Chromebook - FlexClip

Record Now Edit Recorded Video

At its most basic, FlexClip's online screen recorder allows you to record your screen, webcam, and audio with one click on Chromebook, Windows, or Mac even offers a built-in video editor that helps you to edit and perfect your screen recording with powerful tools and stunning effects.

Create Stunning Videos with FlexClip AI Video Maker

Benefits of Using FlexClip to Screen Record on Chromebook:

  • Easy to use: FlexClip screen recorder is a user-friendly online tool that makes screen recording on Chromebook a breeze.
  • Multiple recording modes: You can choose record your screen and webcam simultaneously or separately as you want. It also offers the option to make a screen capture of the whole screen, application windows, or browser tab.
  • Screen recording with audio: You can choose whether to record screen with system audio and/or microphone sound.
  • Annotations and editing: This tool has a built-in video editor that allows you to annotate your recordings with text, arrows, and shapes, as well as trim and crop the video to remove unwanted parts.
  • AI tools to speed up video editing: AI you can even streamline your Chrome screen recording editing process with its advanced AI tools, such as auto generate subtitles, transcript, and translation for your recording!
  • Here's how to screen record on Chromebook with the help of FlexClip.
    Record Now
    Step 1
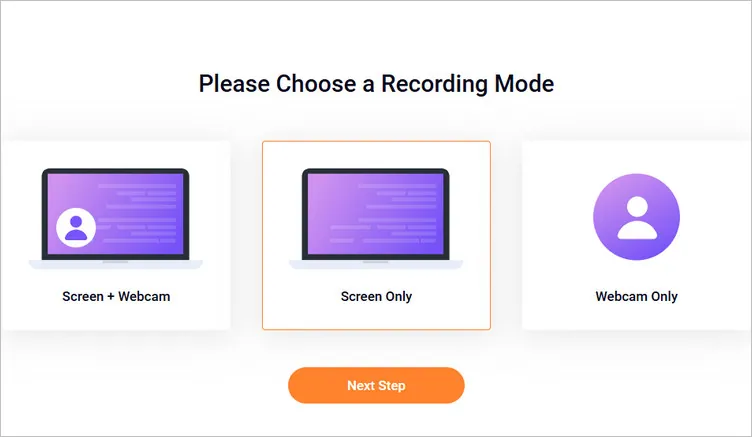
    Go to FlexClip screen recorder tool, then click the Start Recording button to select your preferred recording mode (Screen + Webcam, Screen Only, or Webcam Only).
    Screen Record on Chromebook with Audio Using FlexClip - Recording Mode
    Screen Record on Chromebook with Audio Using FlexClip - Recording Mode

    Step 2
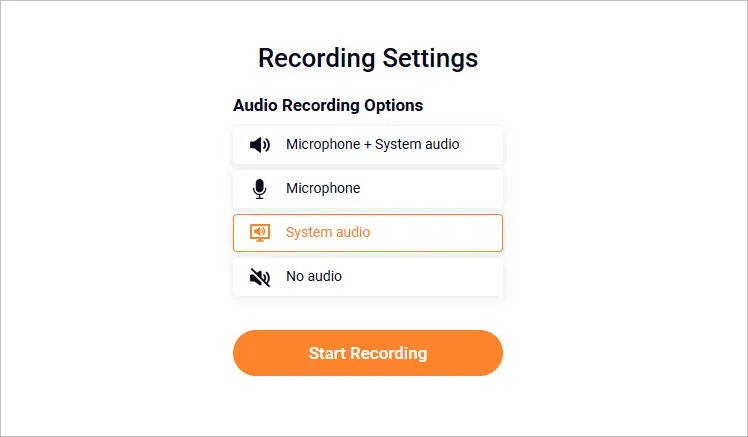
    Then, you can configure your audio settings: choose the Microphone + System Audio option to capture both the voices of other participants and your narration. Alternatively, you can select microphone or system audio separately.
    Screen Record on Chromebook with Audio Using FlexClip - Audio Setting
    Screen Record on Chromebook with Audio Using FlexClip - Audio Setting

    Step 3
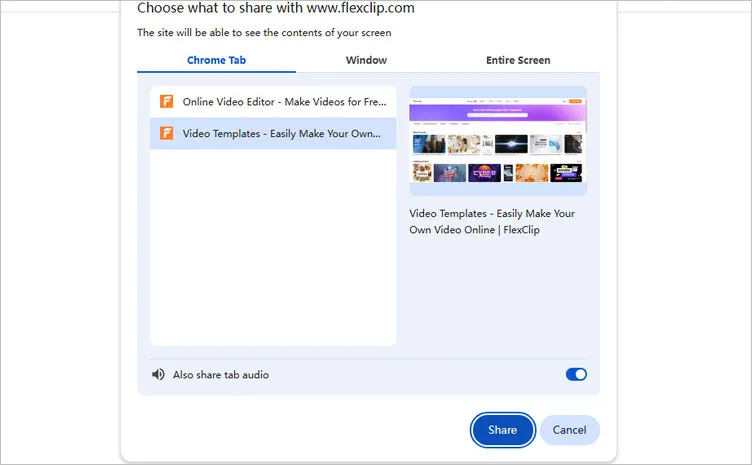
    Once ready, click Share. A new interface will pop up, prompting you to select then content for recording.
    Screen Record on Chromebook with Audio Using FlexClip - Select Record Content
    Screen Record on Chromebook with Audio Using FlexClip - Select Record Content

    Step 4
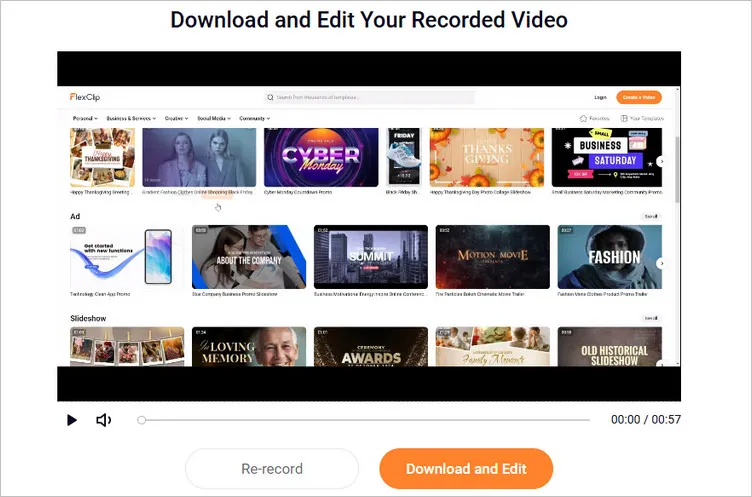
    To stop recording, click the Stop Sharing button in the upper-left corner. Afterward, you can either download the file to your computer or continue editing it with FlexClip's editing tools, such as adding auto subtitles, annotations, highlights, and overlays to level up your video content.
    Screen Record on Chromebook with Audio Using FlexClip - Download and Edit

    Screen Record on Chromebook with Audio Using FlexClip - Download and Edit

    Edit Recorded Video

    Final Words

    While Chromebook’s built-in screen recording tool offer basic screen recording capability, some easy online screen recorders like FlexClip that can offer more flexibility and functionality. Whether you need basic audio recording or advanced features like transcription and noise reduction, FlexClip is a powerful tool to capture high-quality video with audio on your Chromebook. Ready to get started? Give it a try!

    Group 11
    Make a free video online
    Create Your First Video With FlexClip Now
    Get Started - Free