Microsoft Teams, an efficient collaboration platform offers an array of tools and features to support your virtual workspace. One of the standout features of Microsoft Teams is the ability to record meetings for future reference or for those who couldn't attend.
However, the meeting recordings are always lengthy and contain unnecessary footage. So, how do you trim and edit Teams' recordings? This article will guide you on to proficiently trim and edit your Teams' recordings.
Can't-miss: How to Combine Zoom Recording >
Free Editable Templates for Your Inspiration:


Create Video Faster with FlexClip’s Pre-Made Templates →
Start from Scratch Easily with FlexClip’s Online Video Maker →
Part 1 Can You Trim and Edit Teams Recordings?
Yes, Teams itself offers trimming function to its users. However, if you want to add annotations, or improve its overall quality to edit it into a video that’s both informative and engaging, you may use some third-party tools like FlexClip. It can also be used to trim, combine, and edit a Zoom recording or trim third-party videos, like Google Drive video, and more.
Part 2 How Can FlexClip Help You Edit Your Teams Recordings
FlexClip, the feature-packed online video editor, empowers you to edit your Team's recordings with ease, providing an intuitive and user-friendly interface that doesn't require advanced technical skills. Let's check the key features to edit a recorded Teams recording using FlexClip:
Besides, you can add transitions to connect two clips smoothly if you want to combine recordings. Also, you can try to insert overlays and elements like arrows, emojis, or other stickers to enrich your recordings with FlexClip.
Part 3 How to Trim and Edit Recorded Teams Meeting
FlexClip offers various powerful editing features to help you edit your Teams recordings and create professional-looking videos. Let's check the simple steps below and experiment with different options to bring your team's recordings to life and make them more engaging in FlexClip.
Step 1 Download Teams Meeting Recording
Before you can edit your Teams meeting recording, you need to download it from Microsoft Teams. Simply open the Microsoft Teams, then goo to the Teams channel or meeting to find the recording download, and click on the recording file to open it in a web browser, now, just click the ‘Download’ button to download the recording.
Download Teams Meeting Recording
Step 2 Upload Teams Recording into FlexClip
After downloading the Teams meeting recording, go to the FlexClip editor, and switch to the Media section to add upload downloaded Teams meeting recording to FlexClip.
Or if you've saved your Teams recording file in some third-party platforms, like OneDrive, you can import the file from that platform directly.
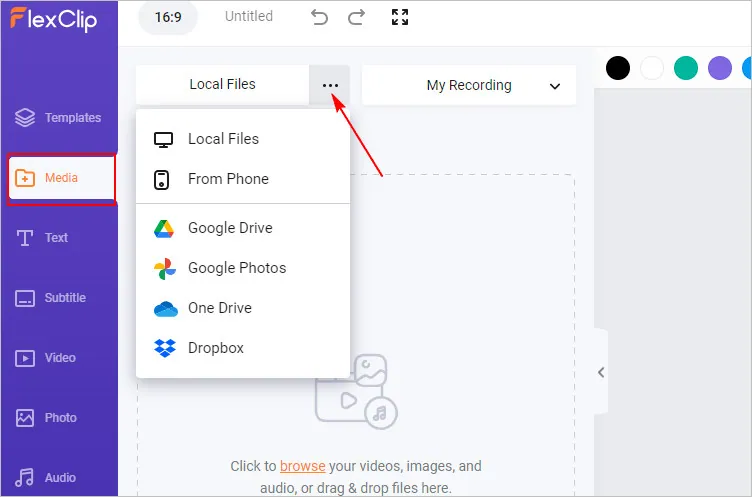
Edit Teams Recording - Trim & Split
Step 3 Edit the Teams Recordings
Now that your Teams meeting recording is uploaded to FlexClip, you can add it to the Timeline and begin editing it. Here are a few editing options you can try:
- Trim and Split: Use the trim feature to cut the beginning or end of the recording, you can also split the video into smaller clips for more precise editing, remove any unwanted parts from the recording.
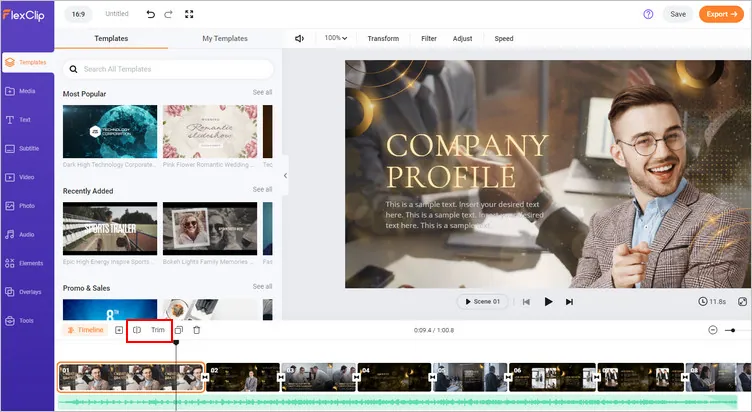
Edit Teams Recording - Trim & Split
- Add Text and Subtitles: FlexClip allows you to add text, title, annotation to your recording. You can choose from various fonts, sizes, and colors to make your text stand out. Besides, the auto subtitle feature is also ready to help you transcribe your recording into clear captions.
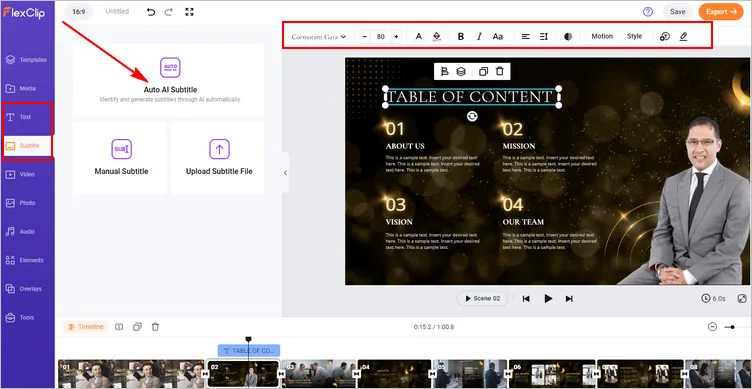
Edit Teams Recording - Text
- Add Music and Voiceover: You can also enhance your Teams meeting recording by overlaying background music or adding voiceovers to explain certain parts of the video. FlexClip provides a vast library of copyright-free music and enables you to import your own audio files. Or, you can try its AI text-to-speech tool to generate AI voice narration for your recording.
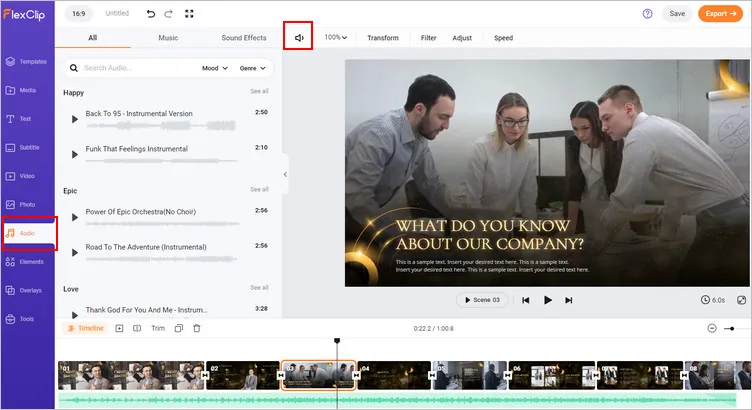
Edit Teams Recording - Audio
- Transition, Overlays, Elements, and More: To make your meeting recording more visually appealing, you can experiment with different transition effects, including fades, wipes, slides, and more. Additionally, you can add stunning overlays, funny elements, to personalize your video even more.
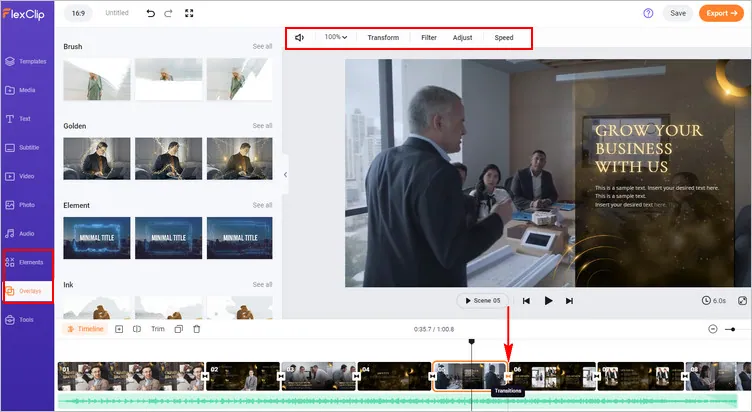
Edit Teams Recording - More Effects
Step 4 Download and Share Your Teams Recording
Once you have finished editing your Teams meeting recording, you can preview the whole video to ensure your changes look and sound as intended. Once you are satisfied, click on the "Export" button to save your edited recording. Here, you can also seamlessly share the edited Teams recording video via a link, or post to social media.
Final Words
That’s it! As you can see, editing your Teams meeting recording using FlexClip opens up a world of possibilities to enhance the quality and impact of your video. So, give it a try and leverage the power of FlexClip to take your Teams meeting recordings to the next level.


