Whether you are a seasoned graphic designer or just someone who is eager to level up photo editing skills, adding a photo to another photo is a key strategy to transform ordinary photos into extraordinary masterpieces, because multiple photos in one background always bring a better aesthetic experience.
Next up, buckle up as we embark on a journey to the detailed steps of putting a photo on top of another. Whether you are on computers or mobile devices, you can always find the best solutions.
Also Read: How to Add a Video On Top of Another >
Dynamic Your Photos With Following Free Templates





Part 1. How to Add a Photo to Another Photo Online
Before getting started, we need to find a nice photo editor to make overlaying a photo to another photo easier and faster - FlexClip. In just clicks, you can overlay as many photos as you want on another photo.
You also have access to numerous options to beautify your photos, for instance, adding filters, adjusting saturation, lighting, and removing background. Can’t wait to have a try? Click the Overlay Photos button below to get started.
Go to the Media section, click on the Local Folder to upload photos from your computer. Alternatively, you can also upload photos from phone, or cloud services like Google Drive, Google Photos, and One Drive..
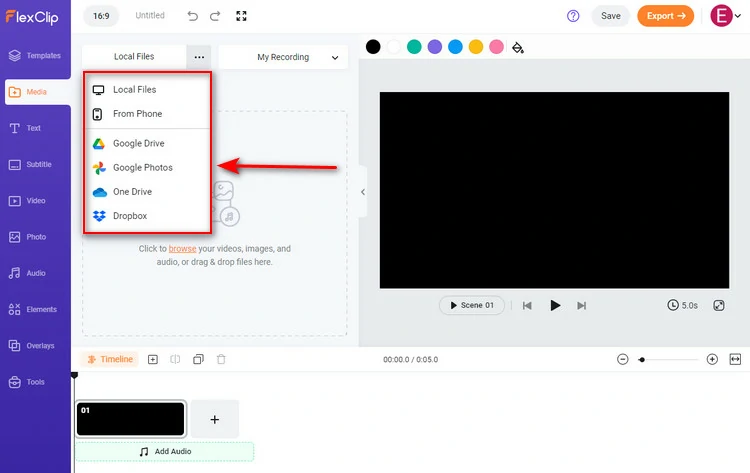
Upload Photos from Local Folder/Phone/Cloud Services to FlexClip
By default, FlexClip gives you a black background image. Click on a photo you want to use as a background, and select Add as Scene.
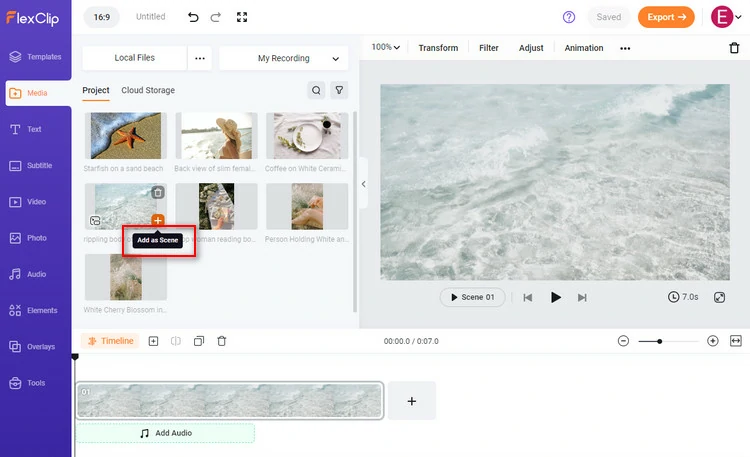
Set a Photo as Background
By the way, FlexClip has a stock library with lots of background photos. Switch to Photo section and explore more possibilities.
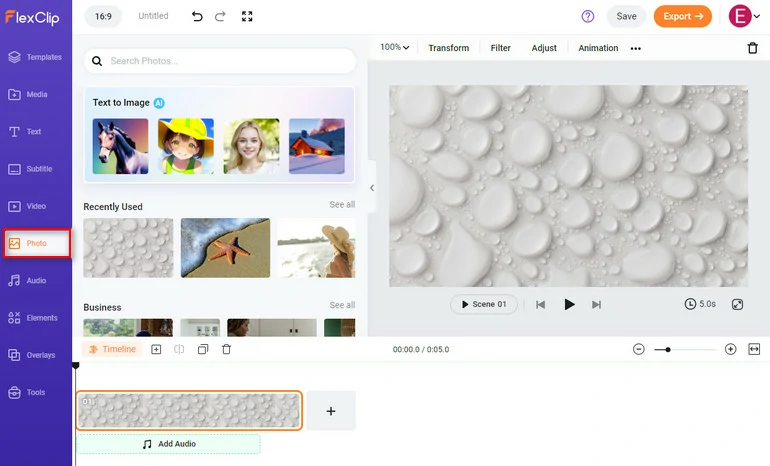
Use Photos in Media Library
Select one picture from the Media section and choose As as Layer. Your photos will be put into the background image. You can overlay as many photos as you want on the background image.
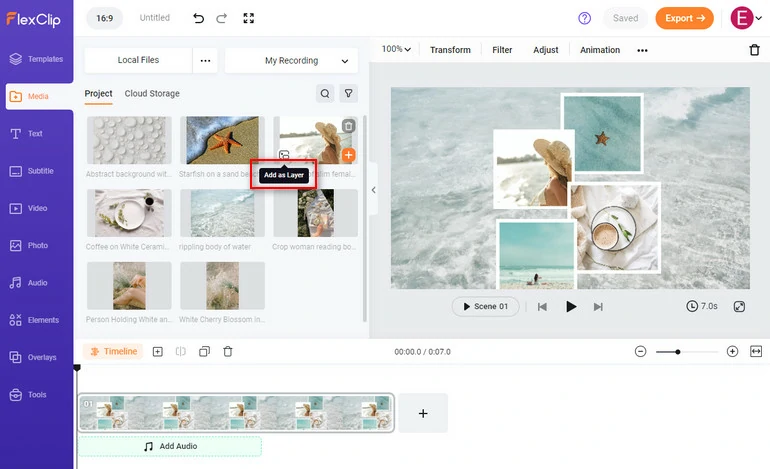
Use PIP to Overlay Photos
As we mentioned earlier, FlexClip has lots of tools to beautify your photos. Here’s what you can follow.
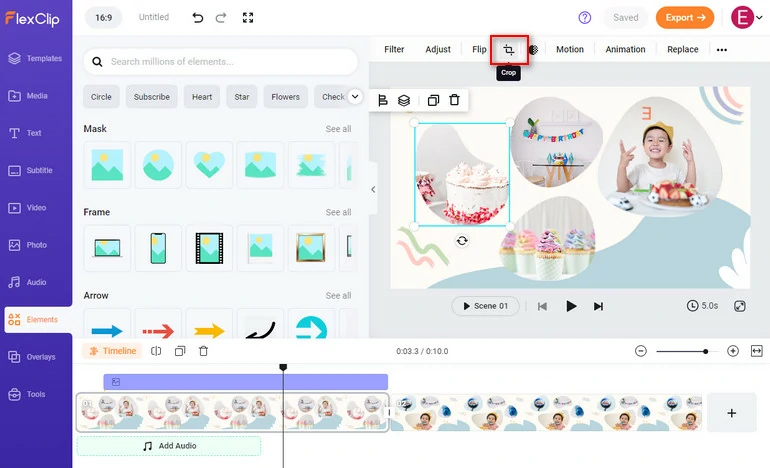
Crop Your Photo to Different Shapes
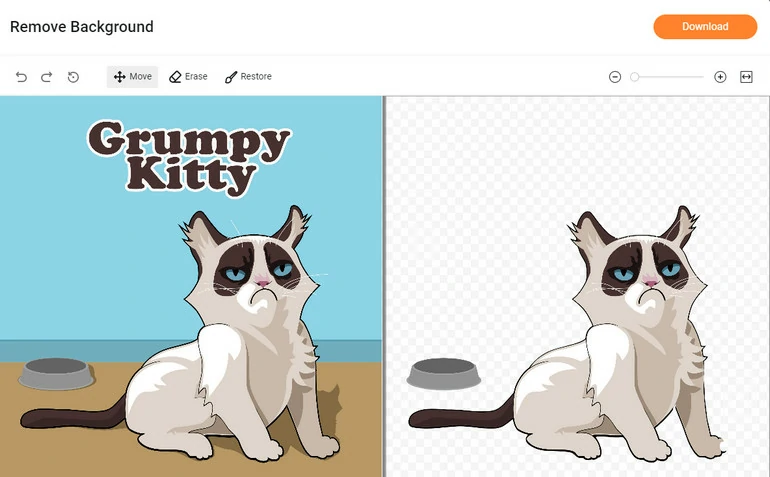
Remove Photo Background
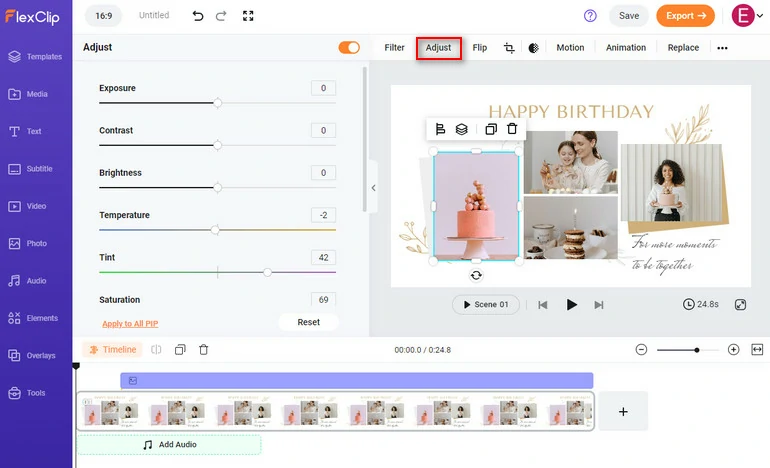
Make Adjustment on Photos
Right-click on the timeline, choose Export Frame. Your photo will be exported to computer instantly for free!
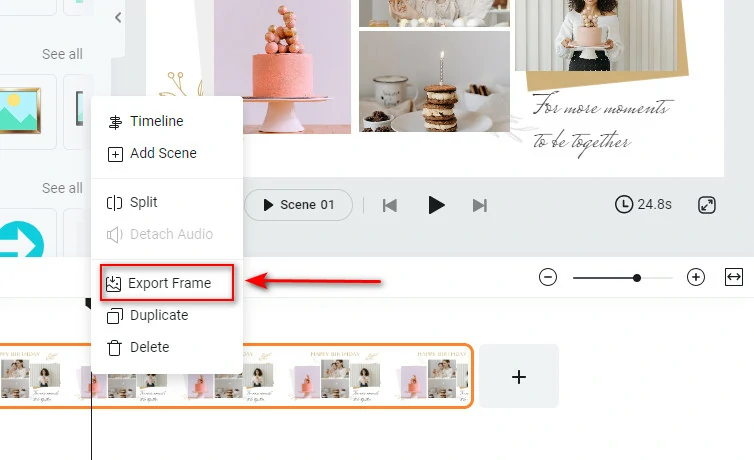
Export Your Photo
Part 2. How to Put a Photo on Top of Another Photo on Desktop
The best software to put a photo on top of another photo for a computer is definitely Adobe PhotoShop. Most people may think it is a professional photo editor, but don’t freak out, Adobe PhotoShop is not that hard to master.
Go to Adobe’s official website and download Adobe PhotoShop. It costs $22.99 per month, but this software comes with a 14-day free trial. By the way, make sure your computer has enough storage room and CPU. Otherwise Adobe PhotoShop can’t work properly.
When you are done with installing Adobe PhotoShop, open all your photos by dragging and dropping. Now, select the photo you want to use as an overlay, drag it to the background image. Hold Shift to make it bigger or smaller while retaining the aspect ratio.
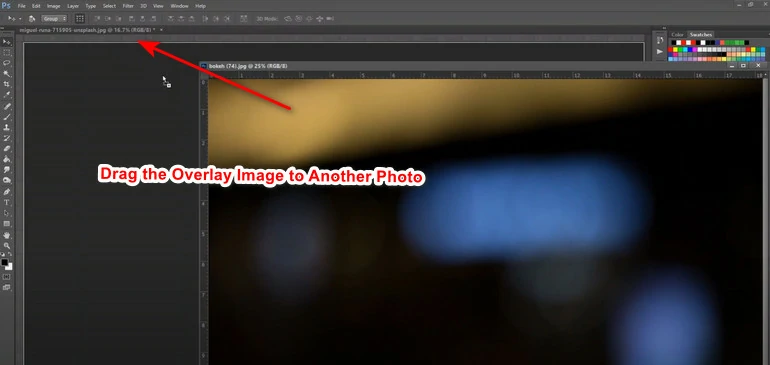
Drag the Background to Another Photo
Change the Opacity from 0%-100%, you can also change the blend mode from screen to Dissolve, Lighten, Darken, or others until the result is satisfying.
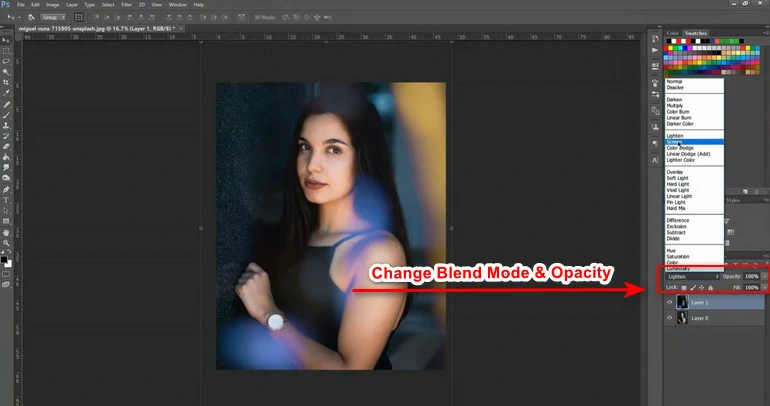
Change the Blend Mode and Opacity
Part 3. How to Overlay An Image to Another Photo on Mobile
Many great photo editing apps can help you overlay an image to another photo, and they are usually much easier to operate. You can directly head to PhotoDirector on both Android and iOS.
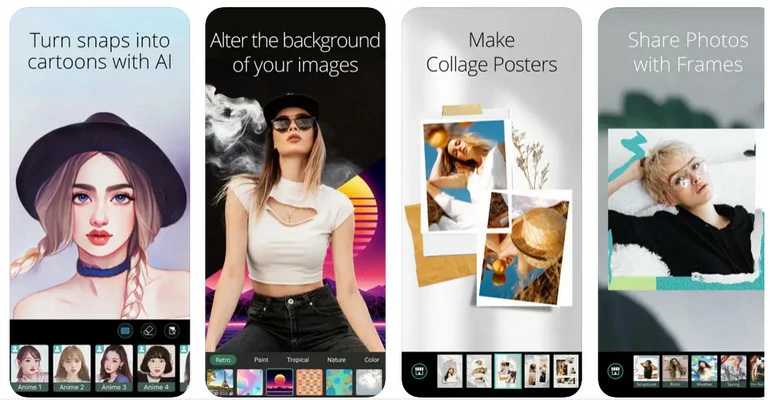
Photo Director App Screenshot
FAQs About Adding a Photo to Another Photo
To put two different photos together, upload your photos to FlexClip, click on the Add as Layer icon, and adjust their position.
Putting multiple pictures together is called Photo Montage. It means cutting, rearranging, and overlapping two or more photos into a completely new image.
To make a great photo montage, you have to make sure your photos are of the same style and evoke the right emotions.
You can also animate your photos by creating a slideshow, or adding the right audios.


