“iMovie keeps cropping every video into 16:9. I’m losing a portion of each video, many times cutting people's heads off. How do I stop this? I don't care if it is widescreen or not, I just want the full video not cropped. ”--a quote from an iMovie user.
Exactly! Well, using iMovie to edit 9:16 or portrait videos does drive you crazy since it will automatically crop parts of your videos and the same thing also happens as you edit vertical and 4:3 photos from your iPhone.
However, no worries! In this tutorial, we will walk you through why iMovie crops your videos and offer you 3 great solutions to easily fix it. So, you can keep the original size of videos and photos as you edit them with iMovie.
Here’s What You Will Learn:
Also, read how to automatically add subtitles to a video in iMovie.
Why Does iMovie Crop My Videos
Well, the very reason why iMovie crops my videos boils down to the discrepancy between the default iMovie aspect ratio and that of your imported videos or photos.
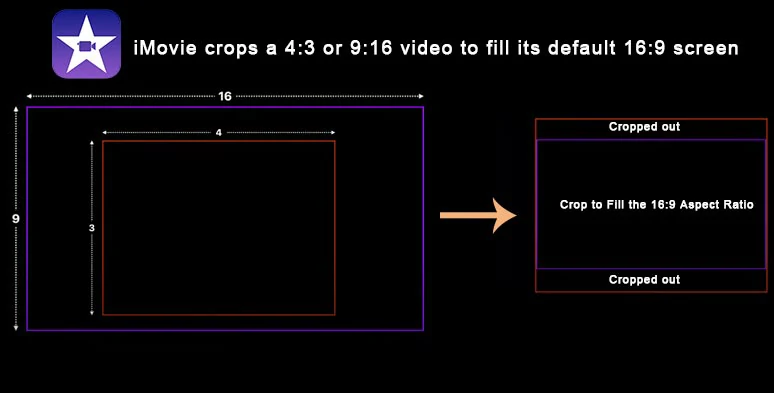
iMovie crops a 4:3 or 9:16 video to fill its default 16:9 video aspect ratio.
If you import a clip or a photo that doesn’t match the default screen ratio of 16:9 to iMovie, let’s say you add a 9:16 vertical video or a 4:3 clip to iMovie, then iMovie’s Crop to Fill feature will automatically crop parts of the video from both the top and bottom to make it into a 16:9 video. That’s why you end up with a cropped video or photo.
How to Stop iMovie from Cropping My Videos on Mac
If you are using iMovie to edit videos on a Mac computer/laptop, you have two solutions to stop iMovie from cropping your videos and photos.
Solution 1: Set the Cropping mode to Fit
Now, your video or photo shall be cropped to fill the 16:9 video aspect ratio. No worries! Let’s leave it as it is.
Click the Cropping tool > select Fit > then the video or photo shall be recovered to its original size. However, the downside is that iMovie will add two black bars on both sides of the video/photo to make it a 16:9 video.
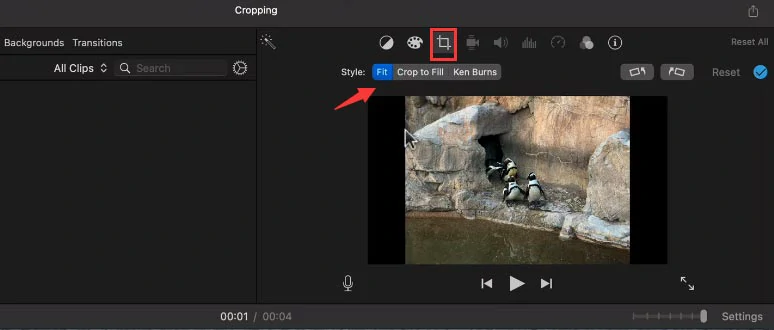
Select Fit to stop iMovie from cropping your videos.
Alternatively, you may also click File > Preference > Photo Placement > set it to Fit. By doing so, as you import a vertical video or photo to iMovie, it won’t crop your videos and photos. Instead, it will add two black bars to make it fit the 16:9 video aspect ratio.
Solution 2: Use the Picture-in-Picture overlay setting
Well, if you don’t wanna iMovie to crop your videos and don’t need the annoying black bars either, another great workaround is layering your video or photo over another video or photo background as a picture-in-picture. In fact, it’s a trick commonly used even in many TV news when 9:16 or 4:3 clips are shown in a 16:9 news broadcast.
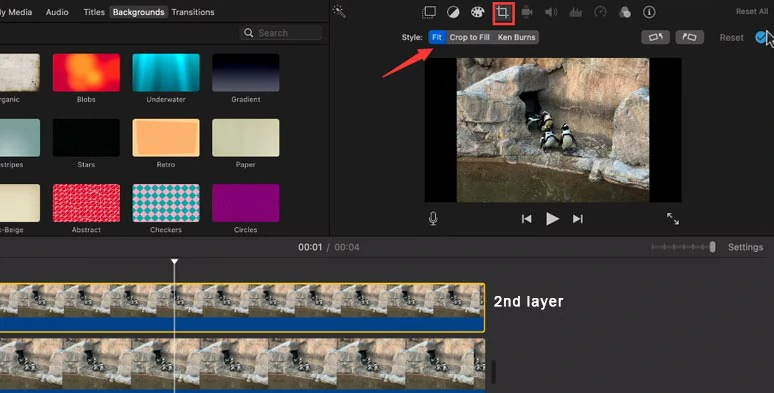
Set the 2nd video layer to fit to keep its original size.
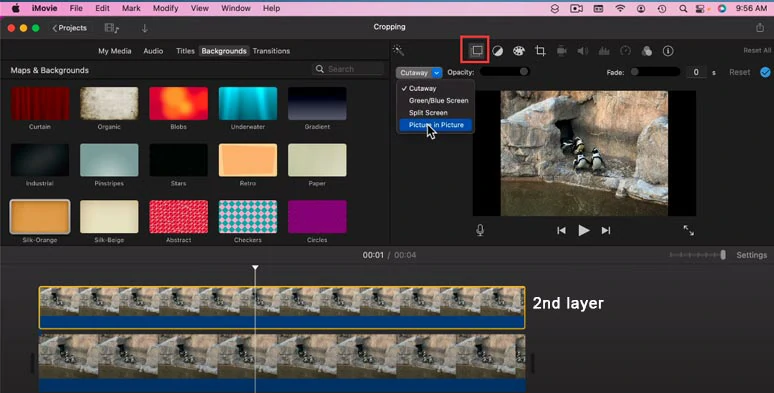
Add the second video layer as a picture-in-picture in iMovie.
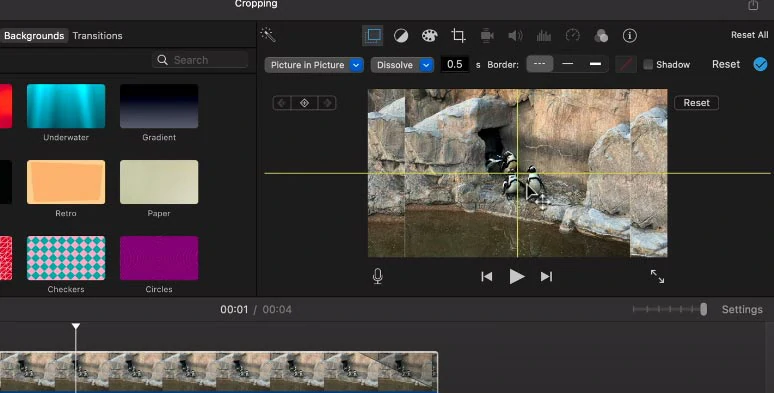
Expand the second video layer and center it.
How to Stop iMovie from Cropping My Videos on iPhone
Well, unlike the desktop iMovie on Mac, the iMovie on iPhone works differently. If you import a 9:16 or vertical video into iMovie on iPhone, it will automatically crop it into a square or 1:1 video with two black bars attached to both sides.
However, if your ISO system is 13 versions or newer, you do have an easy solution to stop iMovie from cropping your vertical videos. Below are the detailed steps.
As expected, your vertical video shall be automatically cropped into a square. No worries! Let’s just leave it there.
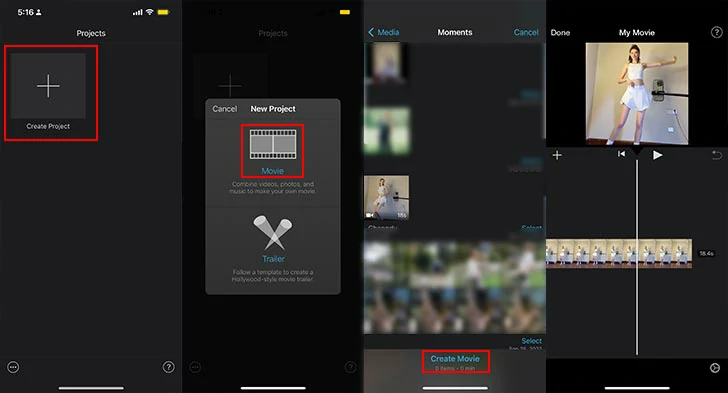
Import a vertical video to iMovie on iPhone.
With the clip selected, tap the magnifying glass icon on the top-right corner > use your finger to pinch and zoom the vertical video back to its original size, with thick black bars on both sides. But, no worries! We will fix that later.
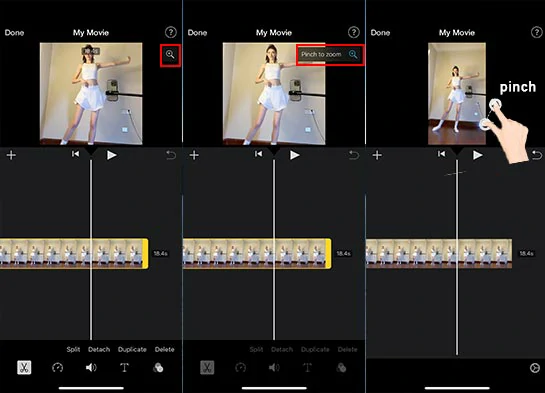
Click the magnifying glass and pinch it to zoom back to the original size of the vertical video.
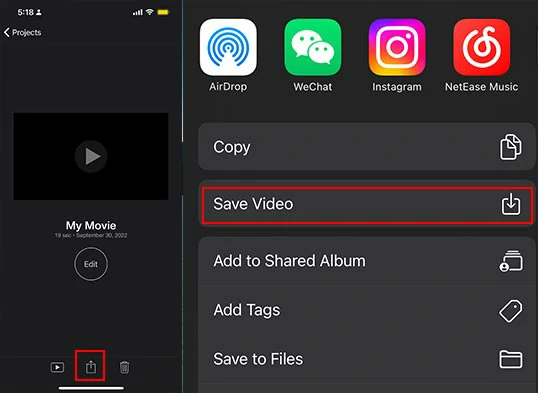
Save the video to the camera roll on iPhone.
Find saved video in Camera Roll > tap the Edit icon on the top-right corner > tap the Crop tool icon > tap the cropping preset tool > tap 16:9 > tap 9:16 vertical cropping > tap Done. Magic!

Remove the black bars by the Photos app on iPhone.
Online Alternative: Edit Vertical Videos without Being Cropped
As a bonus, we’ve also recommended a great online alternative to iMovie that can help you easily edit vertical videos without worrying about being cropped, i.e. the versatile and feature-packed FlexClip online video maker, with no downloads and experience needed.
Use feature-rich FlexClip online video maker to edit vertical videos and photos.

With FlexClip, you can set the video aspect ratio to 9:16 with one click and edit your vertical videos and photos with styles in a breeze. Besides, you can use designer-made and fully-customizable vertical video templates and drag and drop your clips and photo to create compelling videos for TikTok, Instagram Reels, YouTube Shorts, Snapchat, Facebook Story, etc. Also, read how to add original audio to Reels.
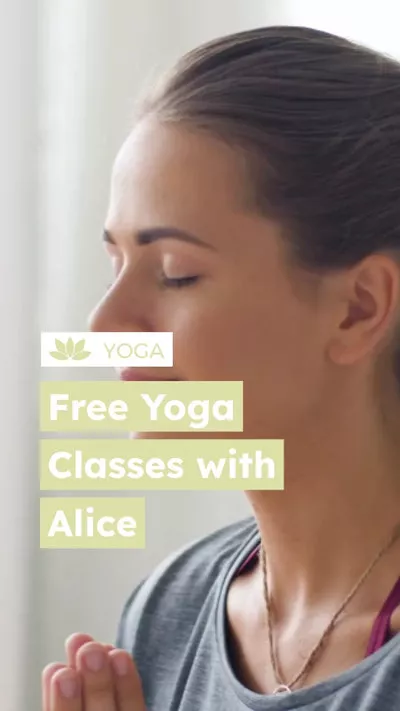


Select a vertical video template.
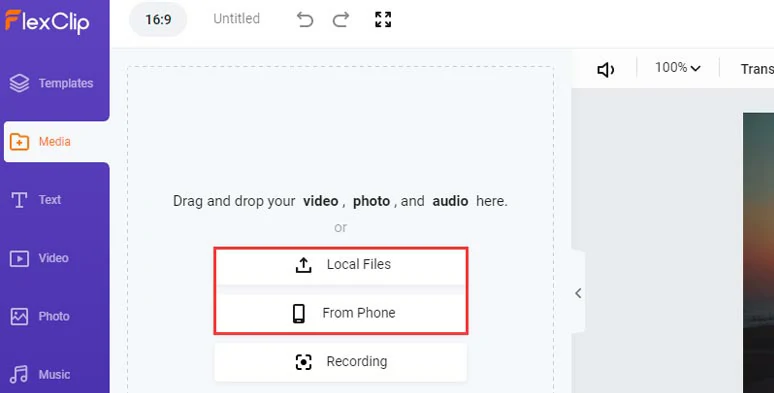
Upload your video assets to FlexClip.
You may trim or split videos/photos or reorder their sequence on the intuitive timeline.
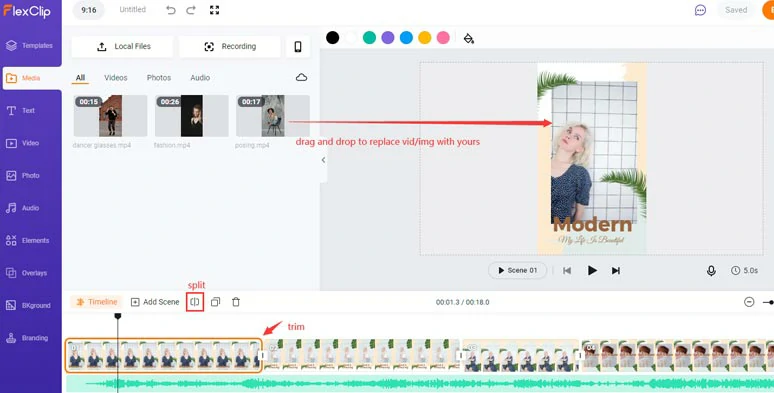
Replace premade videos and photos with yours or trim, split clips.
Double-click the premade texts > type in your text and customize their fonts, colors, styles, and animations, such as typewriter effects, bounce, glitter, stomp, etc. or find more ready-made text animations in the Text tab.
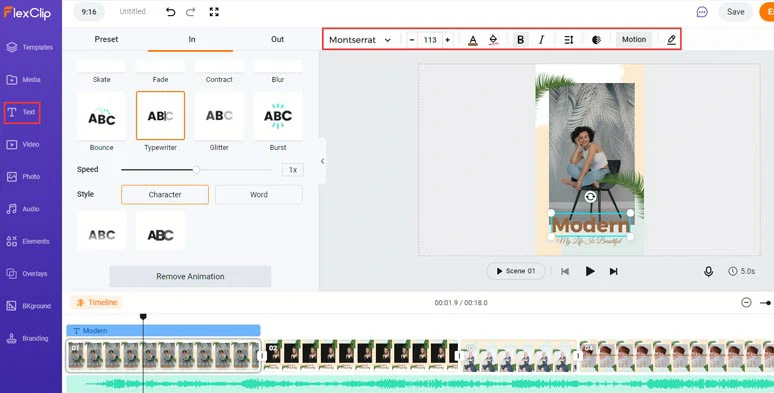
Customize the texts and text animations.
Click the Audio tab, you can select from 7,4000+ soundtracks and sound effects to add vibes and rhythm to videos. Layer multiple audio tracks to add dimension to the auditory experience; adjust the volume of music, trim or split sounds, or add fade-in/out effects.
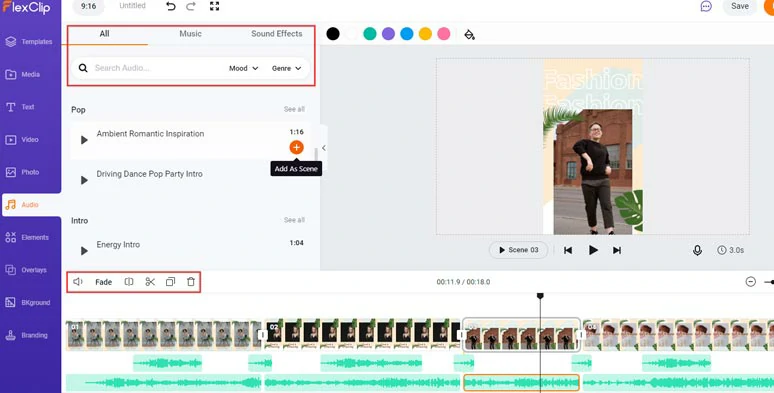
Add royalty-free music and sound effects to your videos.
Select from 200+ transitions like a circle or liquid transitions, etc. to smooth out two shots. Add effect overlays like lens flare effects, smoke, snow, rain, etc. to enhance the vibes. Or add GIPHY stickers and animated illustrations, etc. to add more interest to your videos.
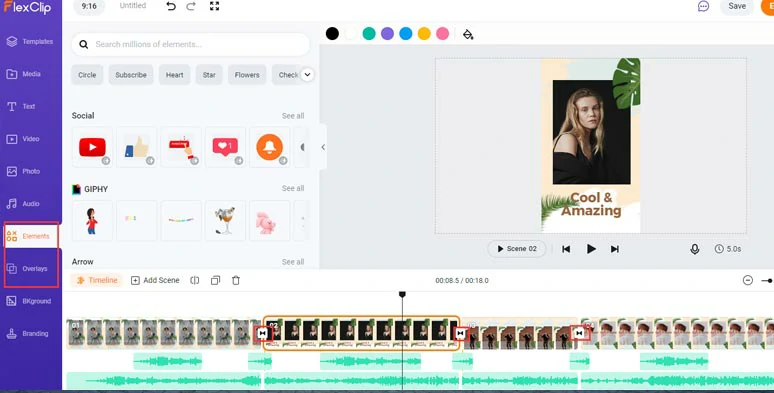
Add more video effects to jazz up your videos.
Done with the editing. You can directly download the video to your PC or share it to YouTube, Google Drive, Dropbox; a clickable link and an embed code are also available for blogging and other repurposing.
Now, It's Your Move
Well, as a time-honored and free video editor on Mac and iPhone, iMovie does have bugs when it comes to editing vertical videos and photos. Now, you know why iMovie crops your videos and how to fix it with different solutions. If you find this post helpful, please share it on your Facebook or Twitter and leave your comments to us. Cheers!


FlexClip Video Maker
The easiest way to help you create custom videos, no design skills needed.
Start Now for Free
Hot & Trending
-
Ultimate Tik Tok Guide – How to Tik Tok & How to Make a Tik Tok Video that Gets Likes
-

Instagram Story Video Quality Bad After Upload? Fix It!
-

7 Best Ways to Find Music in YouTube Videos
-

How to Repost Video on TikTok & How to Remove TikTok Repost
-

Improve Video Quality Online: 3 AI Video Quality Enhancers You Can't Miss
-

4K Convert to HD 1080p without Watermark: Best 4k Video Converters
-
How to Change Face in Video on Phone/Desktop/Online
-

Top 13 Birthday Video Makers with Music and Effects Free