Have you ever wanted to start your own YouTube channel but felt uncertain about your skills or nervous in front of the camera? Consider creating a "Study With Me" video! This popular format has garnered millions of views and can be a fantastic way to motivate both yourself and others while sharing your study routine. In this article, we’ll guide you through everything you need to know about "Study With Me" videos and provide a step-by-step approach to making your own. Let’s dive in!
Free and Customizable Study with Me Video Templates for You:




Also Interested in: How to Make a Monetizable Lofi Video with AI>>
What Are Study with Me Videos?
In short, "Study with Me" videos are typically pre-recorded or live-streamed sessions where creators film themselves studying, often using the Pomodoro technique accompanied by soft background music. This content aims to inspire viewers to stay focused, work productively, and foster a sense of connection among viewers, helping to alleviate feelings of isolation, distraction and anxiety. Generally, a YouTube "Study with Me" video will include one or more of the following elements:
Here’s an example of a "Study with Me" video on YouTube.
A Study with Me Video from YouTube
How to Create a Study with Me Video?
Now that you’re familiar with "Study with Me" videos, let’s explore how to create one with the step-by-step guide below.
Step 1: Preparation Before Recording
Before you hit the record button, take a moment to consider some key elements that can significantly impact the quality of your study with me video.
With these preparations, you’ll be well on your way to creating an engaging "Study with Me" video!
Step 2: Film Your Study Session
Decide whether to film your video in portrait or landscape orientation, depending on the platform you’re using. Once you're ready, hit the record button to capture yourself studying. To enhance viewer engagement, incorporate techniques like the Pomodoro method, such as the 25/5 (25 minutes of study followed by a 5-minute break) or 50/10 (50 minutes of study followed by a 10-minute break). Continue filming until you complete your entire study session.
Step 3: Edit the Raw Study Recording
Want to post your video on a platform? Hold on! Your raw recording needs some polishing to truly stand out. A handy video editor called FlexClip is recommended to help you with this. Simply access FlexClip through your browser and add personal touches as outlined below:
Import Your Video and Make Basic Edits
Whether you captured the recording with your mobile device, camera, or desktop webcam, you can easily upload the raw clips with just one click. Once loaded, use the trimmer to remove any unwanted parts and arrange the video according to your Pomodoro study sessions.
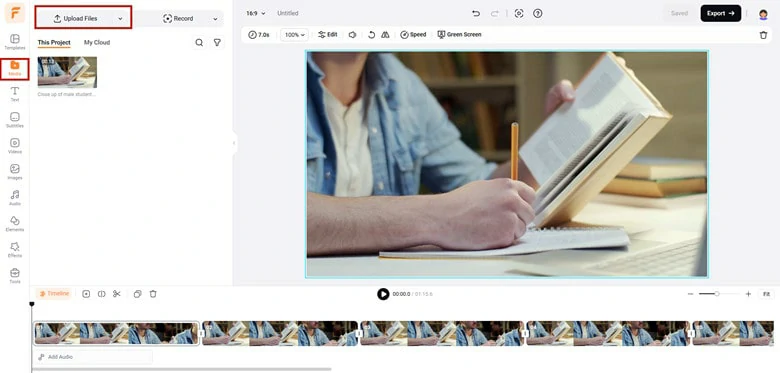
Import Your Video and Make Basic Edits
Stitch the Video and Fine-Tune with Music
To ensure your different segments flow smoothly, add transitions between them. FlexClip offers hundreds of transition effects, which you can apply with a single click. If you prefer a consistent look, the "Apply to All Scenes" button will save you time. Next, focus on the music: choose instrumental tracks or ambient sounds like rain to create a calming atmosphere. You can access FlexClip’s royalty-free music library or upload your own.
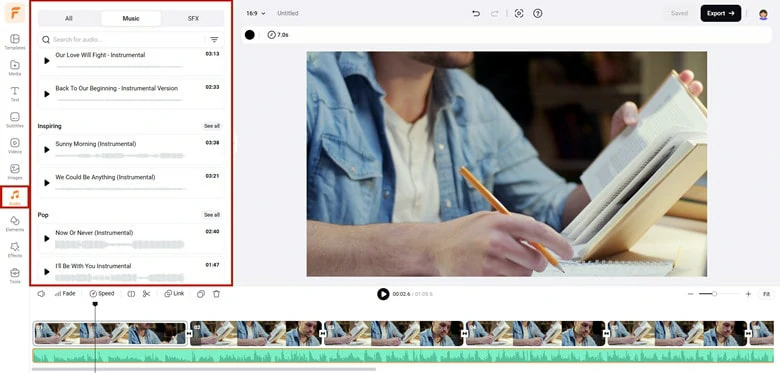
Stitch the Video and Fine-Tune with Music
Perfect the Video with Text, Filters, and Timers
Engage your viewers by displaying your goals and schedule with text overlays. Don’t forget to add a timer to show real-time progress. Under the Effects > Camera panel in FlexClip, you’ll find features to help you achieve this. Enhance the aesthetic by applying filters to elevate the overall look of your video.
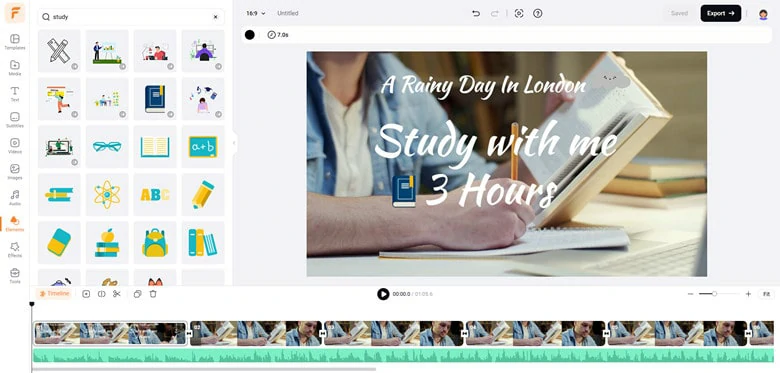
Perfect the Video with Text, Filters and Timers
Create an Appealing Thumbnail
A captivating thumbnail is crucial for attracting viewers to your YouTube video. An effective "Study With Me" thumbnail often includes elements like study duration, Pomodoro techniques, and the genre of music used, all presented in a concise and appealing style.
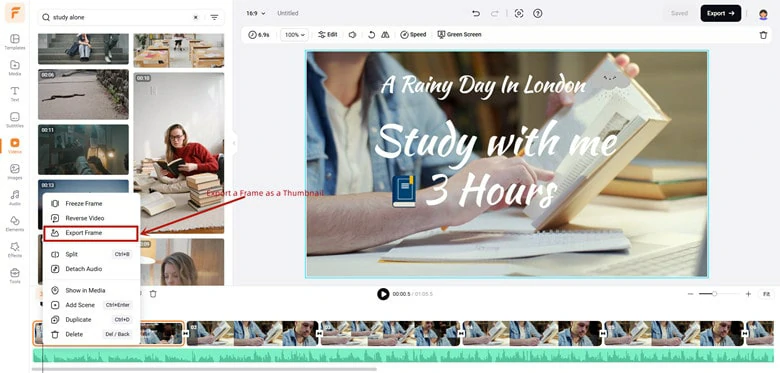
Create an Appealing Thumbnail for Your Video
Once you’re satisfied with your video, play it back to ensure everything flows smoothly, and then you’ll be ready to upload it to your chosen platform!
Step 4: Upload and Share
Now it’s time to share your amazing video with the world! You can use FlexClip to upload your edited "Study with Me" video to YouTube and TikTok, or generate a clickable link to share with friends. Alternatively, FlexClip also allows you to download the video for posting on other platforms.
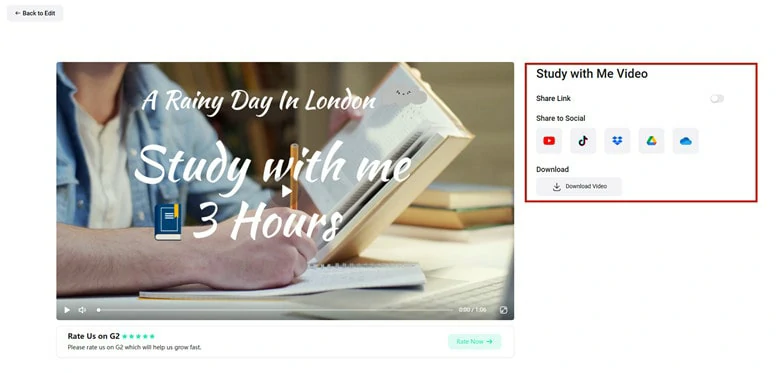
Upload Study with Me Video to YouTube
A helpful tip is to add relevant hashtags, as this can help the platform recommend your content to a wider audience and make it easier for viewers to find your video using specific keywords and tags.
Step 5: Engage with Your Audience
Uploading isn’t the final step in creating your "Study With Me" video. To foster a sense of community among your viewers, take the time to engage with them in the comments. Responding to comments not only shows your appreciation for their feedback but also encourages others to join the conversation. You can ask questions to prompt discussion, share study tips, or even provide additional resources based on viewer inquiries. Remember, your audience is looking for a shared experience, so the more you engage, the stronger your community will grow!
The Bottom Line
Well, that’s all on how to create a "Study With Me" video, covering every aspect you need to consider. We hope this tutorial helps you embark on your video creation journey with confidence!


