Are you looking for ways to start dictating your documents and text using just your voice? Instead of typing words arduously on Windows 10, you can use voice commands under Speech Recognition feature, which interprets the spoken word across the operating system for various tasks.
In this article, you'll learn how to get everything ready and how to enable speech-to-text in Windows 10 using three easy-to-follow methods. Keep reading to explore it more!
Free and Customizable Stunning Video Template for You:


Also Interested in: How to Enable Text to Speech on Windows 10
Part 1. How to Enable Speech-to-Text Feature in Windows 10
Microsoft's dictation software is useful for transcribing audio to text in Windows 10. But it may not already be enabled by default on your system, so you may need to make a quick trip to settings to enable it.
To enable speech recognition, set up as follows.

Go to Ease of Access Option
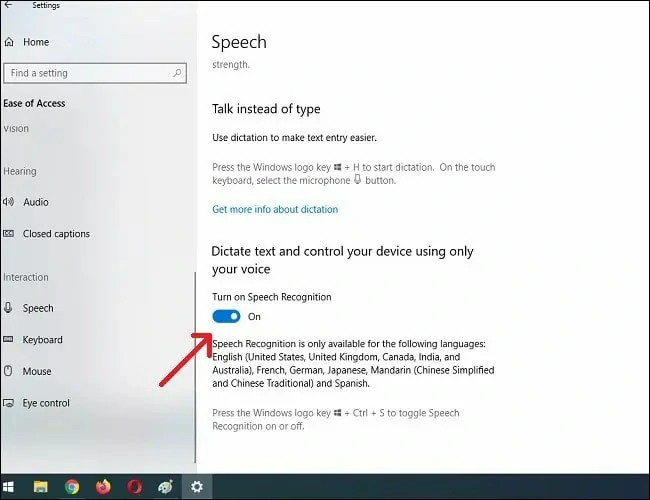
Turn on the Speech Recognition Option
Part 2. Use Speech to Text to Type with Your Voice
After you've successfully setting up your microphone, you can begin voice typing on Windows 10.
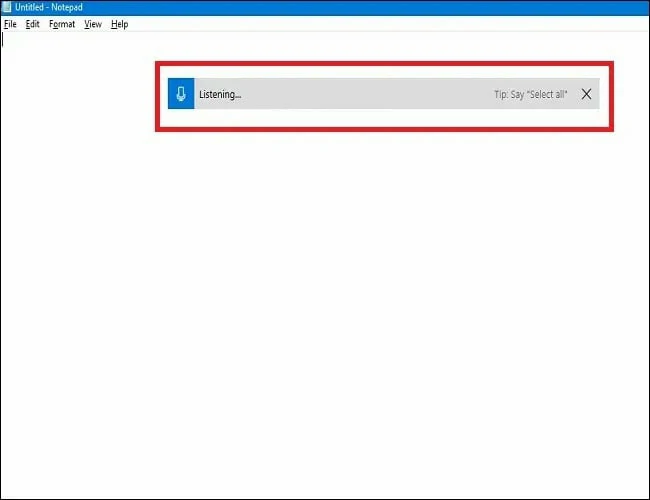
Start to Dictation
Part 3. How to Enable Speech to Text in Word on Windows 10
Audio dictation is also available in Microsoft 365 with a microphone and reliable internet connection. It's a quick way to get your thoughts out, create outlines and take notes. Simply follow the steps below to use this feature in Word.
Part 4. An Easy Way to Transcribe Voice to Text on Windows 10
What if you want to use a video with a voiceover? Is it possible to automatically transcribe voice to text? FlexClip online video editor with speech-to-text feature can be your safe bet.
With mature AI algorithm support, FlexClip can identify audio in 140+ languages with multiple accents of your videos and automatically transcribe it to text in high accuracy and exact timestamp. Besides, it allows you to customize text styles, color, align and change the subtitle length.
Moreover, it provides you stylish text overlay, adjustable templates, an extensive media library, royalty-free soundtrack to help you unleash creativity for creating stunning videos.


How to Use Audio to Text Feature on Windows 10 Using FlexClip
Here are the steps to turn your audio into text in minutes automatically. Check it right now!
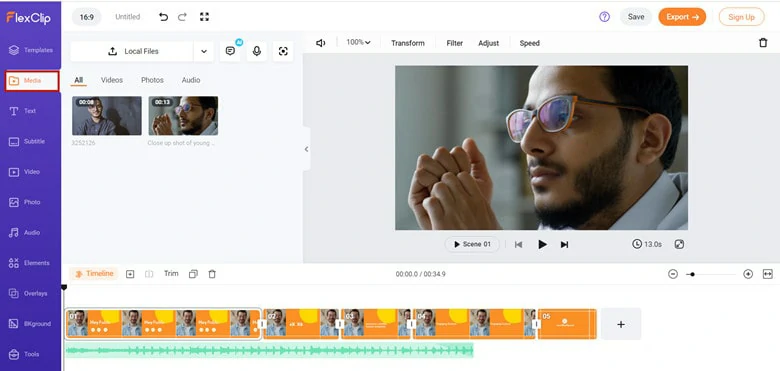
Upload Media Resources to FlexClip

Trim out Unwanted Parts
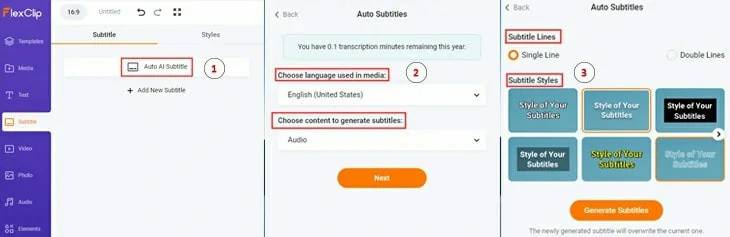
Enable AI Subtitle Feature
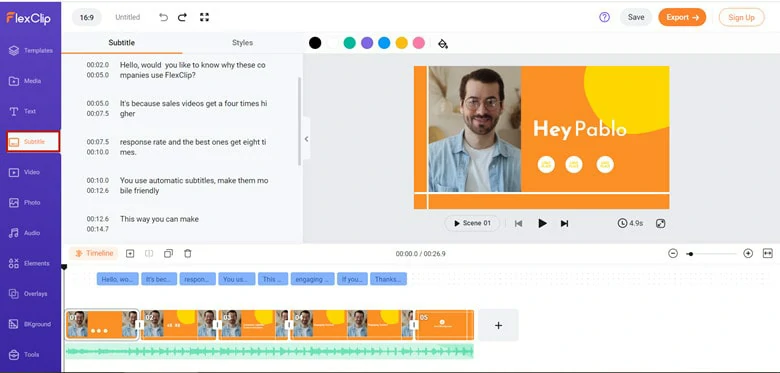
Change Subtitle Style
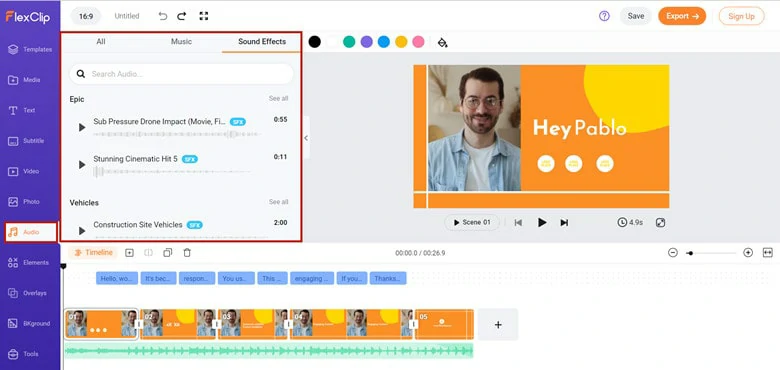
Add Sound Effect to Video
The Bottom Line
That's all for how to use speech to text on Windows 10. The speech recognition feature enables you to get documents by voice typing. While if you need flexible and free ways, FlexClip is a nice option you can try. Now it's your turn!


FlexClip Video Maker
The easiest way to help you create custom videos, no design skills needed.
Start Now for Free
Hot & Trending
-

Ultimate Tik Tok Guide – How to Tik Tok & How to Make a Tik Tok Video that Gets Likes
-

Instagram Story Video Quality Bad After Upload? Fix It!
-

7 Best Ways to Find Music in YouTube Videos
-

How to Repost Video on TikTok & How to Remove TikTok Repost
-

Improve Video Quality Online: 3 AI Video Quality Enhancers You Can't Miss
-

4K Convert to HD 1080p without Watermark: Best 4k Video Converters
-

How to Change Face in Video on Phone/Desktop/Online
-

Top 13 Birthday Video Makers with Music and Effects Free