Under most circumstances, changing the video/photo aspect ratio always means the loss of a portion of the background. Even if you decided to zoom out to keep all backgrounds, you might end up with having a default black background which doesn’t agree with your visual assets.
We understand how much eager you are to extend the backdrop of your photo and video naturally. Now, follow us to extend photo and video background with a powerful photo and video editor, or generative AI.


2 AI Image Background Extenders
There are tons of photo background extenders out there, thanks to the development of AI. Nearly all image extend tools can identify the object around the border and complete filling tasks instantly.
After countless trials, we now recommend two AI image extenders which work perfectly in terms of generation quality, as well as generation speed. They are Adobe PhotoShop, and FlexClip.
Extend Photo Background with Adobe PhotoShop
Adobe PhotoShop, integrated with Generative AI, can identify the items on your photo borders and automatically fill the background. What's better, you are able to use simple prompts to decorate the background. For instance, you can add an artwork to the empty wall, or add plants near the table. Go from imagination to creation at Adobe PhotoShop in a matter of clicks!
Step 1. Increase Canvas Size
Launch Adobe PhotoShop Beta, and then drag and drop your photo to it. Click on the Crop tool, hold Shift and Option on Mac, or Shift and Alt on windows, and drag the lines to increase canvas size. Click on the check mark to confirm the changes.
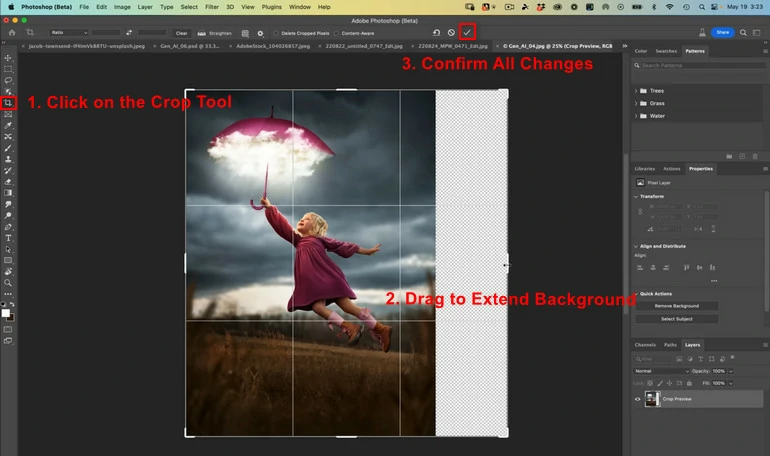
Increase Canvas Size
Step 2. Fill the Empty Background with AI
Go to the Rectangular marquee tool, select the empty background.
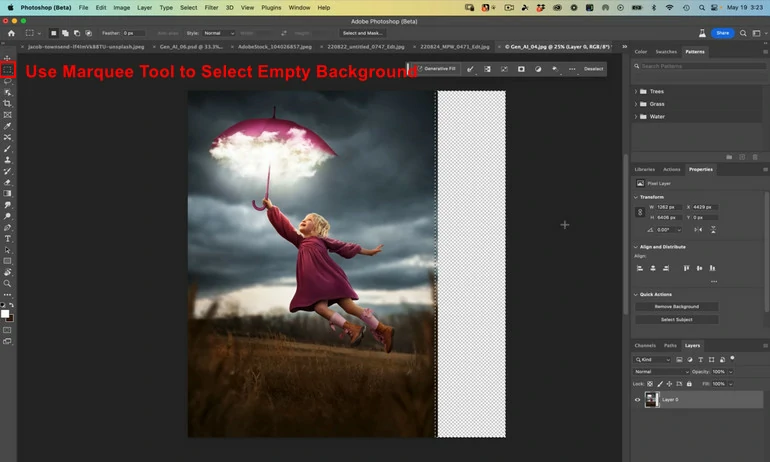
Select Empty Background with Marquee Tool
Now, you will have the Generative Fill tool. Click on it and hit generative. You will have 3 available backgrounds. Choose one of them and confirm.

Generate Empty Video Backgrounds
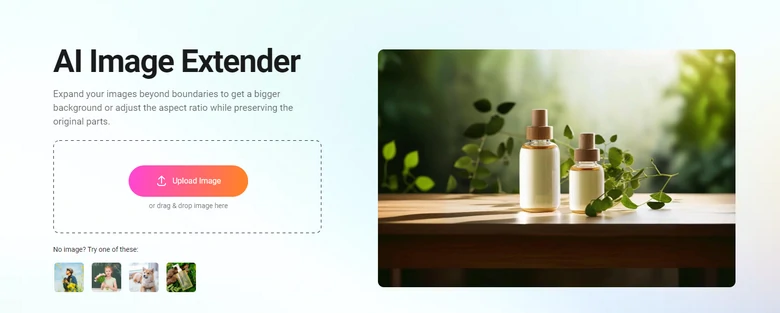
Extend Image Background with FlexClip
If Adobe PhotoShop offers the most flexible way to extend image background, then FlexClip's AI image background extender is the most convenient way to go. Once you upload an image, you are able to render among 8 different aspect ratios and up to 4 outputs for each generation. All you need to do is grabbing a cup of coffee and wait for a satisfying result.
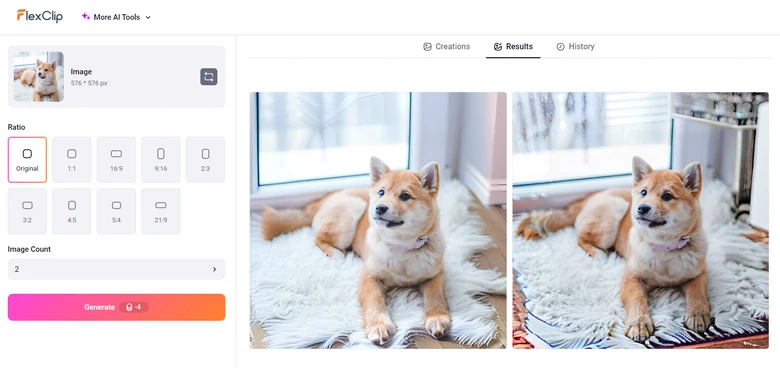
Step 1. Access FlexClip's Image Extender
Visit FlexClip's AI Image Extender Online Tool, select one of your images and upload.
FlexClip AI Image Expander Overview
Step 2. Setups
Select an aspect ratio. You can stay with the original aspect ratio, or make it more drastic by selecting a completely different one. Set up the image generation count, and hit Generate.
Extend Image Background with FlexClip
Step 3. Download & Share
If you are satisfied with the output, click to save directly, or share to social media instantly.
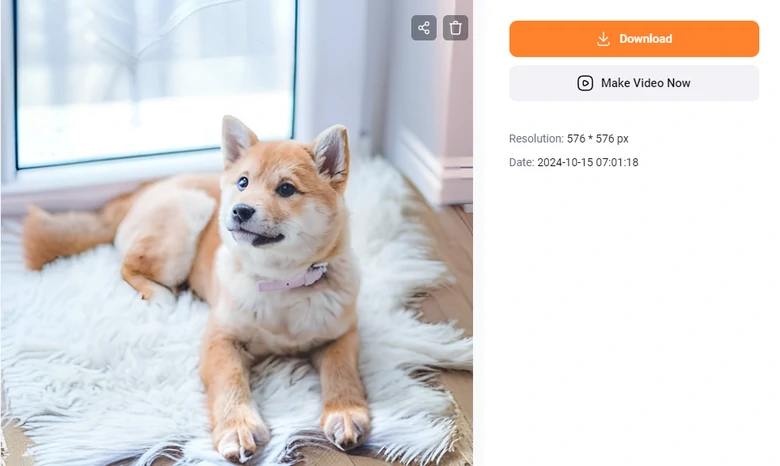
Export Extended Image
After downloading the image output, you are also able to make extra edits with the power of AI at FlexClip.
2 AI Video Background Extenders
Currently, there is no such a thing called AI video background extender. The technology hasn't reached this far to fill the background with corresponding elements and animate them. To extend video background, we will need the extended background and a little bit of editing skills.
Extend Video Background with Adobe PhotoShop
Step 1. Choose a Desired Canvas Size
Launch Adobe PhotoShop. Click New File, choose a desired canvas height and width. You can even enter specific data. Confirm the change.
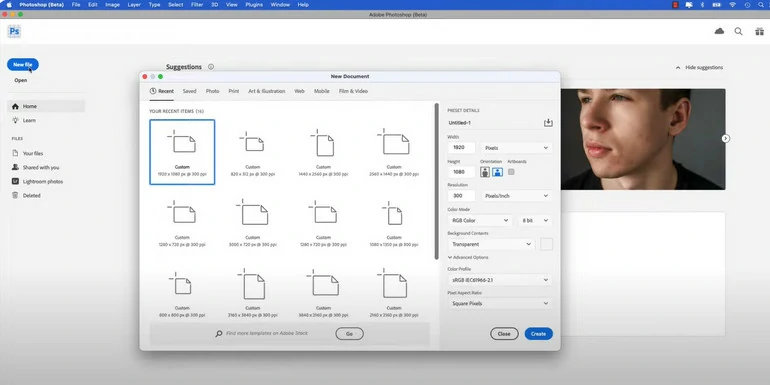
Choose a Desired Canvas Size
Step 2. Access Timeline Mode
Go to Window > Timeline. Now you are in the timeline mode. Drag and drop to bring in the video.

Enter PhotoShop Timeline Mode
Step 3. Do More Setups
When your video is successfully uploaded to Adobe PhotoShop, you have to click on the check mark above the canvas so that Adobe PhotoShop accepts your video.
Down below the canvas, there is a button showing either Create Video Timeline or Create Frame Animation. Make sure yours is in Create Video Timeline mode.
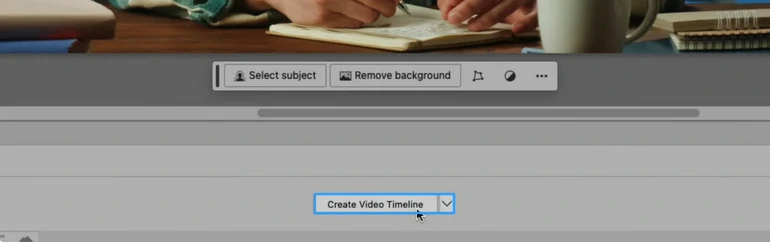
Create Video Timeline Mode
Step 4. Zoom Out Your Video
Zoom out your video a little bit by clicking Ctrl + C on Windows, or Command + Minus key on Mac.
Click on the Crop tool, there will be four lines around your video. Hold Shift and Option on Mac, or Shift and Alt on windows, and drag any of the lines to extend the video width and height.

Zoom Out Your Video
Step 5. Fill the Empty Background
Below the canvas, there is a button called generative expand. Click on it, enter some text prompts and hit Generative. Instead, you can type nothing and hit Generate directly. Choose one out of three generated backgrounds.

PhotoShop Generative Expand
Step 6. Expand the Background
Go to the background layer on the timeline so that it covers the whole video.
Extend Video Background with Adobe Premiere Pro
Extend Video Background with Premiere Pro - Video Tutorial
Step 1. Create an Extended Video Background
Adobe Premiere Pro is not like Adobe PhotoShop where you can extend video background and incorporate the background into the video. You can only make video edits with this software. So if you've decided to stick to Adobe Premiere Pro, the first thing is taking a screenshot of the first frame of the video, and then utilize Adobe PhotoShop or FlexClip.
Step 2. Export the Background & the Video
After successfully getting the extended background, drag and drop the video to the timeline, with the extended background image on the top layer.
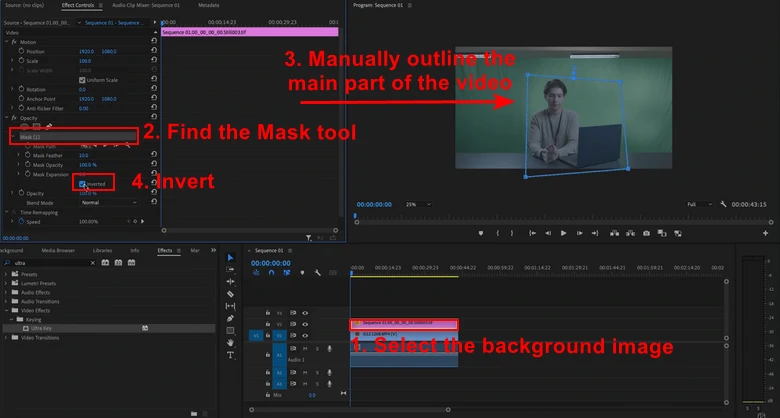
Step 3. Use the Mask Tool
Click on the background image. Head over to Effect Controls > Mask. Manually outline the main parts of the video, and check the box of Invert, which is the last option under the Mask. You have now perfectly merged the video and the extended background.
Extend Video Background with Premiere Pro
The Bottom Line
In a word, if you are extending a photo, go to FlexClip or Adobe PhotoShop, and then fill the background in just several clicks. When you need to extend videos with complicated backgrounds, you should take advantage of Adobe Premiere Pro. If you find this post helpful, remember to share, like and come back often to check for updated content.


FlexClip Video Maker
The easiest way to help you create custom videos, no design skills needed.
Start Now for Free
Hot & Trending
-
Ultimate Tik Tok Guide – How to Tik Tok & How to Make a Tik Tok Video that Gets Likes
-

Instagram Story Video Quality Bad After Upload? Fix It!
-

7 Best Ways to Find Music in YouTube Videos
-

How to Repost Video on TikTok & How to Remove TikTok Repost
-

Improve Video Quality Online: 3 AI Video Quality Enhancers You Can't Miss
-

4K Convert to HD 1080p without Watermark: Best 4k Video Converters
-
How to Change Face in Video on Phone/Desktop/Online
-

Top 13 Birthday Video Makers with Music and Effects Free