Video noises usually refer to the white or silver particles on the video. They are caused due to bad lighting condition, wrong recording settings, low video export resolution after compression, or even poor recording equipment. They bring bad viewing experiences and distract you from viewers, especially for real estate videos, introduction videos which should look authentic and real.
In this article, we will be showing you the top tools to remove video noise for enhanced quality. Without further ado, let’s check how they remove video noise and their pros and cons.
HIGH QUALITY VIDEO TEMPLATES


Can't Miss: How to Create Animated Text Masks >
1. Adobe Premiere Pro
Price: subscription plan starts at $22.99 per month.
Best for: Video editing professionals.
Adobe Premiere Pro deserves the fame of the powerhouse in video editing. It offers tons of tools to realize all sorts of ideas like masking, editing to the music beats. Most importantly, Adobe Premiere Pro is able to target and eliminate different video noises, from grainy footage, digital noise from high ISO settings with built-in setup options. You can easily adjust parameters like strength, threshold, frequency to tailor the noise reduction to your specific needs.
Other professional video editing software like Final Cut Pro, Davinci Resolve, can ensure the video outputs in professional level, but Premiere Pro is part of the Adobe Creative Cloud Suite. It is seamlessly integrated with other Adobe applications like AE, Adobe Audition, even Adobe PhotoShop. You can render through all of them and explore more possibilities.
How to Denoise a Video with Premiere Pro
Use Premiere Pro to Denoise a Video
2. Topaz Video AI
Price: $299
Best For: Get ultra crystal & clear clips
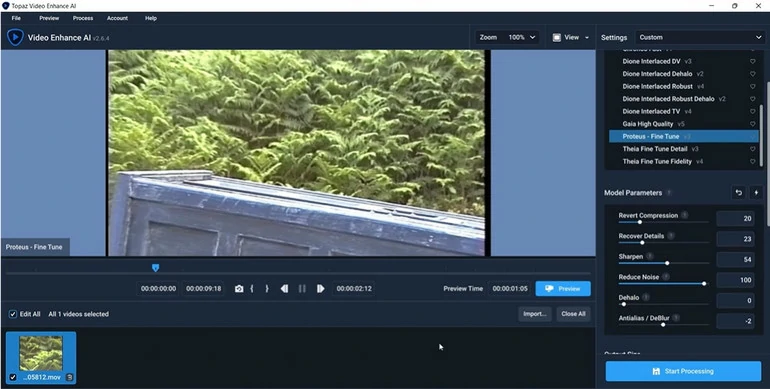
Topaz Video AI is trusted by major film studios and professionals everywhere. Trained with millions of video clips, Topaz Video AI 5 intelligently understands the figures and the environment around and developed different video denoise models for different video clips. It knows exactly how and which model to use to achieve the best video noise reduction results.
Topaz Video AI 5 works seamless across your devices. You can use it on both Mac and PC computer. It can also be used as a plugin in Adobe After Effects and Davinci Resolve. More importantly, it partnered with major hardware manufacturers to ensure Video AI run as fast as possible!
How to Reduce Video Noise with Topaz Video AI

Reduce Video Noise with Topaz Video AI
3. Neat Video
Price: Starts from $129.9
Best for: Fast & convenient video noise removal
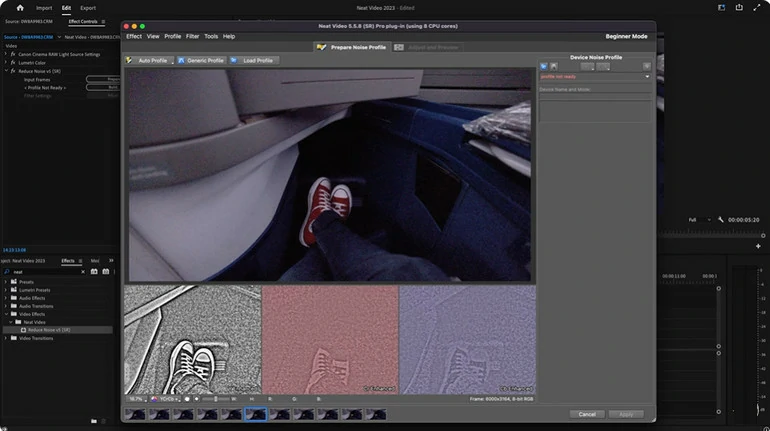
Neat Video is a top video denoise plugin working with famous video editing tools like Premiere Pro, Final Cut, DaVinci and 20 more. Whether it is visible pixel noise, compression artifacts, color banding, Neat Video can help out! Whenever a video clip is uploaded, it analysis the video noise and builds a profile out of the data. When a similar video is uploaded, the profile will help reduce video noise in greater accuracy.
You might wonder, since Premiere Pro, Davinci, Final Cut Pro have built-in options to remove video noise, why a plug-in? Firstly, Neat Video significantly improves the processing speed, no matter which hardware you are using. Secondly, Neat Video has several other tools to enhance video quality and keep the all details.
How to Remove Video Noise with Neat Video

Reduce Video Noise with Neat Video
4. Veed
Price: Starts from $12 per month
Best for: Remove noise from dark video clips
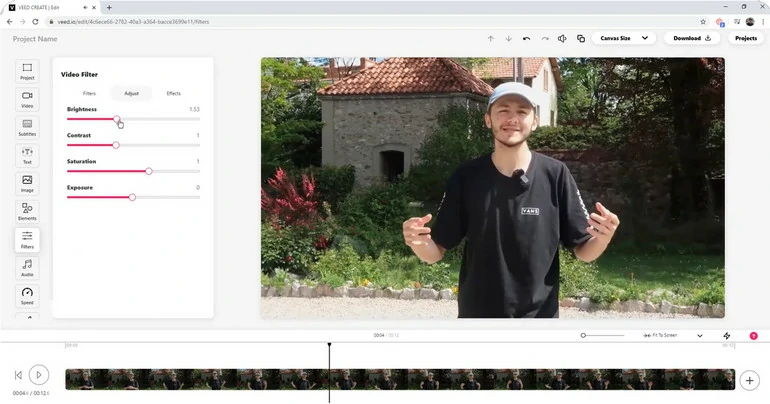
Veed can reduce visual noise on your video, especially when a video is filmed under poor lighting conditions. You can use Veed to adjust lighting, contrast, saturation and other settings to make the video crisper and brighter. Under the settings tab, you can also adjust video’s sharpness, noise, blur and vignette effect, apply filters to further enhance the video quality.
The best part of using Veed is that anyone can remove video noise without a steep learning curve. Drag the slider, a crystal clear video is at your hand.
How to Remove Video Noise with Veed

Reduce Video Noise with Veed
5. Media.io
Price: Starts from $6.99 per month
Best for: One video noise removal solution for all videos
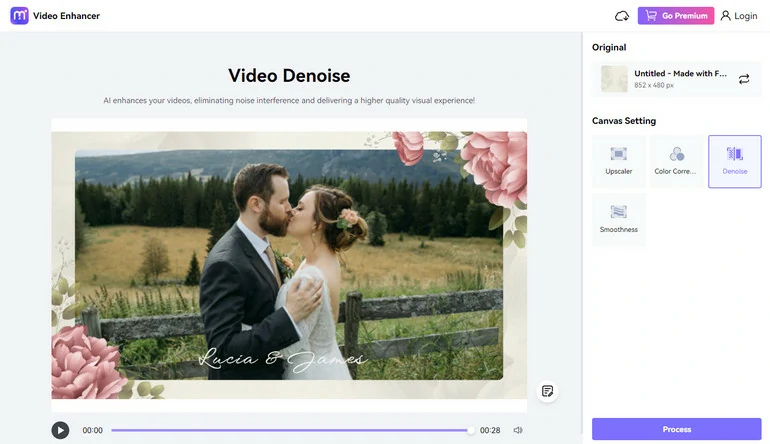
With Media.io, removing video noise is just like a breeze. Leveraging the magic of AI, it can identify and eliminate noise automatically while preserving all the details. You can just grab a cup of coffee and wait the AI to finish tasks, without making any adjustments. Meanwhile, Media.io also has options that allow you to adjust brightness, saturation, sharpness, etc. They are best for marking a video brighter.
Media.io also has tons of AI tools to make your video clip more interesting than ever! For instance, Auto subtitles, AI voice clone, background changer, etc. Feel free to explore them.
How to Remove Video Noise with Media.io

Reduce Video Noise with Media.io
The Bottom Line
Here are 5 methods to remove video noise for enhanced video quality. Whether you want to brighten your video, or remove flickers, grains on the video, the 5 tools we recommend can all help out! Besides them, professional software like Final Cut Pro, Davinci Resolve, plugins like Red Giant Denoiser III can also be helpful. Even though they are not on the list, but they are also great.
By the way, try FlexClip’s online video editor to embrace the future of video editing. It helps write a video script, turn a video script to a video, convert text into melodious voice, etc. Don’t miss out!


