
公司的網路研討會、教師演講或生動的播客採訪的Zoom錄屏是寶貴的媒體資源,可以分享在社交媒體上,傳遞非常有價值的資訊。
錄製完成後,你可能需要先美化一下Zoom錄屏,再進行分享。例如,裁剪掉一些不需要的畫面,或者將長達幾個小時的網路研討會分成更小的章節,並添加文字動畫、動態圖形和音樂等。這些細節上的編輯會讓你的Zoom錄屏更具吸引力。
在本篇教程中,我們將帶你瞭解如何找到你的Zoom錄屏,以及如何在Mac和Windows上免費線上編輯Zoom錄屏。這樣,你就可以輕鬆優化你的Zoom錄屏,並分享到YouTube或其他平臺。

目錄:
相關閱讀: 如何輕鬆製作吸引眼球的網路研討會預熱影片。
如何找到Zoom錄屏
在編輯Zoom錄屏之前,首先也是最重要的是,你需要先找到你的Zoom錄屏。以下是查找Zoom錄屏的3種主要方法:
如何在Mac電腦上找到Zoom錄屏:
在Mac電腦上打開Zoom應用程式 > 點擊Zoom > 首選項 > 錄屏 > 本地錄屏 > 點擊“打開”按鈕以查找存儲在Mac上的Zoom錄屏。
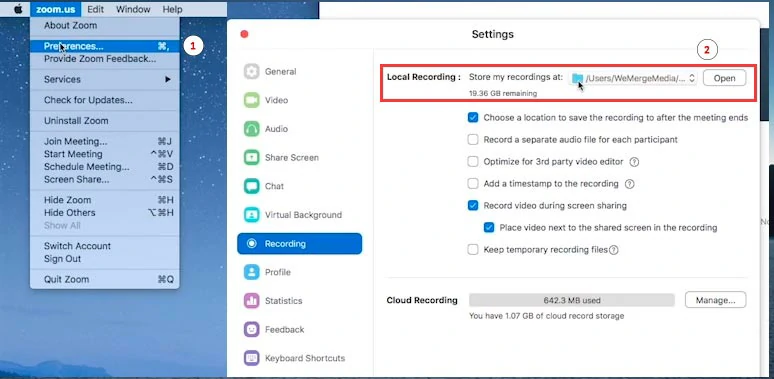
在Mac電腦上訪問Zoom錄屏。
常規的Zoom錄屏檔包含一個MP4檔(影片和音頻)、一個M4A檔(僅音頻),以及一個M3U檔(僅音頻)。
如何在Windows電腦上找到Zoom錄屏:
在Windows電腦上打開你的Zoom應用程式 > 設置 > 錄屏 > 本地錄屏 > 點擊“打開”按鈕以訪問Zoom錄屏。
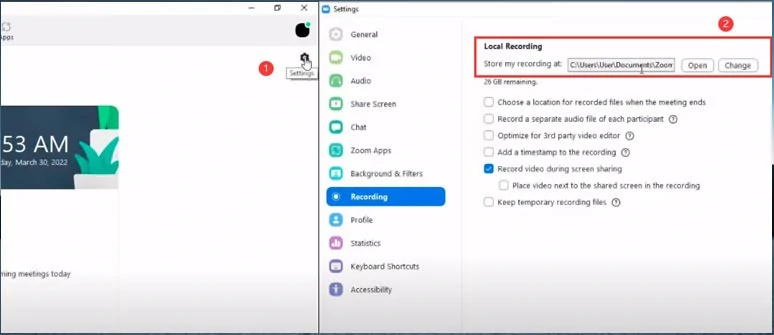
在Windows電腦上訪問Zoom錄屏。
如果你不喜歡Zoom的默認下載位置,你可以點擊“更改”按鈕,自定義你的Zoom錄屏的保存位置。
如何在雲端找到Zoom錄屏:
如果你是Zoom的訂閱用戶,你也可以在Zoom網站上的雲端找到你的Zoom錄屏。
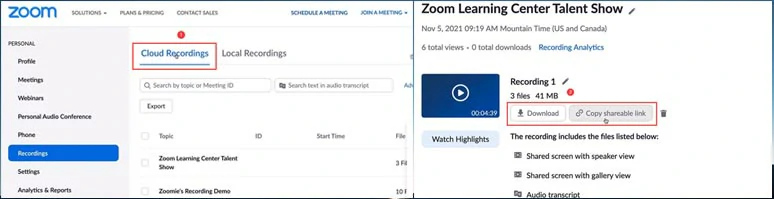
付費用戶如何在雲端找到Zoom錄屏
登錄你的Zoom門戶網站 > 轉到“錄屏”選項卡 > 點擊“雲錄屏”以在雲端查看你的Zoom 錄屏 > 點擊任何一個Zoom錄屏並將其下載到本地,或複製可共用鏈接以進行共用。
如何線上編輯Zoom錄屏
你或許會想,自己是不是需要一款功能強大複雜的影片編輯器來編輯Zoom錄屏呢?其實不然。最適合Zoom錄屏的影片編輯器應該是簡單、免費、資源豐富且相容性強的。
如果你是商務影片和網路研討會的常客,那麼我們會為你推薦FlexClip。FlexClip是一款強大又好用的線上影片編輯器,可以幫助你免費輕鬆編輯Zoom錄屏。
用FlexClip影片編輯器編輯Zoom錄屏

為什麼用FlexClip編輯Zoom錄屏會如此簡單呢:


如何使用FlexClip影片編輯器編輯Zoom錄屏:
你可以從多種管道輕鬆上傳素材到FlexClip,像是個人電腦、手機、Google Drive、One Drive、Dropbox等。上傳完成後,點擊+按鈕將Zoom按順序添加到時間軸上。
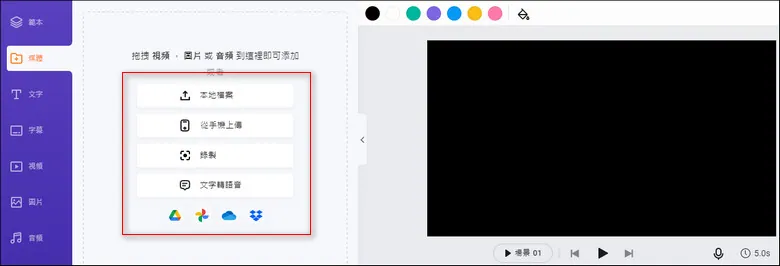
上傳素材
點擊“分割”按鈕,將Zoom錄屏分為兩個部分,然後向左拖動滑塊以裁剪Zoom錄屏。你可以輕鬆刪除不需要的畫面以提高影片品質,例如“讓我們等待下一位與會人員”這種銜接性話語,或錄屏過程中的任何卡頓。通過拖拽,你可以在時間軸上隨意調整Zoom錄屏的順序。
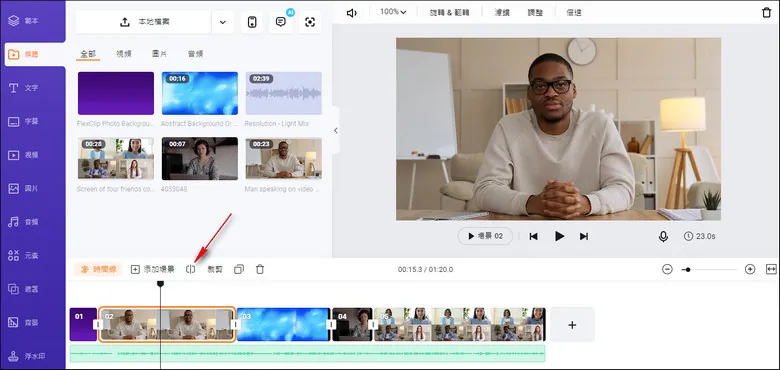
裁剪/分割Zoom錄屏
FlexClip的自動字幕功能可以幫助你給Zoom錄屏一鍵生成字幕,省時又省力。
你只需要點擊【字幕】按鈕 > AI字幕 > 選擇語言及字幕樣式,即可輕鬆為目標內容生成字幕。
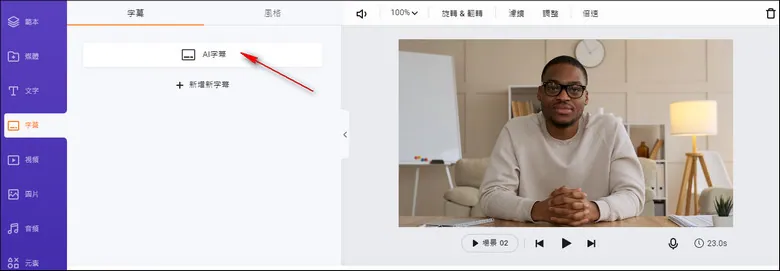
自動字幕
字幕生成之後,你可以檢查並修改錯誤的部分,也可以分割或合併字幕、調整字體、顏色、風格、透明度等細節。
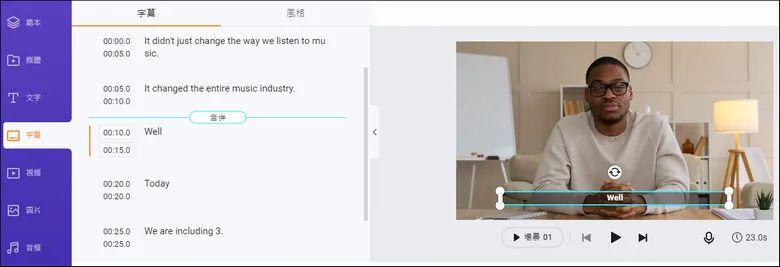
調整字幕
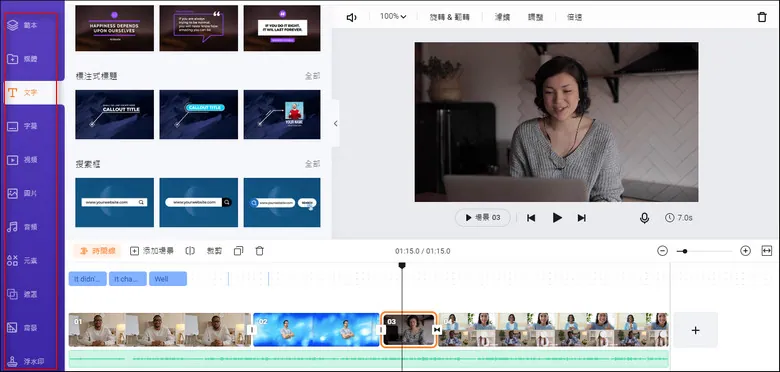
除此之外,點擊側邊欄的【文字】按鈕,你可以發現多種文字樣式,如字幕條、社交媒體、名人名言、標注標題等等。現在一種喜歡的樣式,然後用自己的文字替換範本中的內容即可。所以的字體、顏色、風格、動效都可以隨意修改。
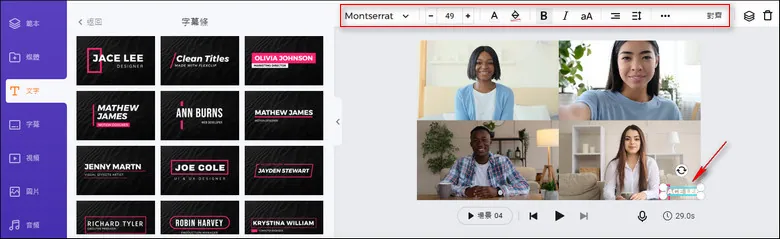
選擇喜歡的文本樣式
點擊兩個影片片段之間的部分即可選擇添加合適的轉場效果。FlexClip提供了大量預設的炫酷轉場風格,比如遮罩、液體、淡入淡出等等。添加轉場之後,你可以調整轉場的時長和方向,遮罩類轉場還可以調整顏色。
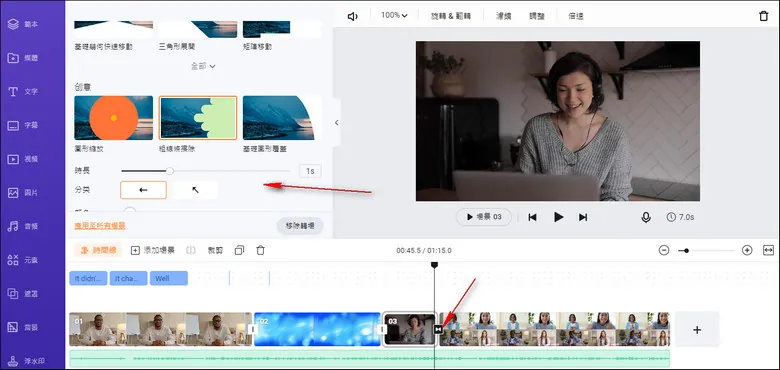
添加轉場
你還可以在Zoom會議中添加VIP發言人介紹。點擊“加為圖層”按鈕,即可將你的圖片添加到影片背景上。點擊“摳圖”,FlexClip將自動去除圖片背景,你還可以使用“擦除”或“恢復”畫筆工具來細化邊緣部分。
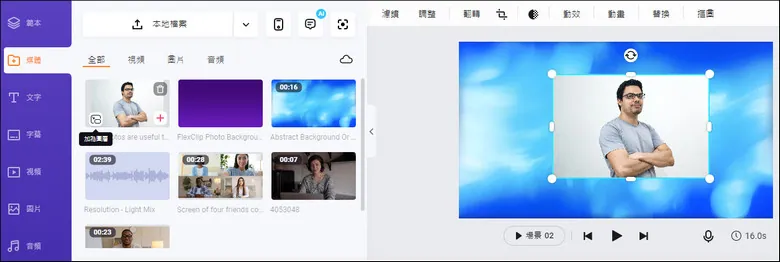
添加圖片為圖層
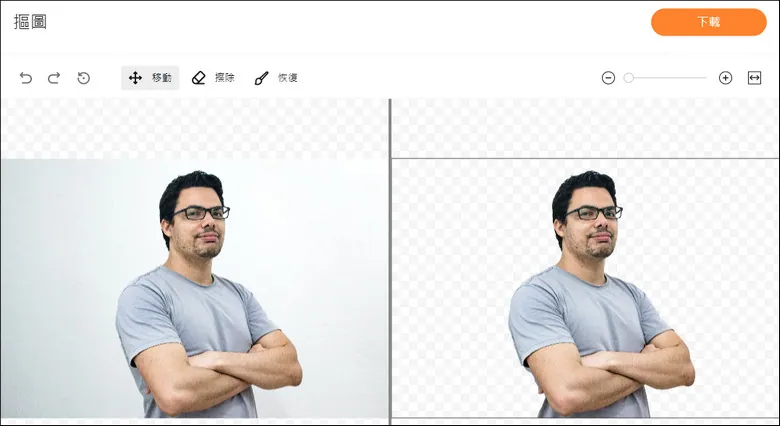
自動摳圖
然後,你可以把主講人圖層放在文字層後面,調整其大小、持續時間和位置,並使用【運動】工具對其進行動畫處理。
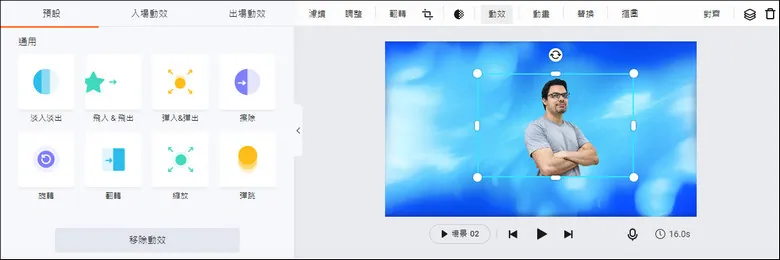
確定主講人圖像的位置並為其添加動畫。
點擊【音樂】按鈕,你可以用關鍵字搜索各種免版權的音樂和音效,為你的Zoom錄屏添加風格和節奏。在關鍵內容出現時,你可以選擇【彈出/突然出現】的音效來配合動態箭頭,這樣可以快速吸引觀眾的吸引力。
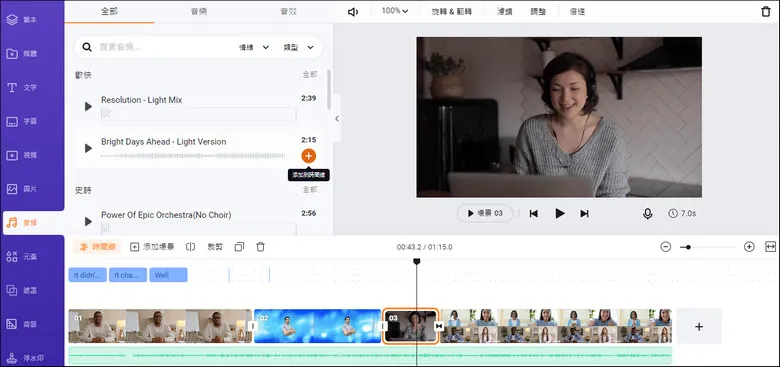
添加免版權的音樂或音效
想要保護隱私或者機密資訊,你可以添加馬賽克效果進行遮蓋。點擊【影片】按鈕,在搜索框中輸入【mosaic】,在搜索結果中選擇合適的效果然後作為畫中畫添加到畫布中。然後點擊【元素】按鈕,選擇一個喜歡的形狀拖動到馬賽克上方來調整其形狀,然後你可以調整馬賽克的大小、透明度和位置。
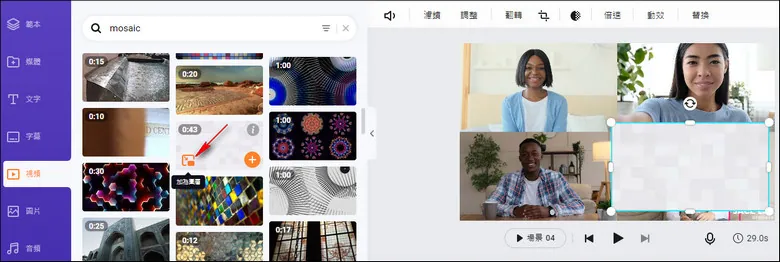
添加馬賽克
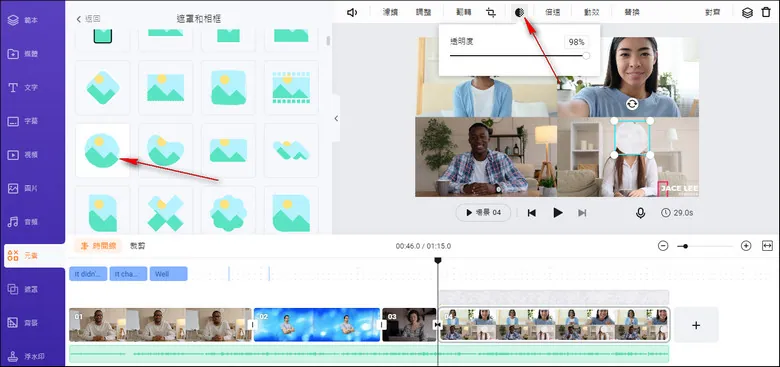
調整馬賽克的大小和位置
你可以添加logo或者浮水印作為印記來宣示自己的版權,也可以添加濾鏡、調整影片速度、添加網路研討會的片頭/片尾範本、GIPHY貼紙和美學插圖來優化影片品質。
個性化編輯
完成編輯後,點擊【導出】按鈕,即可以1080P清晰度、MP4格式將影片直接下載到你的電腦上,或分享到YouTube、Google Drive和Dropbox。作為個人分享的話,可以生成鏈接發送給你的朋友哦。
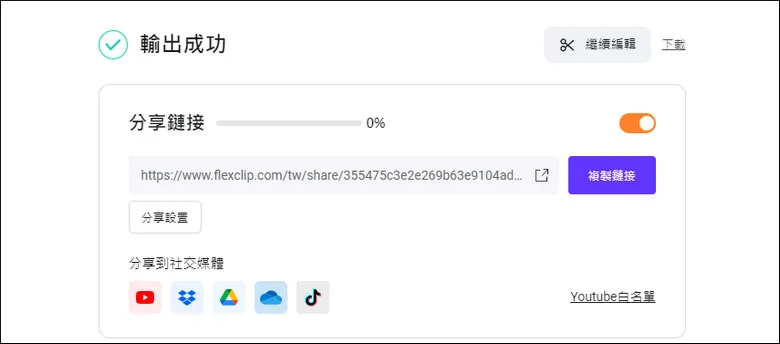
分享影片
如何用Mac電腦編輯Zoom錄屏
想在Mac電腦上剪輯Zoom錄屏的話,可以試試iMovie。這是蘋果電腦自帶的影片編輯器,使用起來非常方便。它最高支持編輯4K影片,並且提供所有基礎編輯功能,包括裁剪、分割以及合併Zoom錄屏、添加標題和音頻、簡單的轉場等。最重要的是下載的影片完全沒有浮水印!
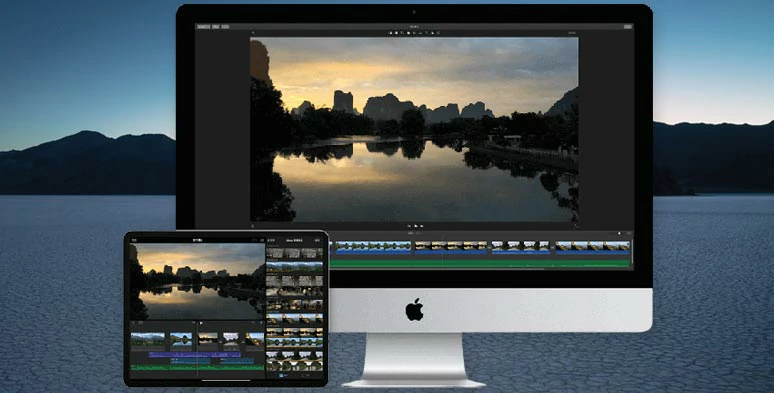
用iMovie編輯Zoom錄屏
用iMovie編輯Zoom錄屏的具體步驟:
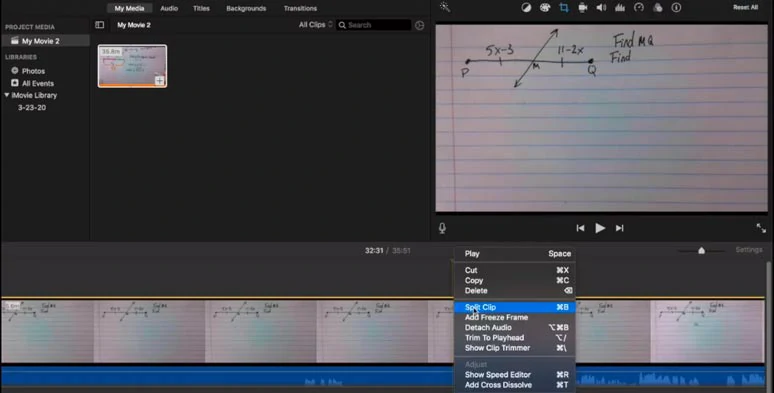
用iMovie裁剪Zoom錄屏
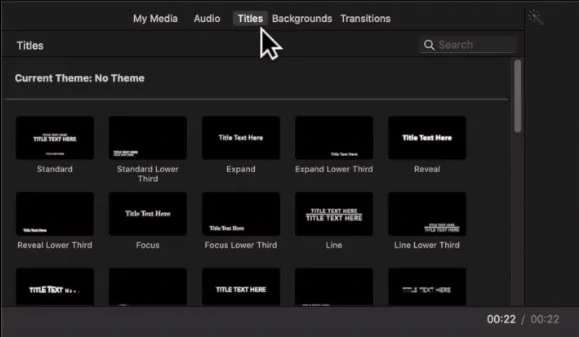
添加標題

調節音量
iMovie唯一的缺點是它無法導出豎屏影片。相關閱讀:為什麼iMovie會裁剪你的影片?如何解決?
如何用Windows電腦裁剪Zoom錄屏
如果你的電腦是Windows系統,那麼VSDC Free Video Editor就是編輯Zoom錄屏最好的選擇。這是一款羽量級的影片編輯軟體,即使電腦記憶體容量小也可以正常運行。VSDC提供豐富的影片編輯功能,基本可以滿足你對影片編輯的所有需求。它的編輯介面看起來可能有點複雜,但是只要你熟悉之後就會發現這真的是一款非常簡單好用的工具。
用VSDC編輯Zoom錄屏的具體步驟:
用VSDC在Windows電腦上免費編輯Zoom錄屏:

使用VSDC編輯影片
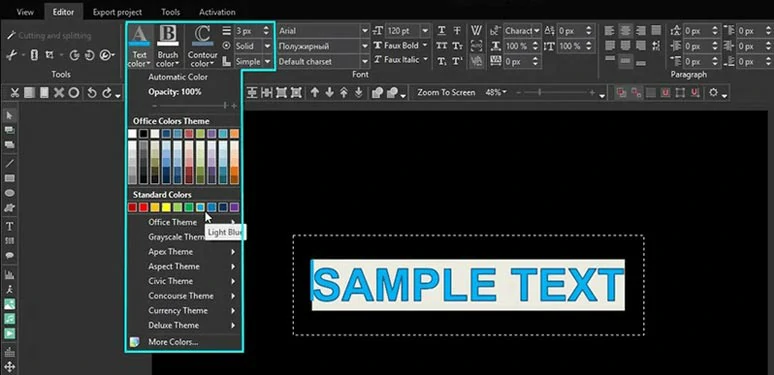
用VSDC給影片添加文字等內容

輸出影片
結語
以上就是關於在電腦上編輯Zoom錄屏的全部內容了。選一個感興趣的產品免費試試吧!如果你覺得這篇文章有用的話,歡迎將它分享給其他人哦!


